For our 1st code commit, we will create the default Blazor WASM application on our local workstation, deploy it on to Azure Static Web Apps, and then use a pre-approved Authentication Provider [GitHub] to verify that the IAM is working as intended on the frontend. In the subsequent post, we will replace it with a Custom Authentication Provider[Auth0].
The original blog post has been amended and is split into two since we were waiting on a fix for a bug on Azure SWA blade, for which we now have a workaround. For original versions of this post, please refer to Dev, or hashnode
Most of the work was done over the release candidate versions, RC1 & RC2, but I have revalidated the codebase against the LTS version of dotnet 6 released during .net Conf'21 .
Local Development #
For services similar to Azure SWA, developers had to follow a circuitous path of building the code on their local machine, followed by deploying it onto the cloud, and only then would they have been able to verify if their code performed as intended. Especially true when the feature was infrastructure-dependent, like Identity and Access Management (IAM).
Azure SWA CLI #
Azure SWA addresses the above pain point by providing a command-line tool that approximates the cloud environment: SWA CLI. We will be relying on the SWA CLI abilities to emulate authentication, custom routing, and route authorization.
Install the SWA CLI globally
npm install -g @azure/static-web-apps-cliOur Blazor WASM application will primarily address the organizer use cases; we will name it accordingly.
dotnet new blazorwasm -o OrganizerWebEnsure you are in the main git branch.

Immediately, you are confronted by the bane of modern software development: the spawning of way too many files.
Create a .gitignore to ensure the unnecessary files are not inadvertently checked in.
dotnet new gitignoreBear in mind that we are creating the .gitignore at the Blazor WASM project level. Logically, I feel it should reside at the .git folder/solution(.sln) level, but, presently dotnet cli does not traverse through each .net project within the solution and generate a top-level .gitignore.
Please don't forget to check-in the .gitignore file, though🤷♂️.
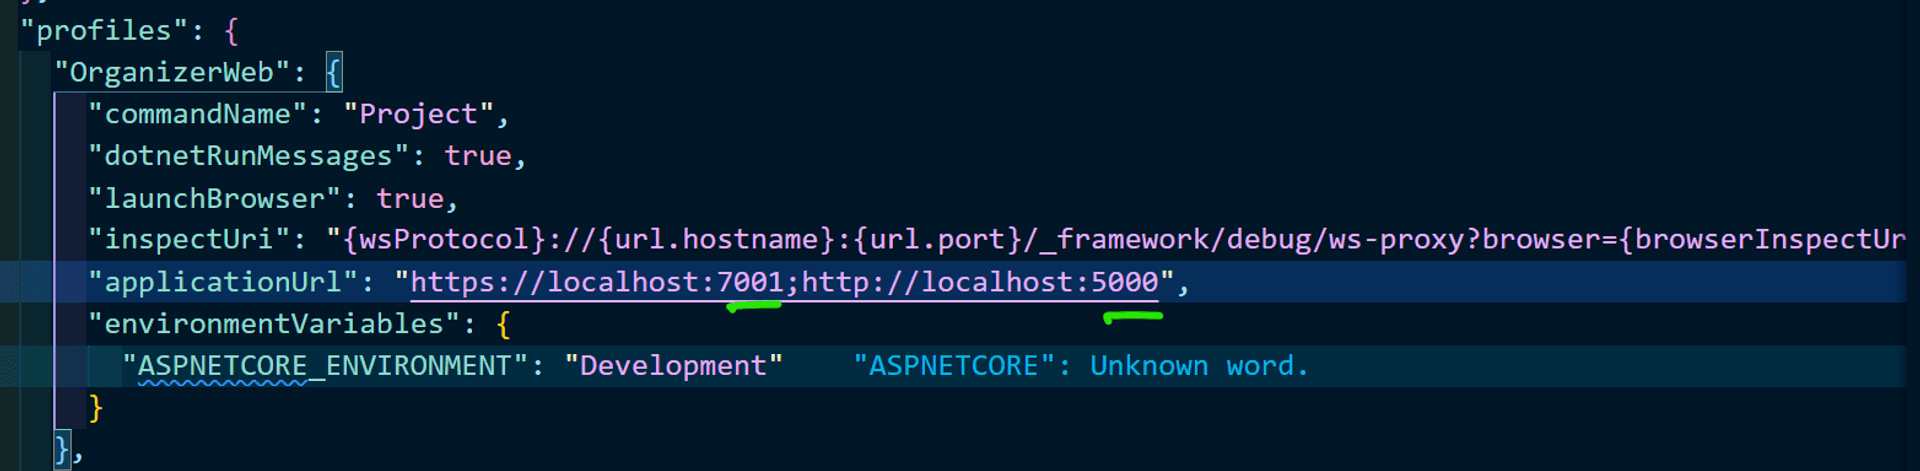
While creating the Blazor WASM project, dotnet will generate application URLs with random ports. It's a matter of preference, but I like to standardize the port numbers [which will help us later when using the SWA CLI].
Let's kick the tires to ensure things are in working order.
dotnet watchWe also get to see in action one of the most touted features of dotnet 6: hot reload, which generated a lot of heat🔥 recently
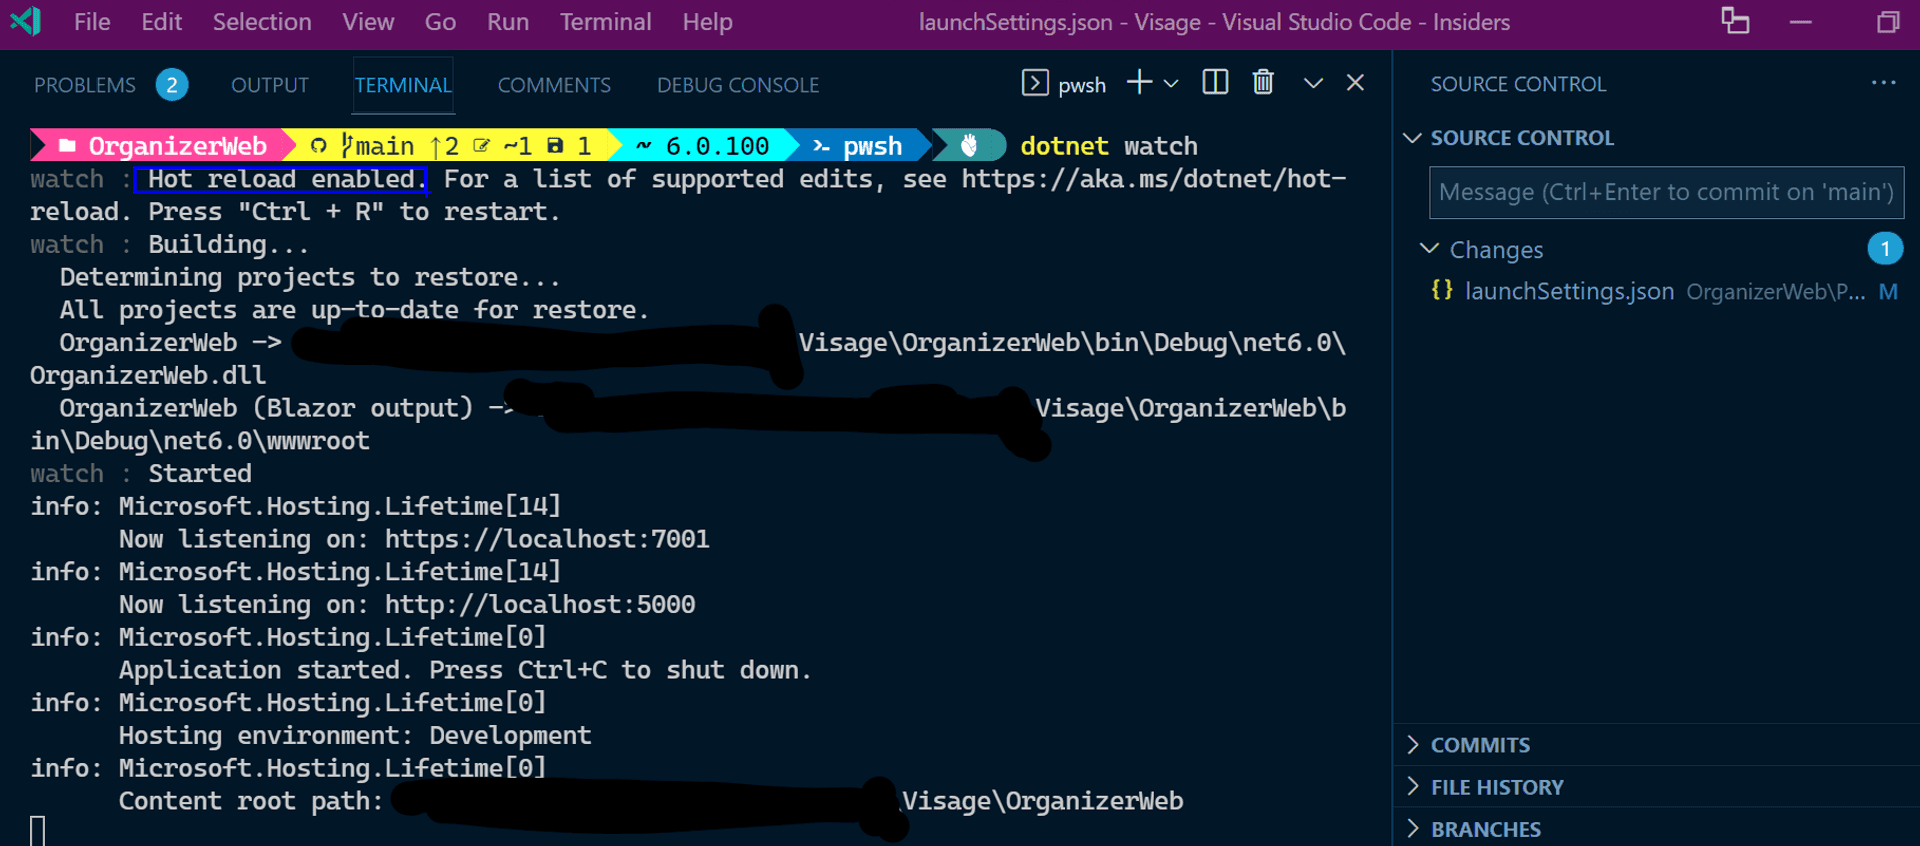
Looks good.
Next up, we want the Azure SWA CLI to serve the Blazor WASM application. I prefer to execute the SWA commands at the solution level because it will be convenient when we want to repeat this later by also including the Azure Function.
swa start http://localhost:5000 --run "cd OrganizerWeb && dotnet watch run"Voilà, the Blazor WASM served from the SWA CLI !!!
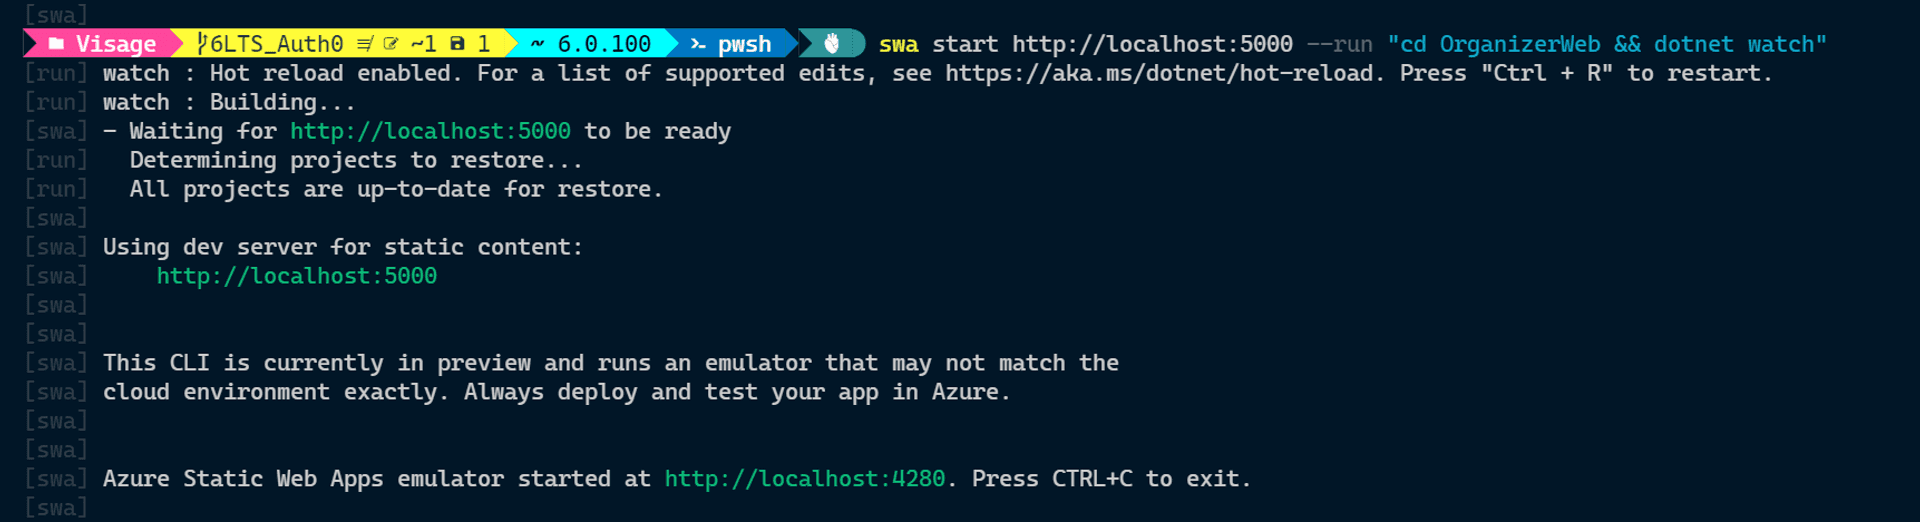
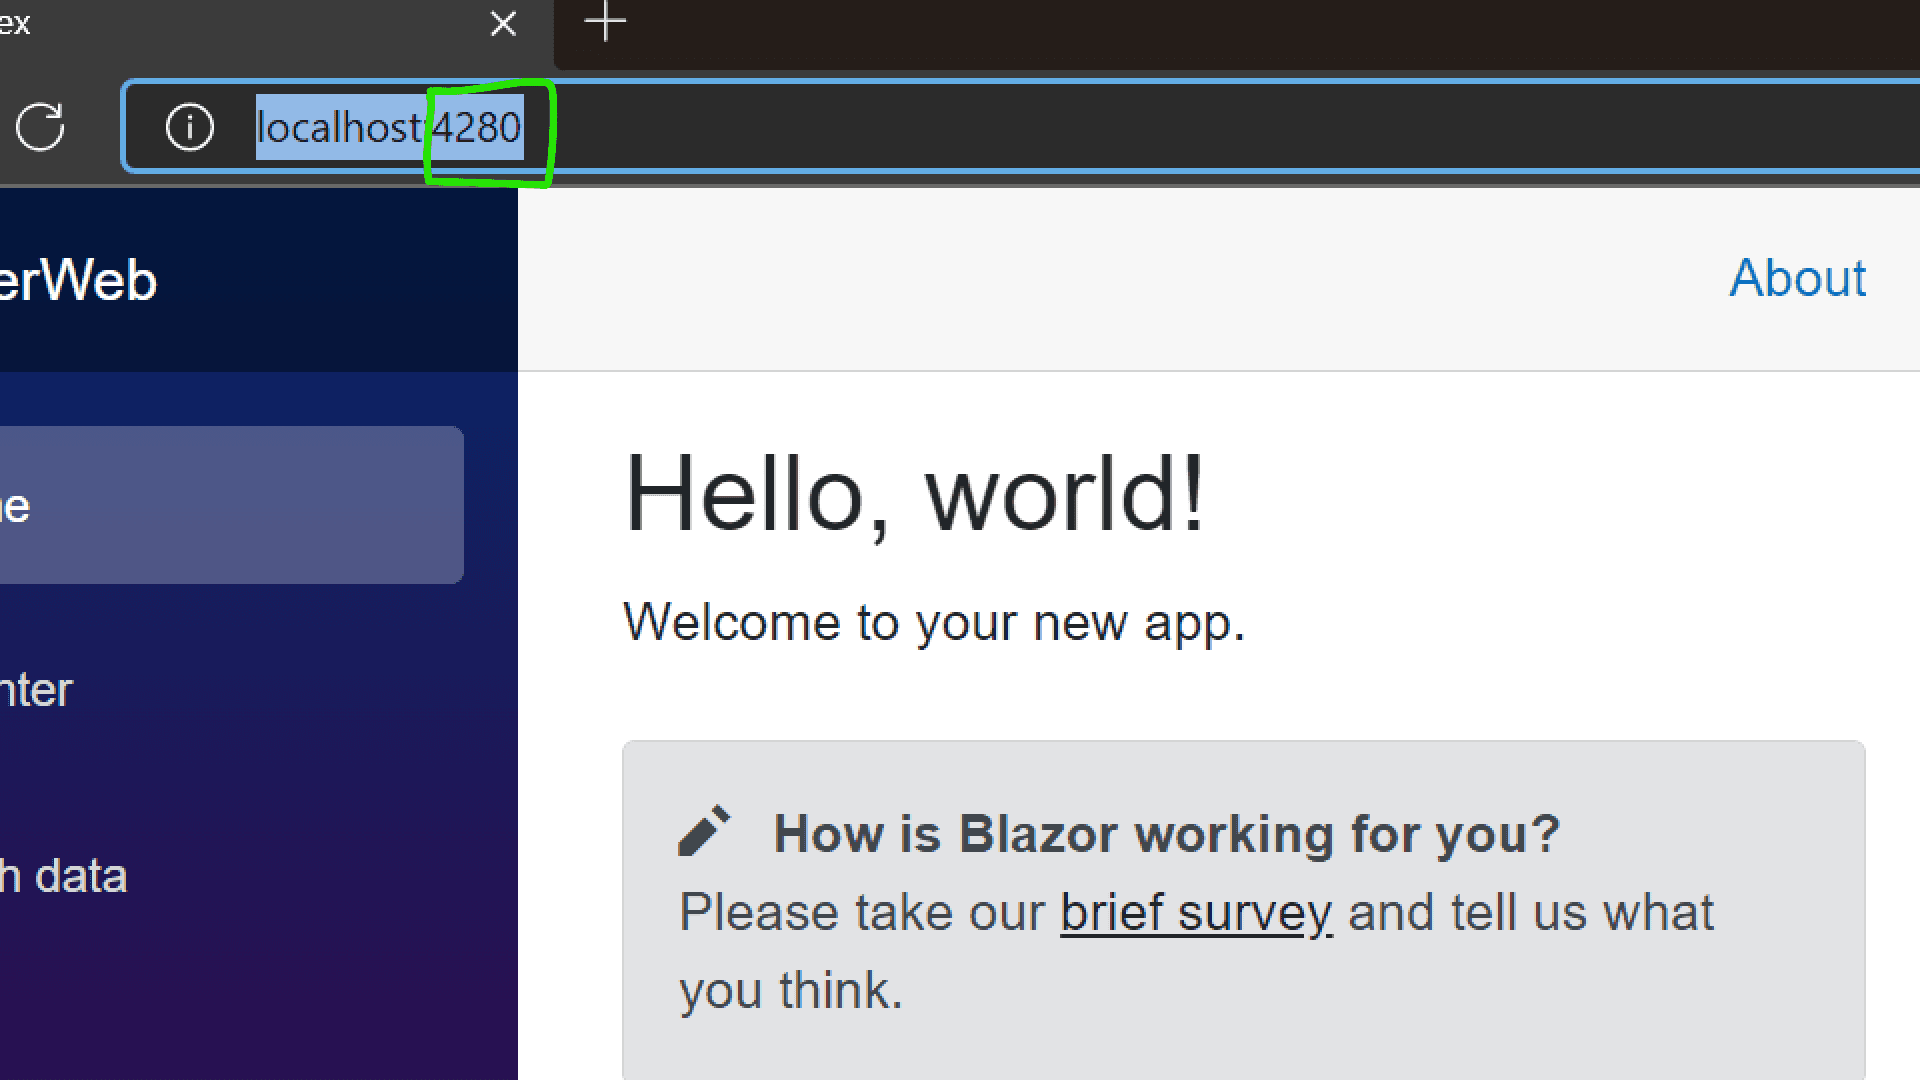
A page automatically opens in your browser, but it is opened by the dotnet watch command[please close this tab/browser; lest it will just confuse during development]. Note the URL with the port number 4280 and traverse to that location; this is the Azure SWA CLI rendered page.
SSL #
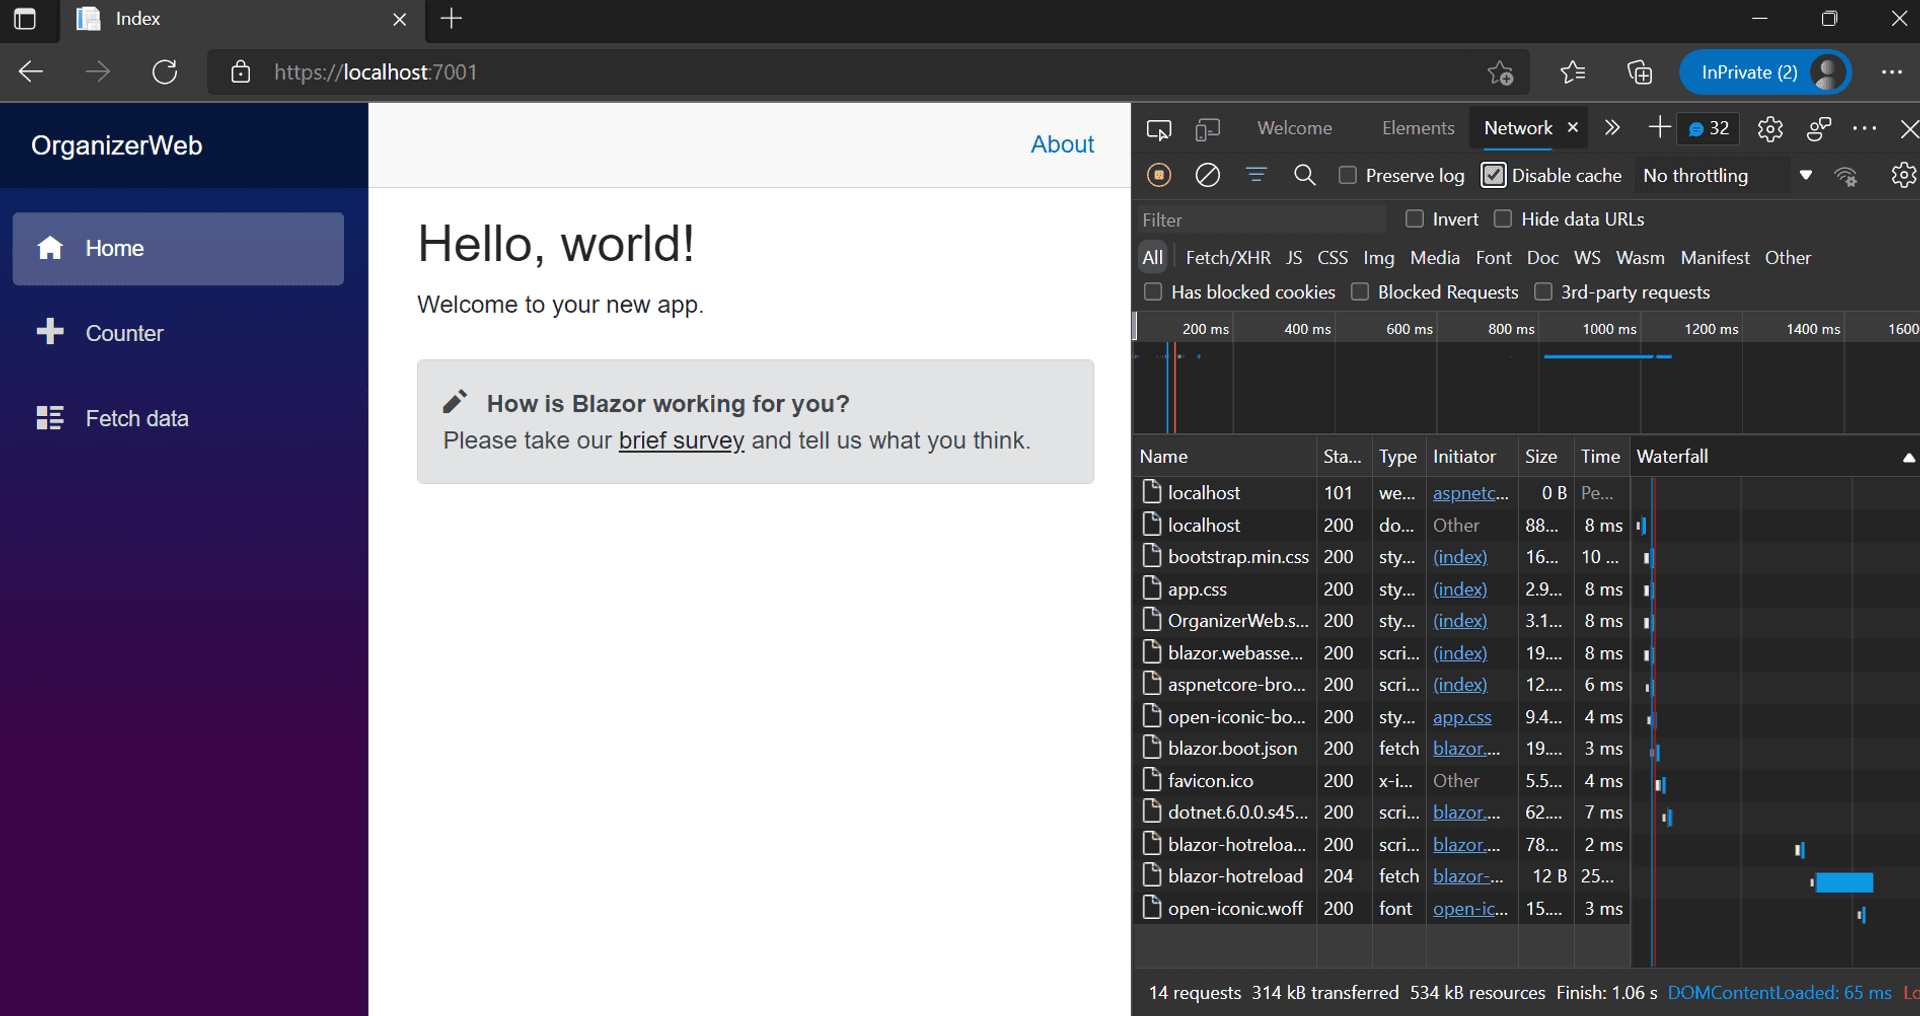
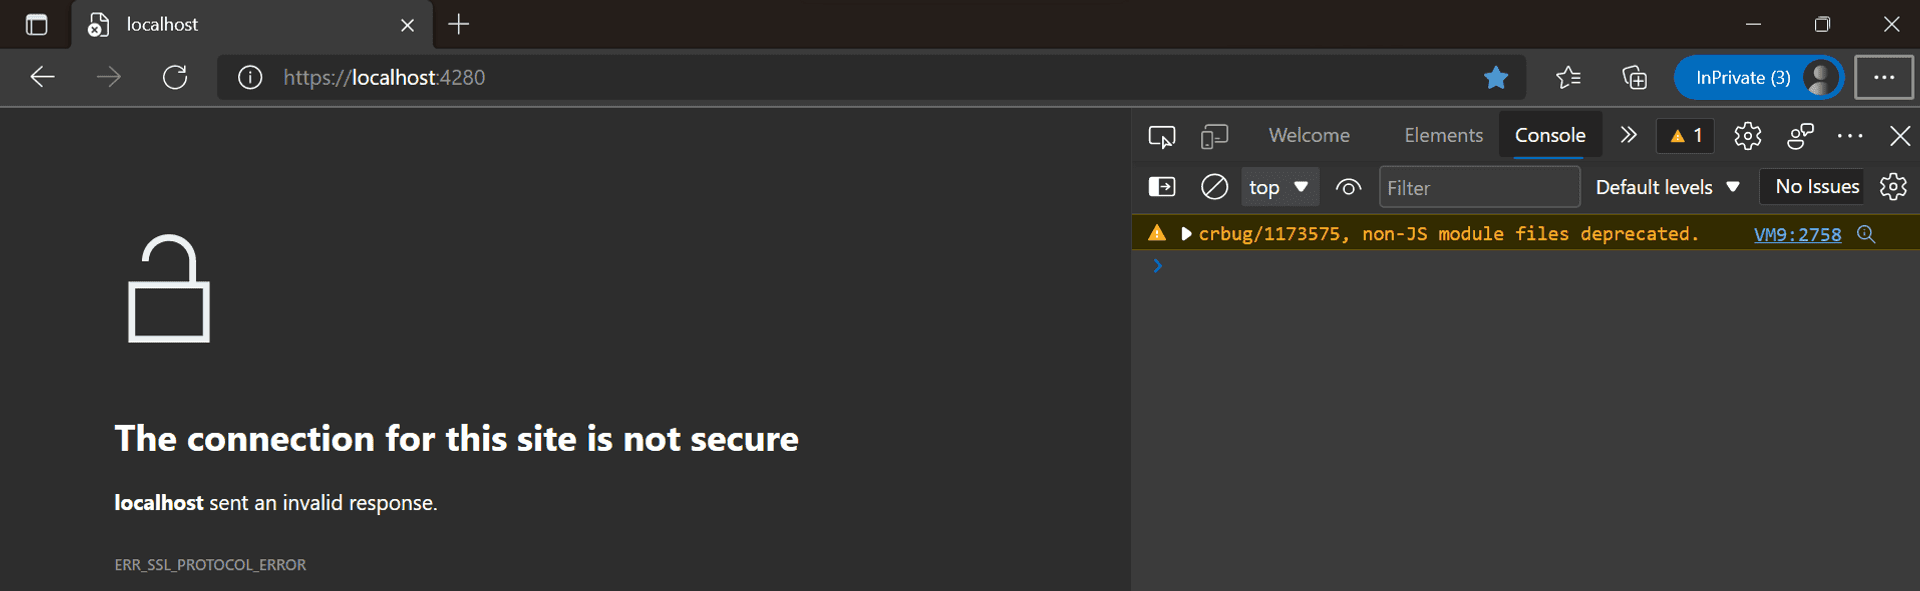
Production web apps are served over HTTPS. Moreover, the default security posture adopted by browsers is to open sites in SSL. In fact, when we ran the watch run command above, dotnet opened the browser in https[port 7001]. And when we attempt to traverse to the SWA CLI rendered page, the browser promptly disallows it.
It's a good practice to use SSL in our development to catch any potential bugs early. The SWA CLI repository's README information to enable SSL is cursory at best. I will walk through the different steps I tried before getting SSL enabled.
One CLI SSL option errored out.

Providing only the SSL option to the CLI did not work.

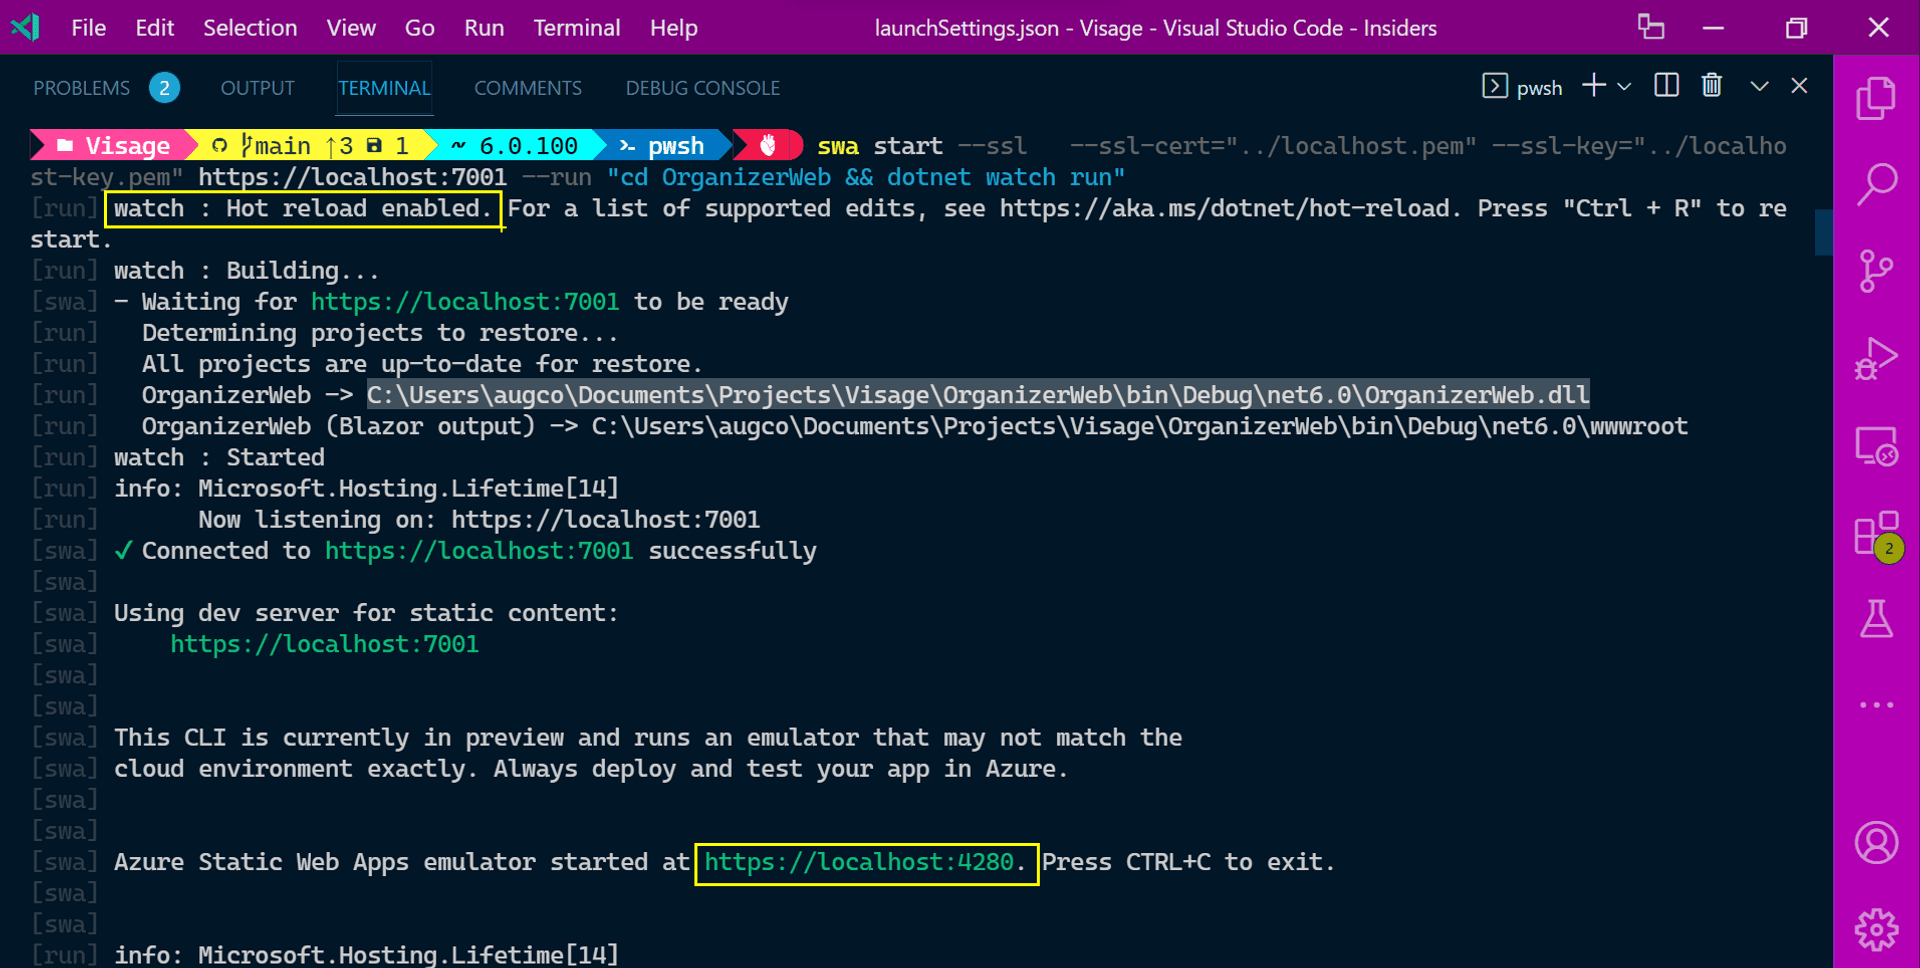
A certificate and key generated by a Root Certificate Authority, trusted by the browser. I recommend mkcert for its ease of accomplishing this. Please ensure that the generated certificate, and key, are kept in a secure location. These should NOT be checked-in if generated within the repository folder; amend the .gitignore file to exclude the key and certificate files.
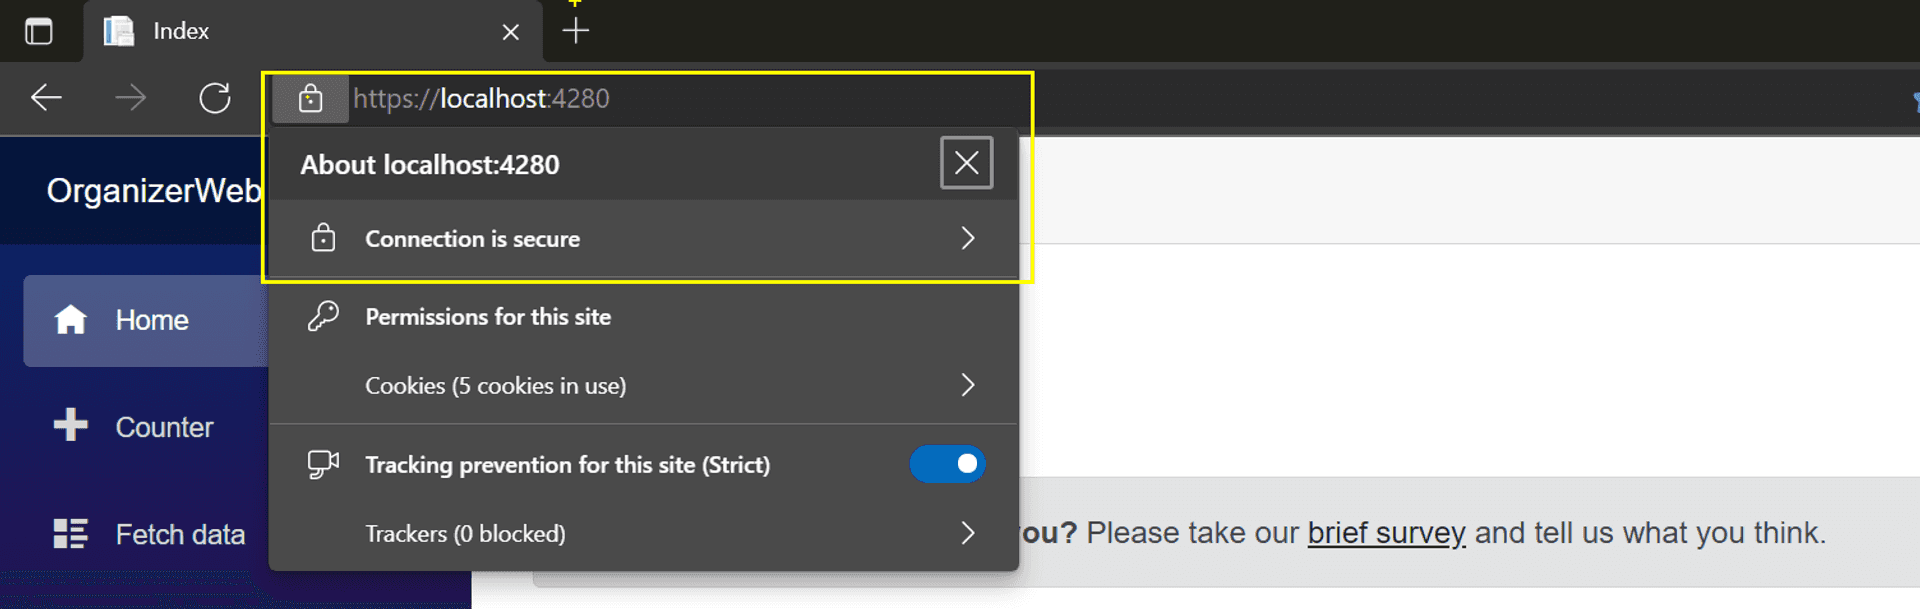
swa start --ssl --ssl-cert="../localhost.pem" --ssl-key="../localhost-key.pem" https://localhost:7001 --run "cd OrganizerWeb && dotnet watch run"To confirm in the terminal logs, note the HTTPS protocol of the SWA CLI rendered URL.
Traversing to the URL 👇
Azure SWA VS Code Extension #
Now it is time to lob our app into the cloud. And we can do it right from the comforts of VS code itself, courtesy of the Azure SWA extension.
Ensure you have checked in all your code and have pushed them up to GitHub.
Assuming you have logged into the Azure & GitHub by the Azure SWA extension:
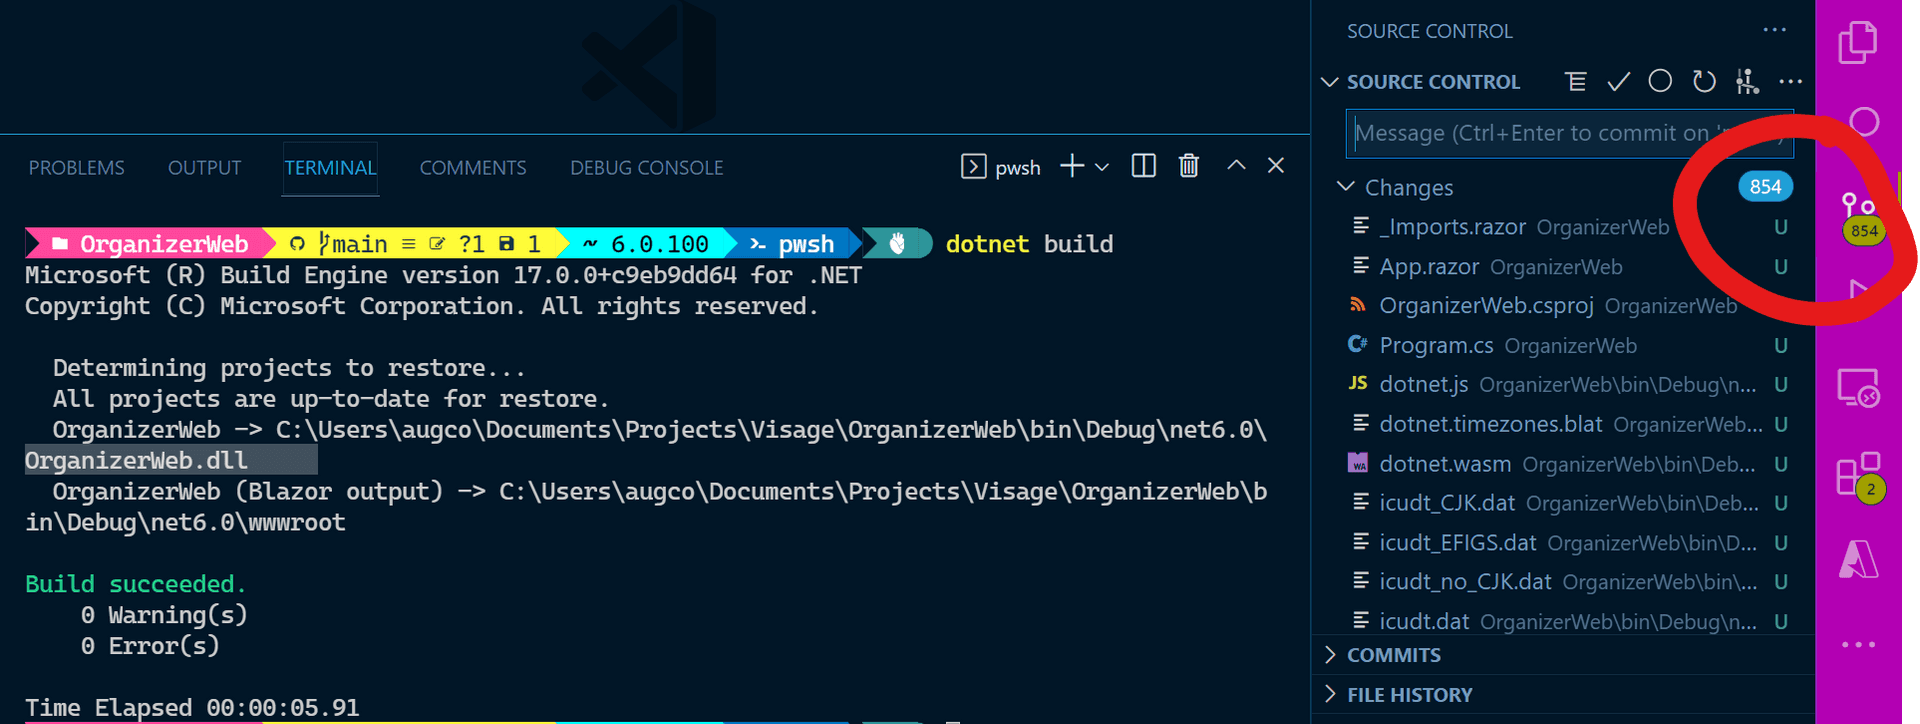
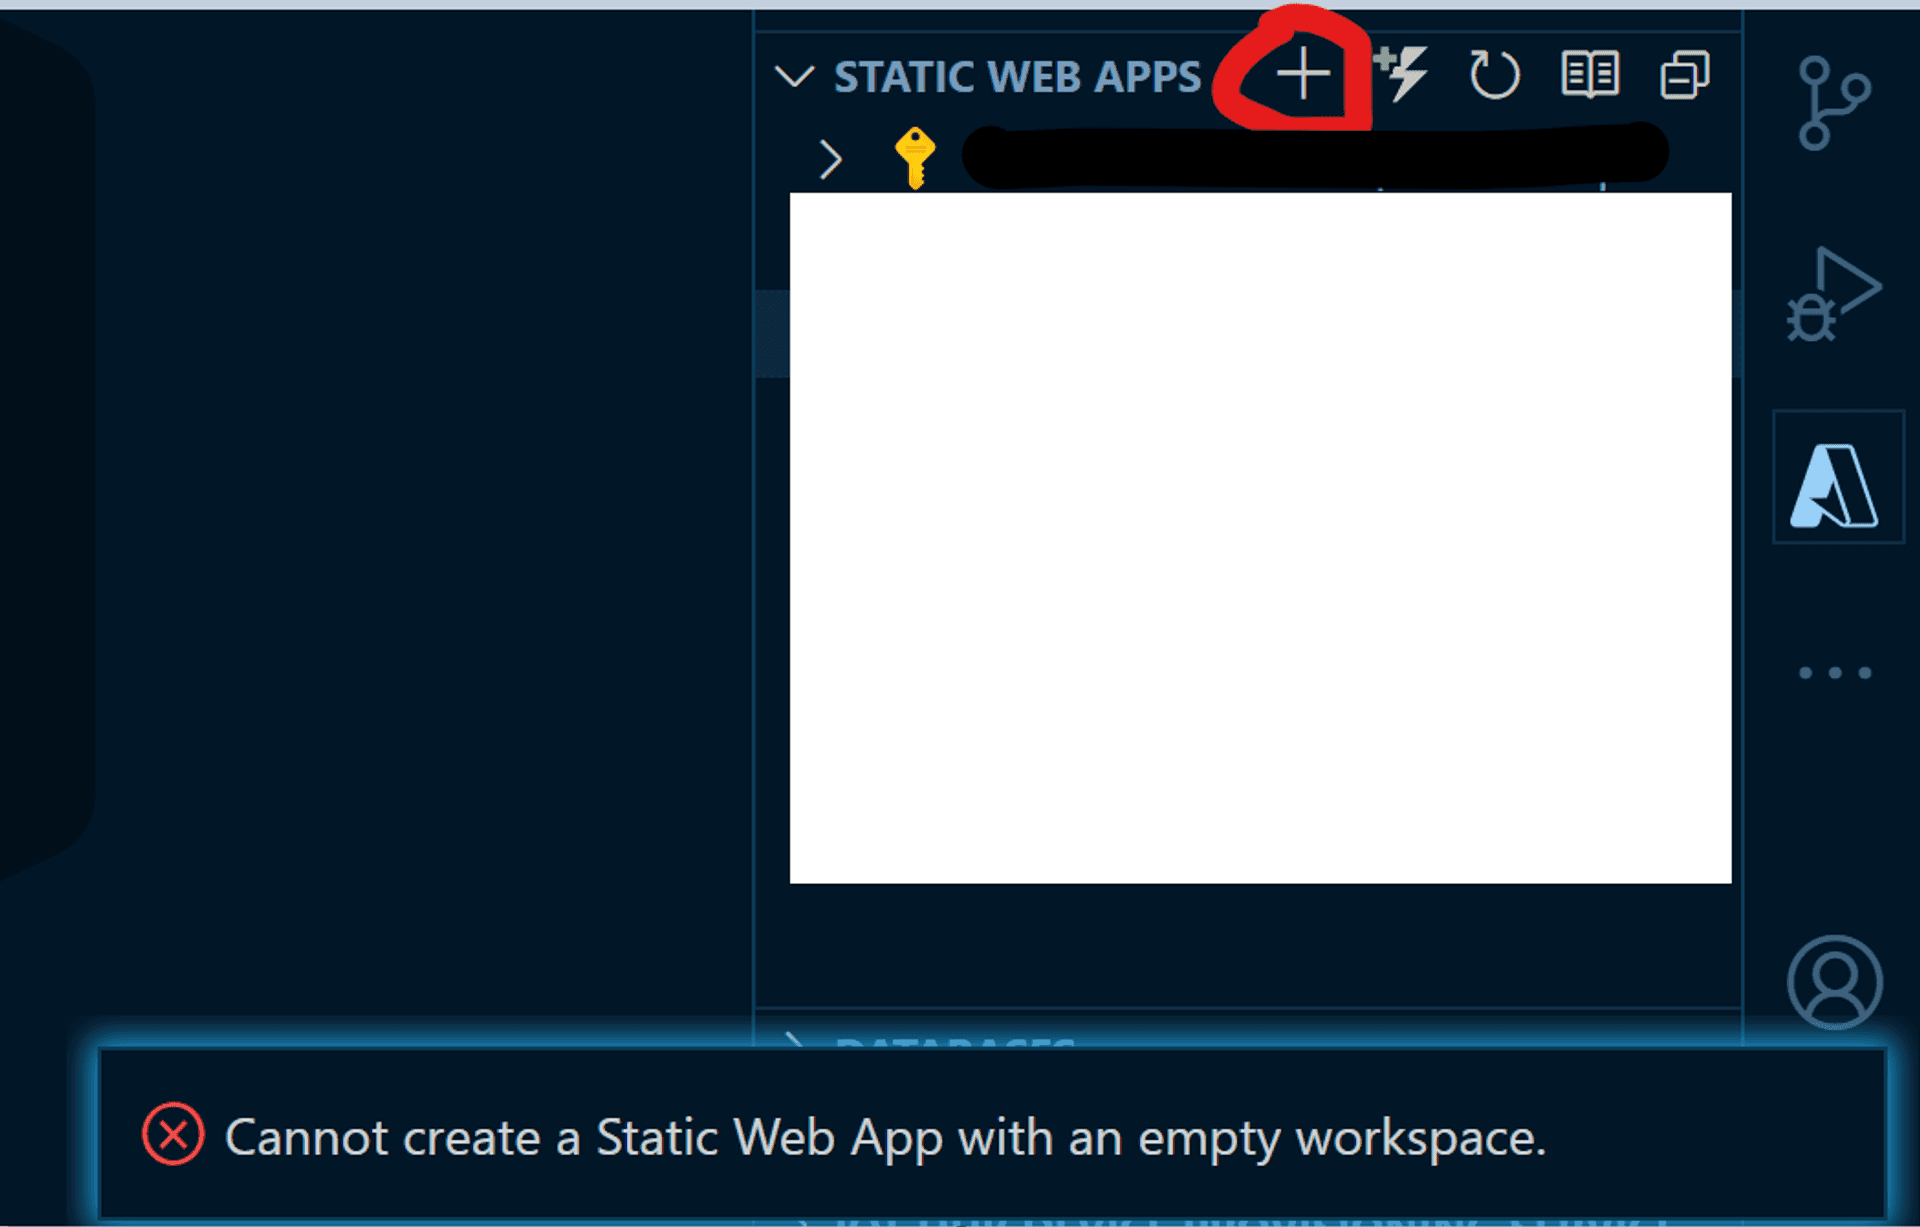
When clicking on the "plus" icon [circled in red below] of the extension, you will be prompted to select the Azure subscription, followed by a dialog box for entering the name of the Azure Static Web App project.

You will be asked for the Azure Region you wish to deploy the app. Right now, East Asia will be the nearest for the alpha users of the app.

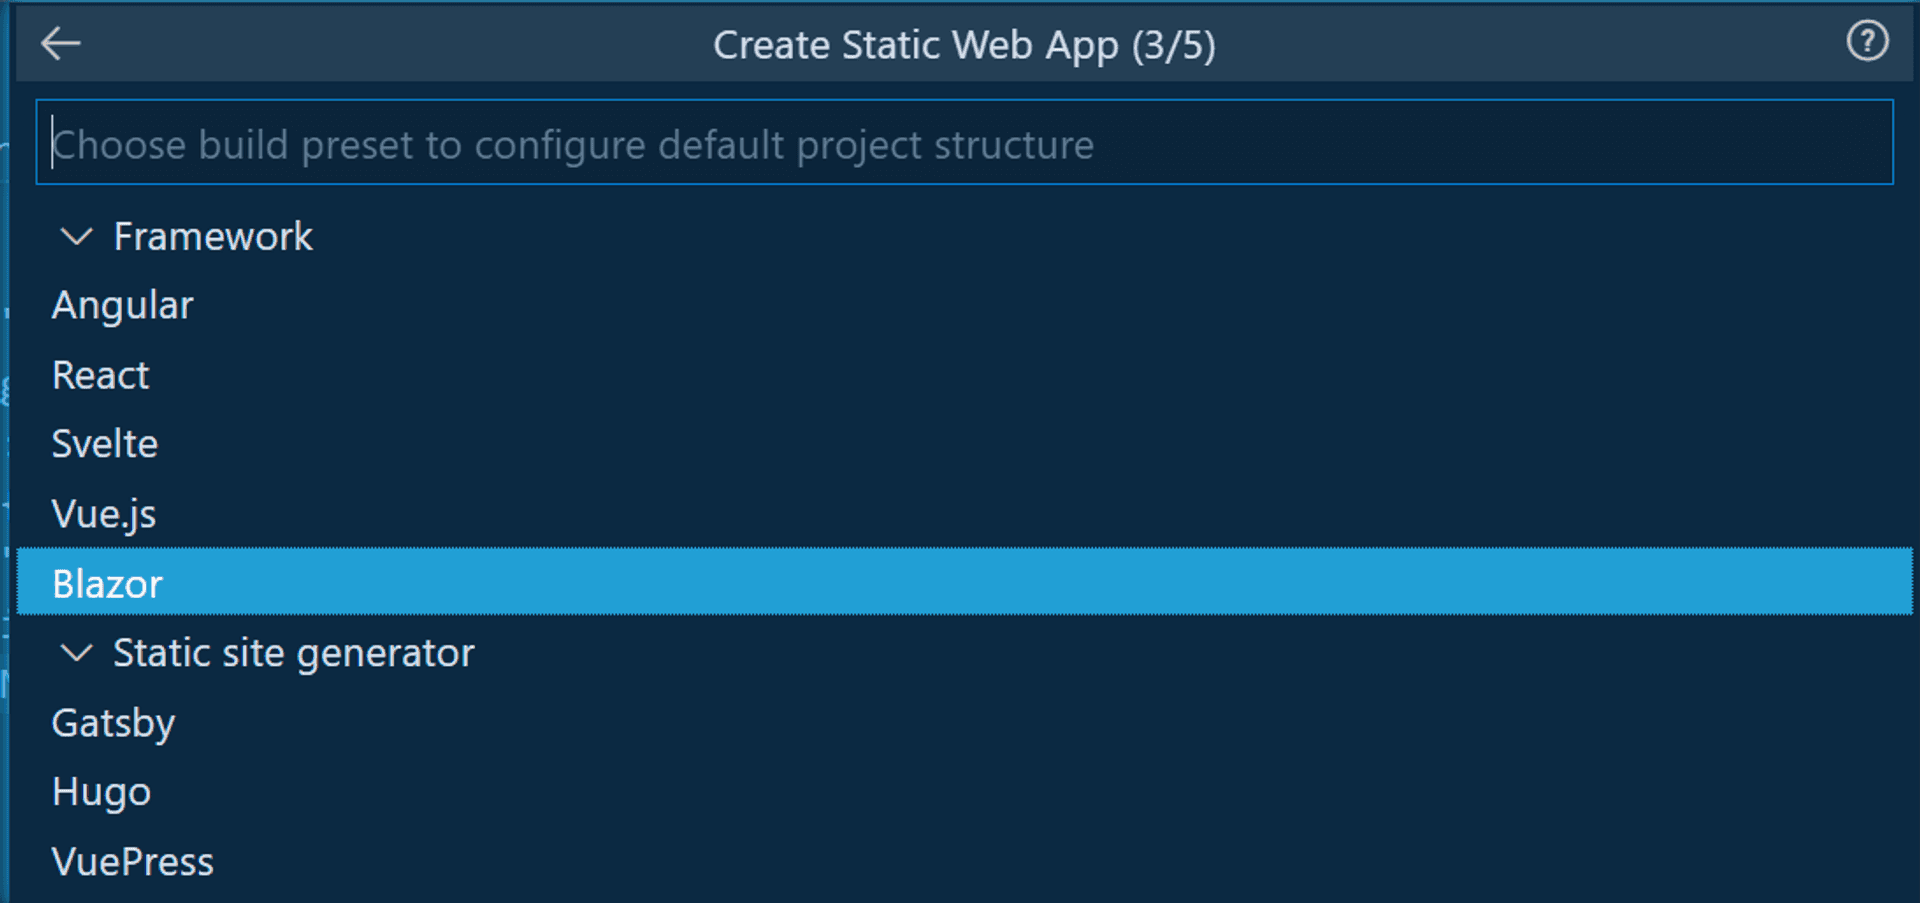
Your frontend framework: choosing Blazor for this project.
Next, you will be asked for the source folder for your frontend project.

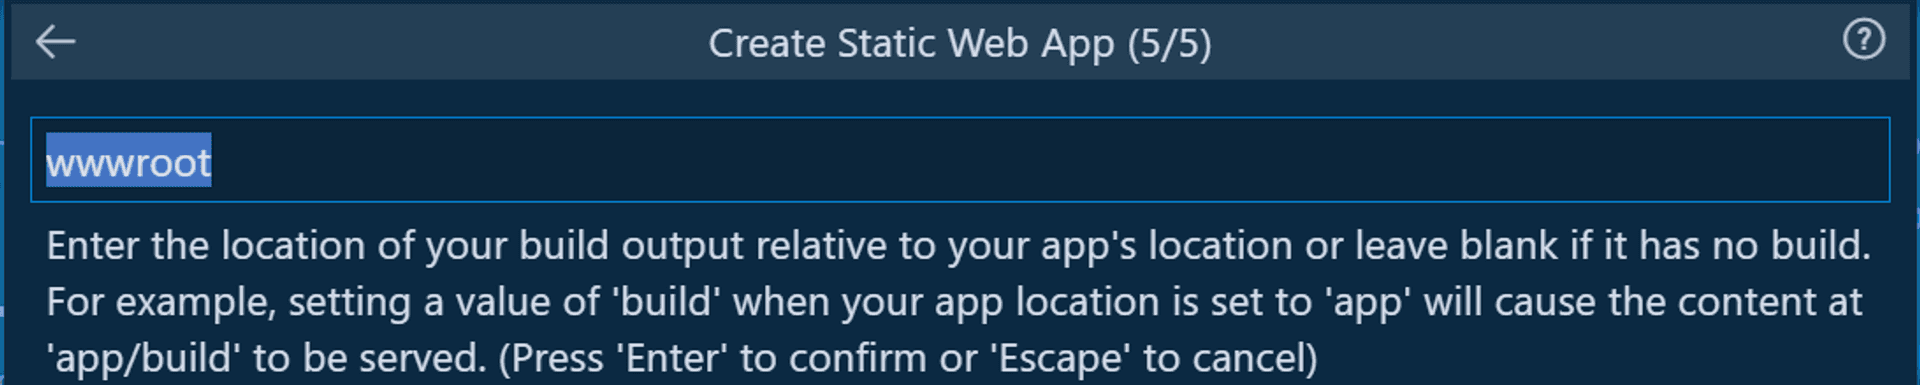
Finally, the build location for your frontend project.
If everything goes to plan, a VS Code toast notification about the successful completion of the GitHub actions will pop up. And within the Azure SWA extension, and tucked under the subscription it was created in, the Azure SWA project should be listed.
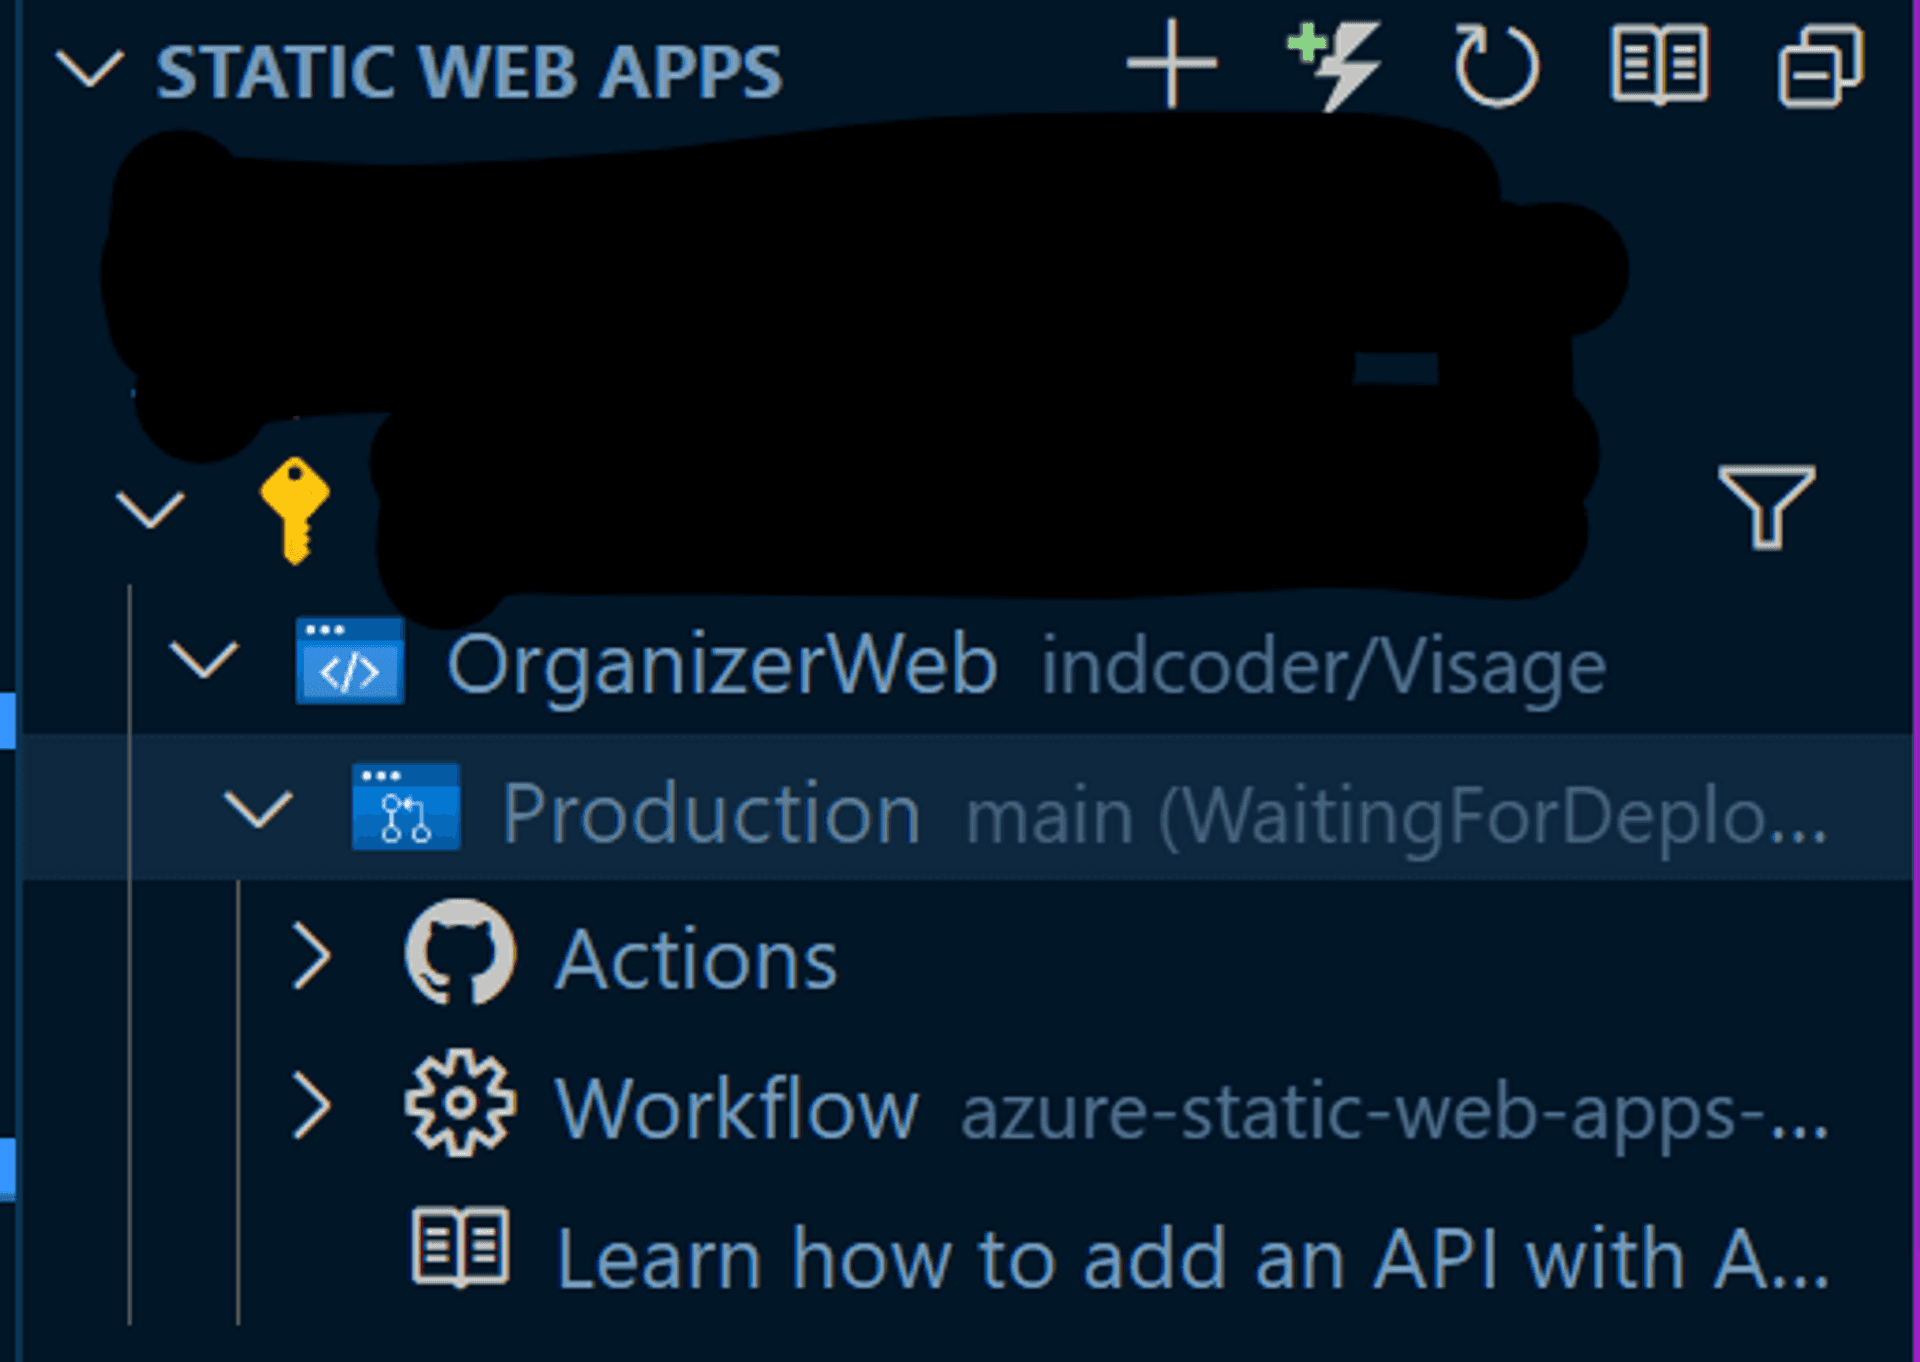
By right-clicking on the Azure SWA project, you will be presented with a context menu with one of the menu item called "Browse site". Clicking on it, you can traverse to your Azure SWA hosted page.
🎉🎉🎉 Congratulations! You have successfully deployed your Blazor WASM app to Azure Static Web Apps. 🎉🎉🎉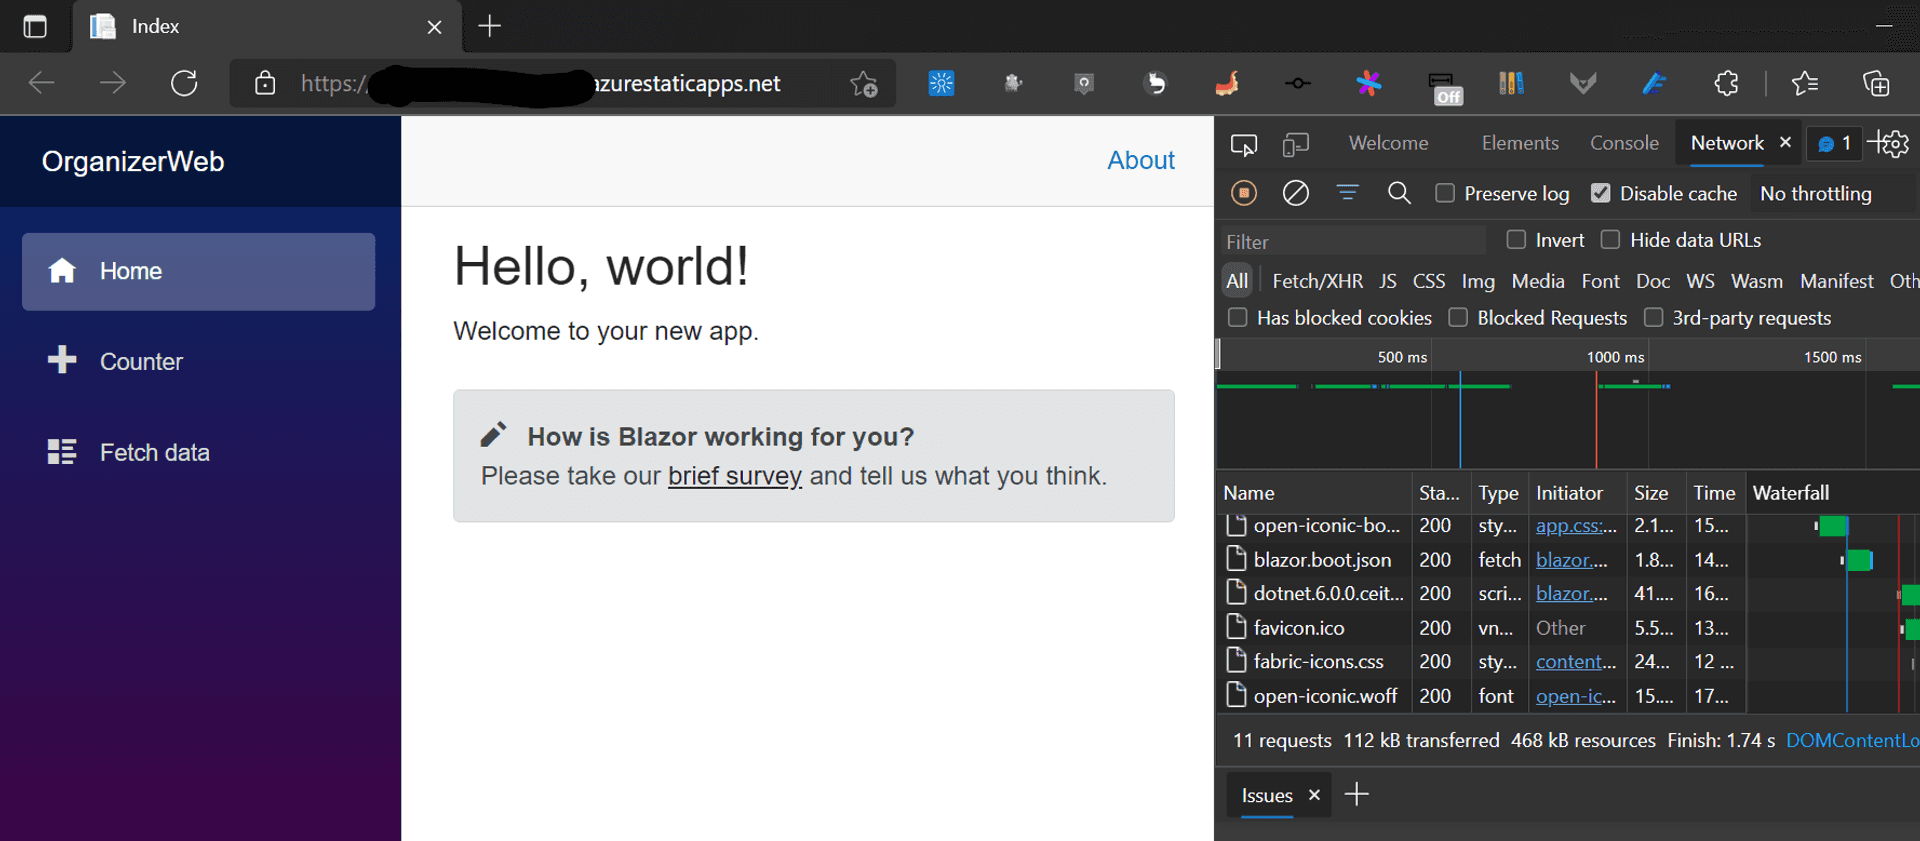
Things that tripped me #
For folks from a TDD/BDD background who like to create an Azure SWA project first and then proceed to code, the extension does not work on an empty folder.
Having said that, try to deploy your code asap. This project is not just our first project in Azure but also a re-entry into .net [coming from a 10-year Node.js background]. Tinkering with the generated .gitignore, I un-commented the below line [brain freeze on my part that I want to attribute to working with ASP pre-2012😉].

This led to an insidious error: the app worked fine on the local machine via SWA CLI, but on pushing the commits onto the cloud, GitHub actions failed because it could not find those files.When you are creating a new Azure Static Web Apps project, the Azure SWA-generated GitHub action expects the artifacts to be on the default branch[main/master]. If not, it will fail.

However, once the Azure SWA is created, the GitHub action works very well with other branches in powerful ways, which we will see in action during our next section.
Authentication #
Now that we have got our app up and running, let's secure it by ensuring that only authenticated users with the requisite role can access certain pages, just like any good self-respecting production web app out there.
Authenticating with Pre-approved providers #
But before plunging headlong into the custom authentication, we will first ensure the IAM plumbing works with one of the Azure SWA pre-configured providers, GitHub.
Let's create a new git branch
git switch -c CustomAuthMicrosoft Learn has a great video series on Azure SWA, and one of them, Frank Boucher's authentication video, was crucial for this post.
Microsoft has released a .net library that configures an Authentication State Provider for our Azure SWA app.[ Don't go by its nomenclature. Microsoft is underselling it; it's not just for Azure Functions😉]
dotnet add package Microsoft.Azure.Functions.Authentication.WebAssembly --prereleaseWhile developing this app in RC1 and RC2, there was only a prerelease version we could use. I expected that we would have an official one when .net 6 was released. Alas, it is still in prerelease.
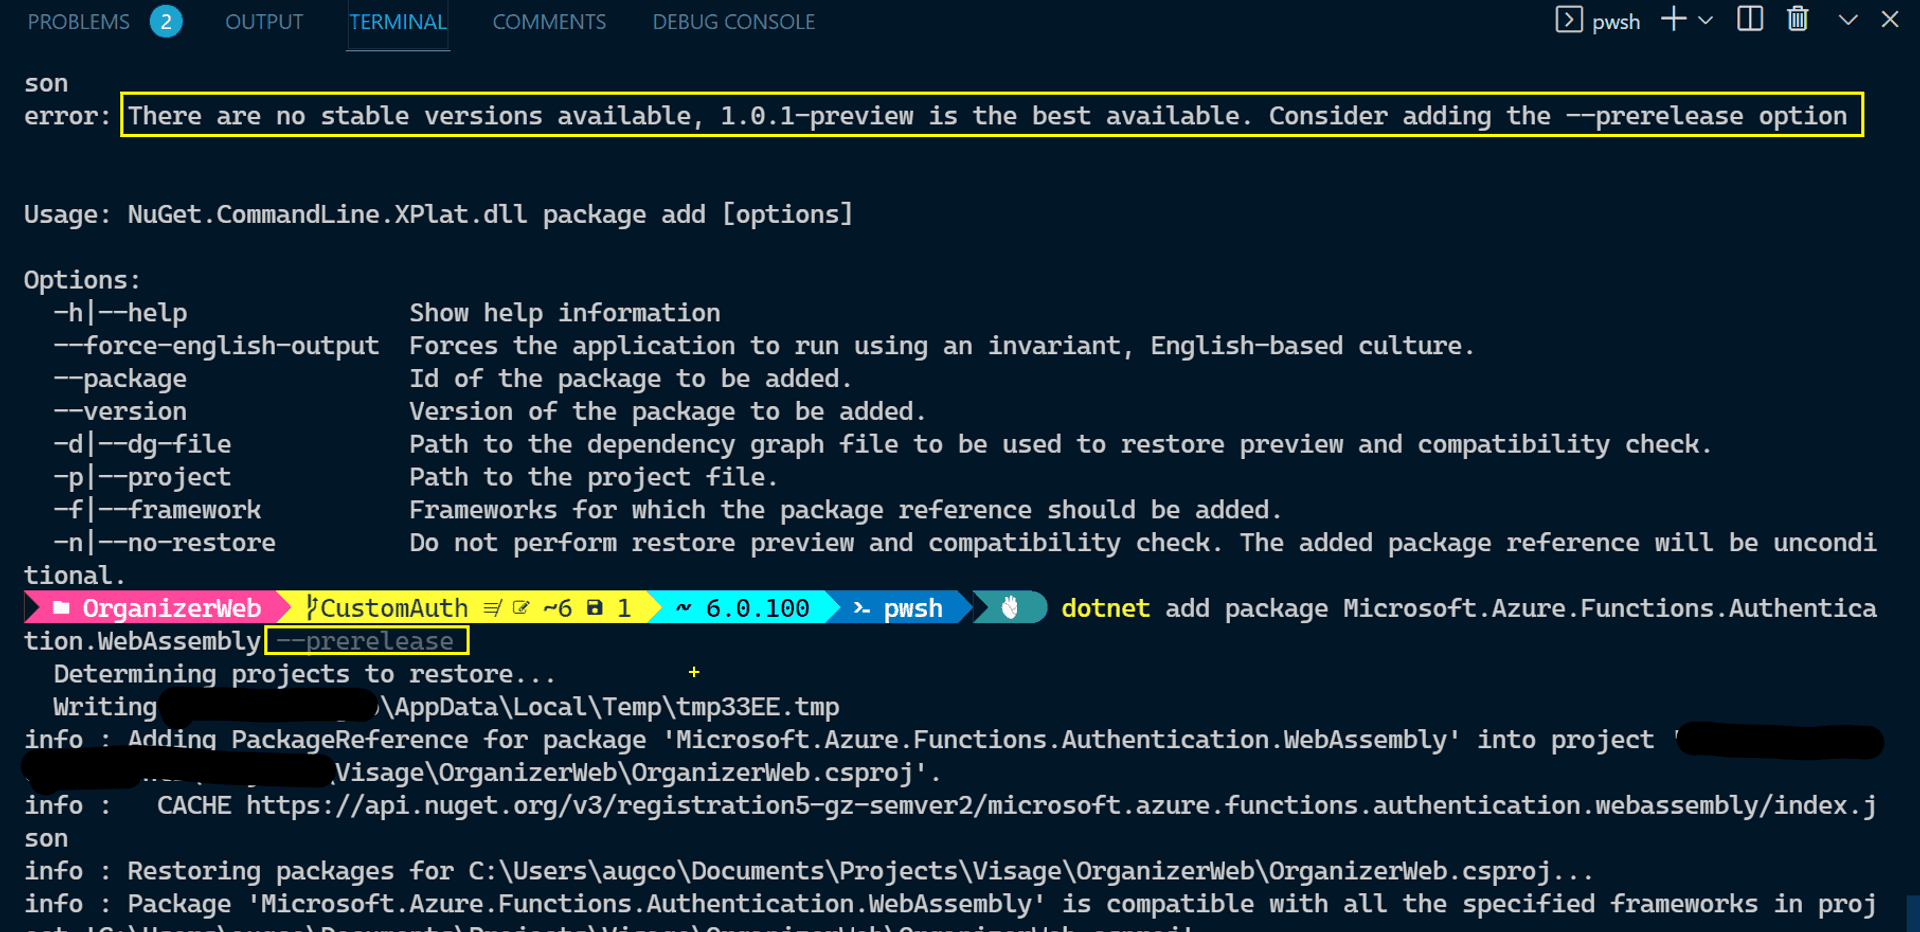
Also, this package's nuget page is bereft of any content for a potential user, and I have serious doubts about the GitHub repo it's claiming to be its source.
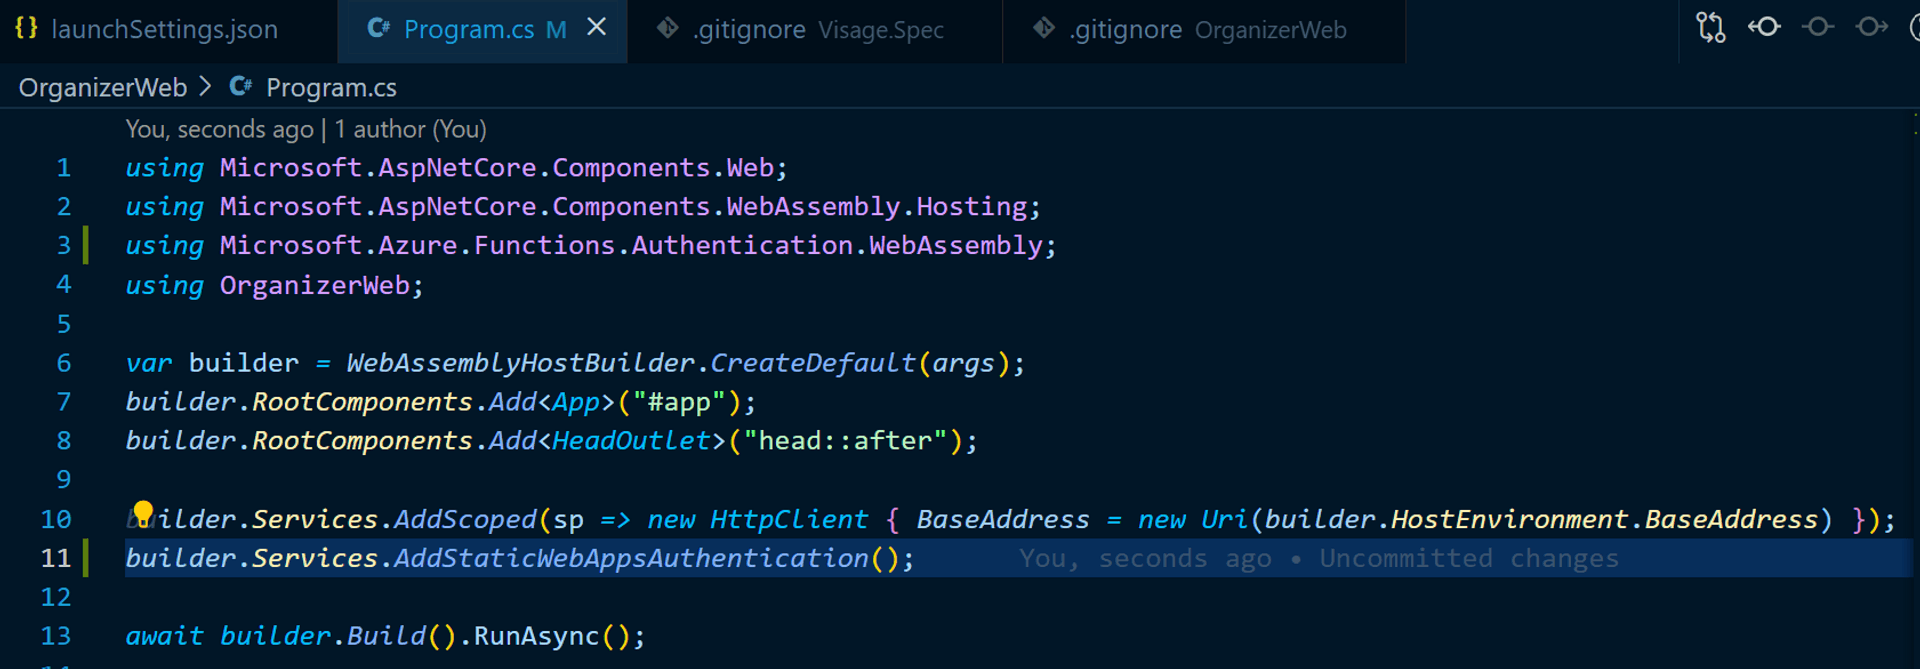
Once you add the library, we need to register the service in the WASM app builder found in the Program CSharp file: the 2 new lines added 👇 [The structure of this page will be different if you are on .net 5.]
Next up, we need to bolt on the Authentication scaffolding to the Blazor App [This step is applicable for any Blazor WASM standalone app; its not specific to Azure SWA]
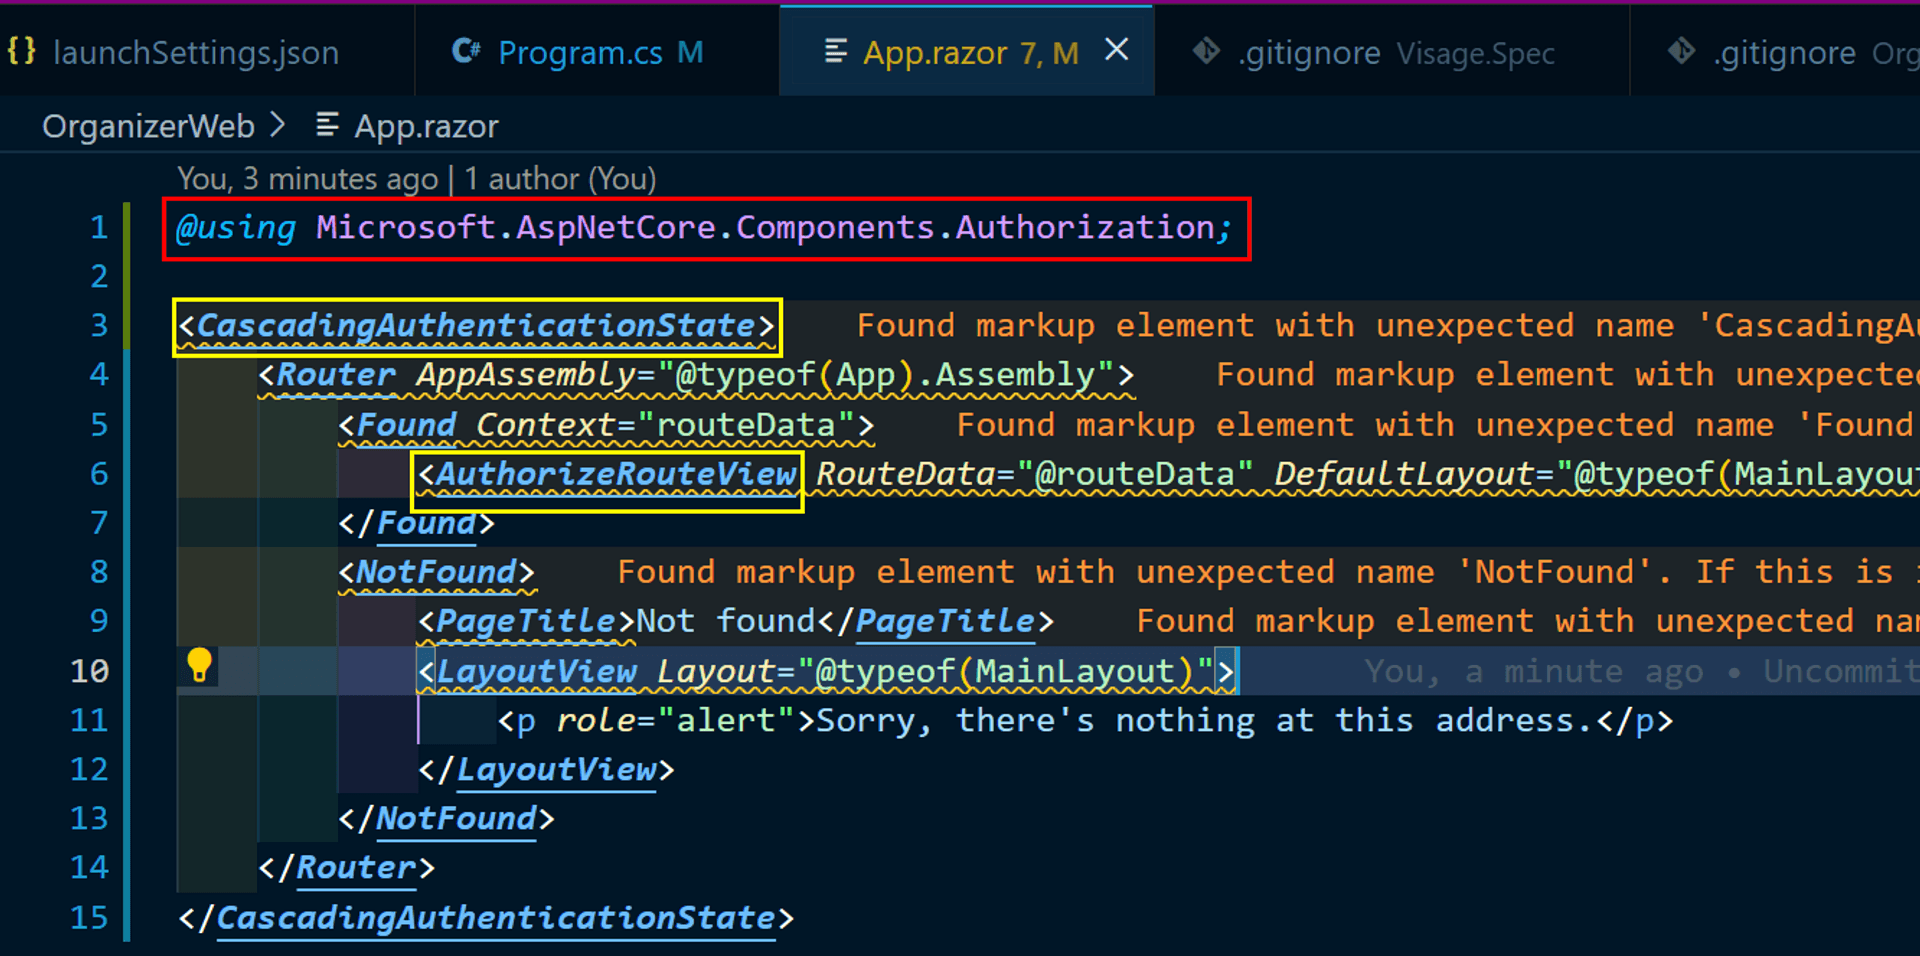
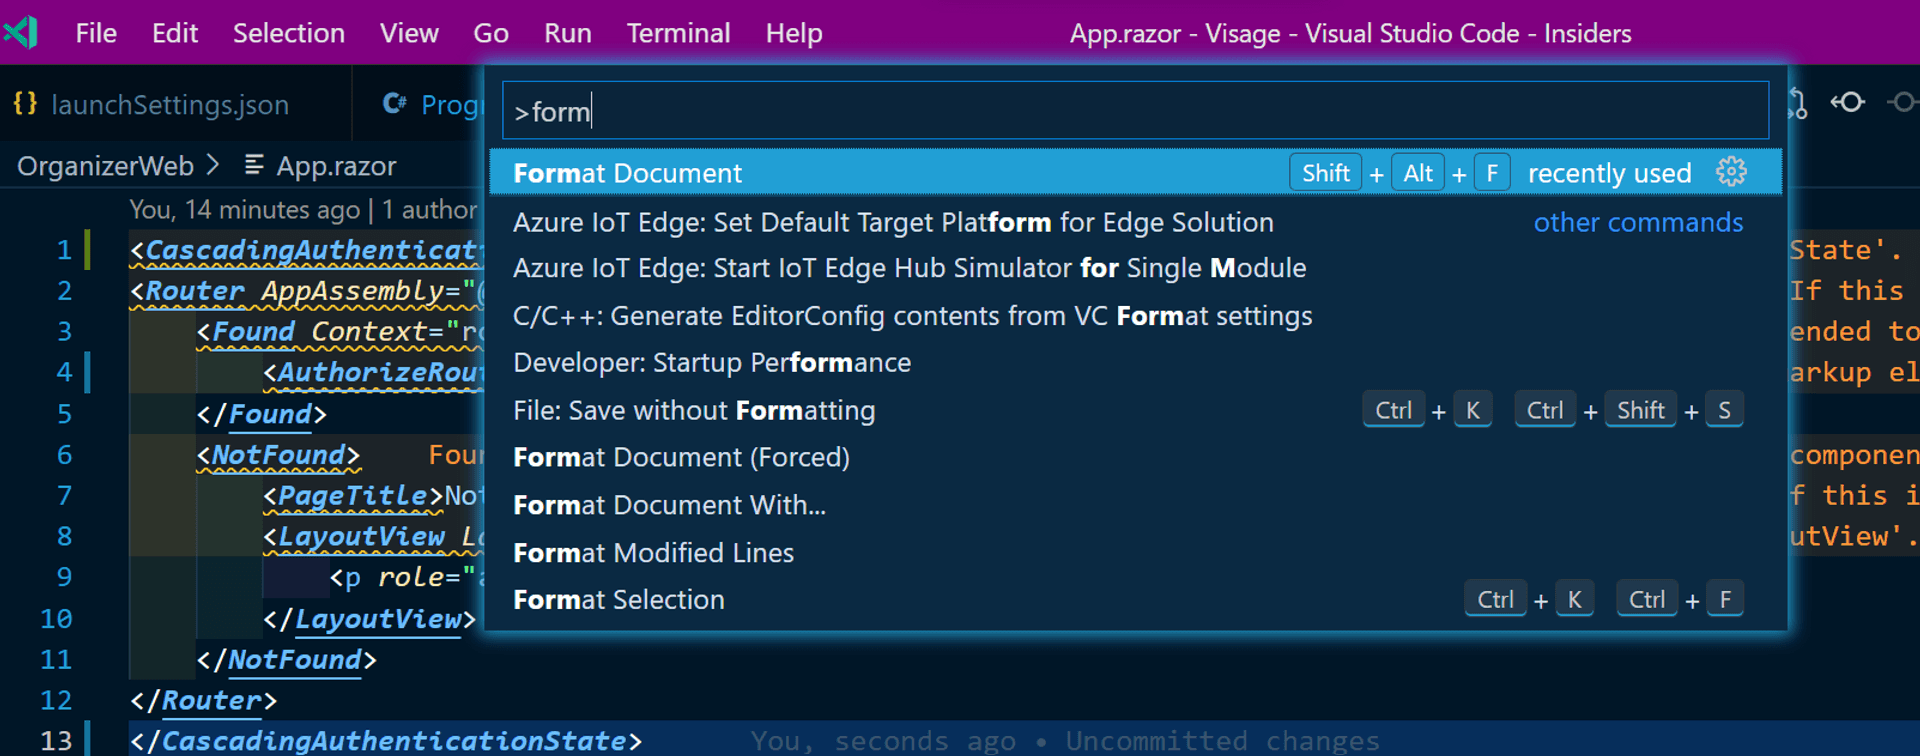
Productivity tip: Use VS Code Format Document to get your code indented.
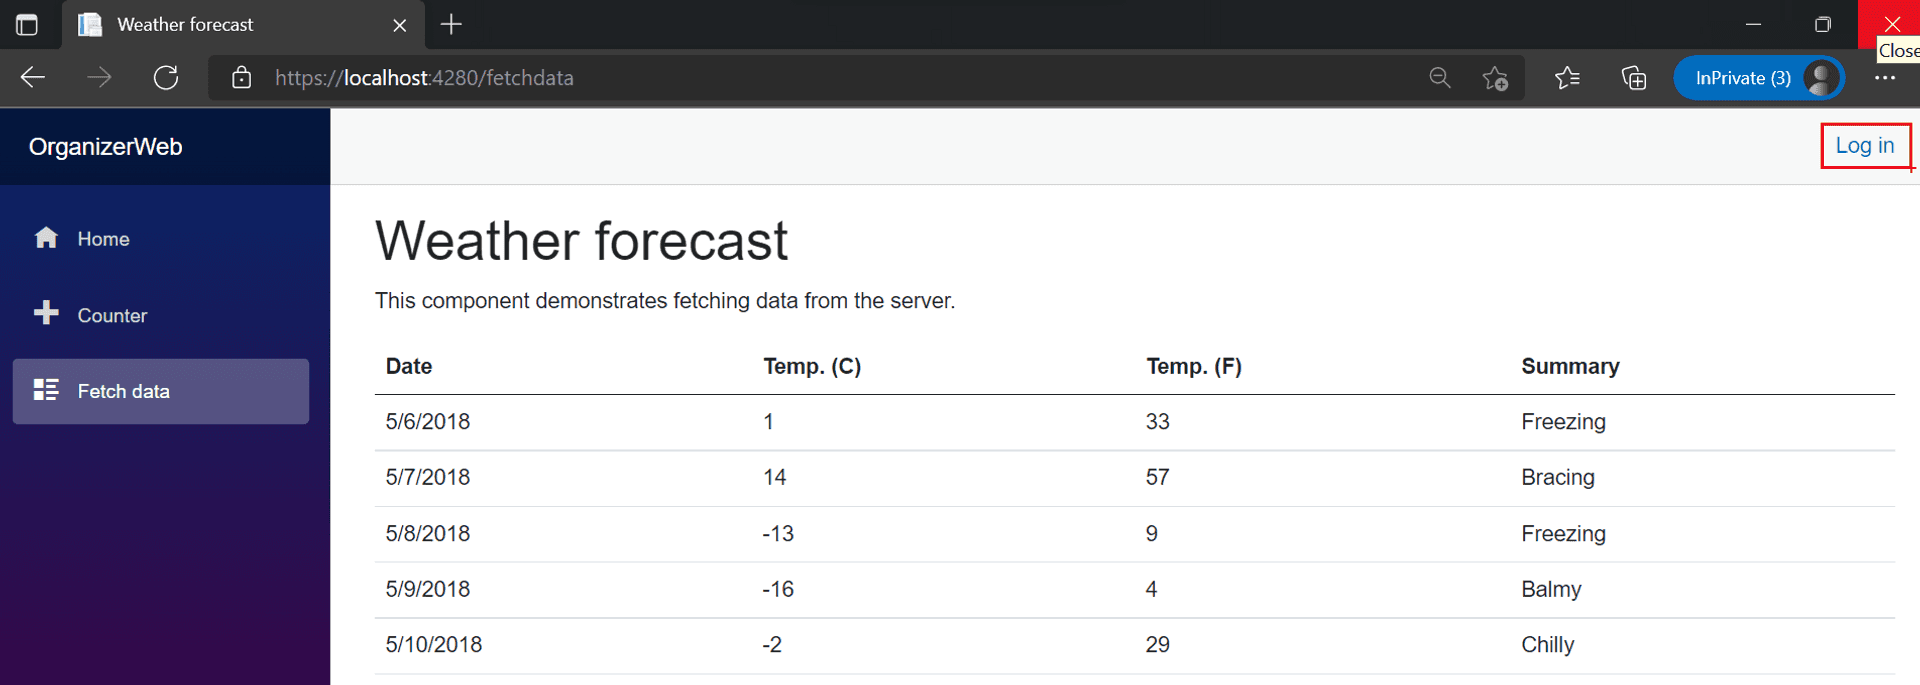
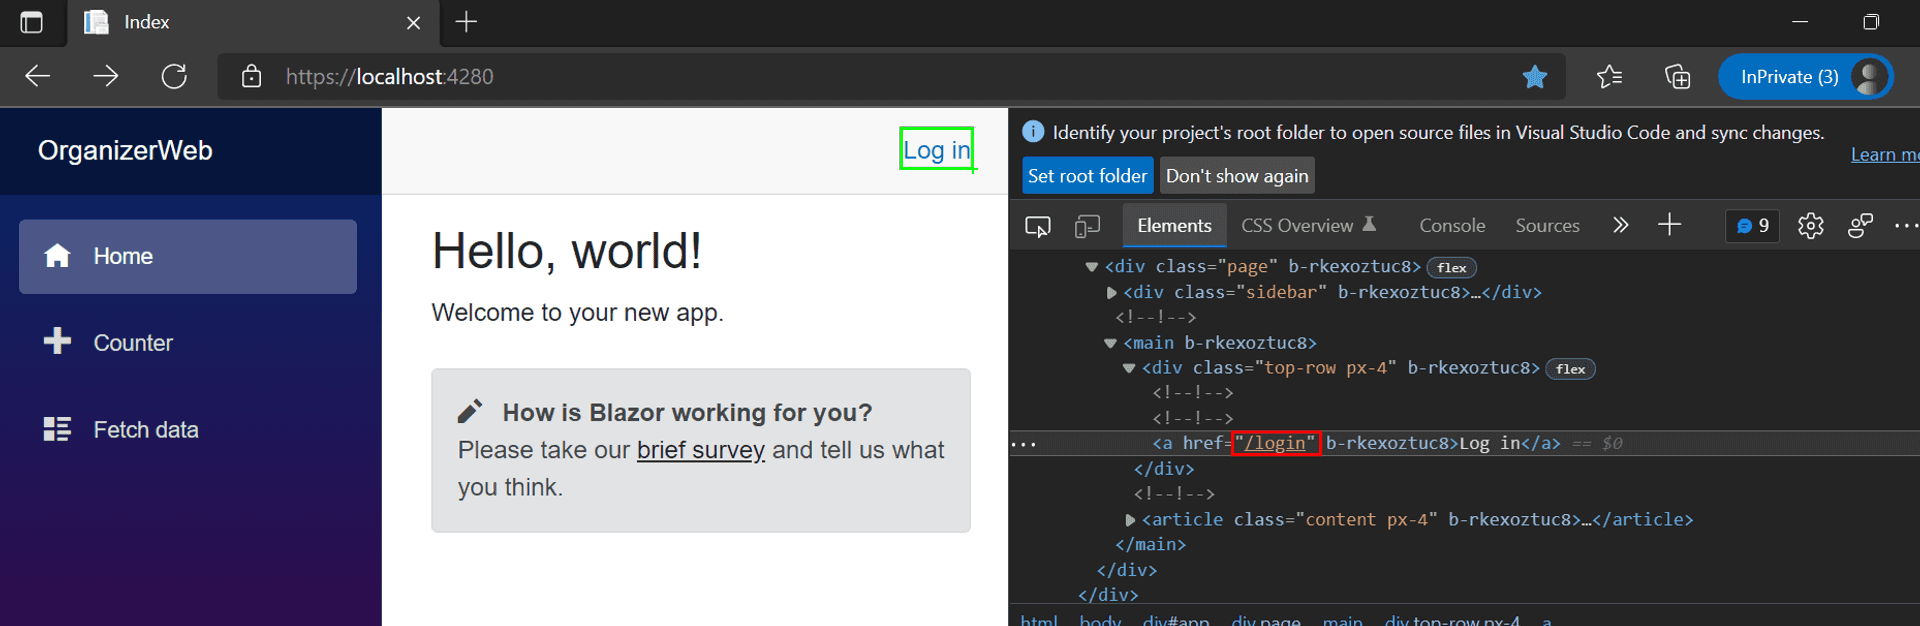
Let's update the layout of the Weather App by replacing the "About" link with a "Login/Logout" one.

Check out the URL highlighted within red: "Azure Static Web Apps uses the /.auth system folder to provide access to authorization-related APIs."
Run the SWA CLI command to bring up the Azure SWA app locally. When you click the Login link, you will come across one of the best features of SWA CLI: its emulation of the Azure SWA authentication infrastructure.
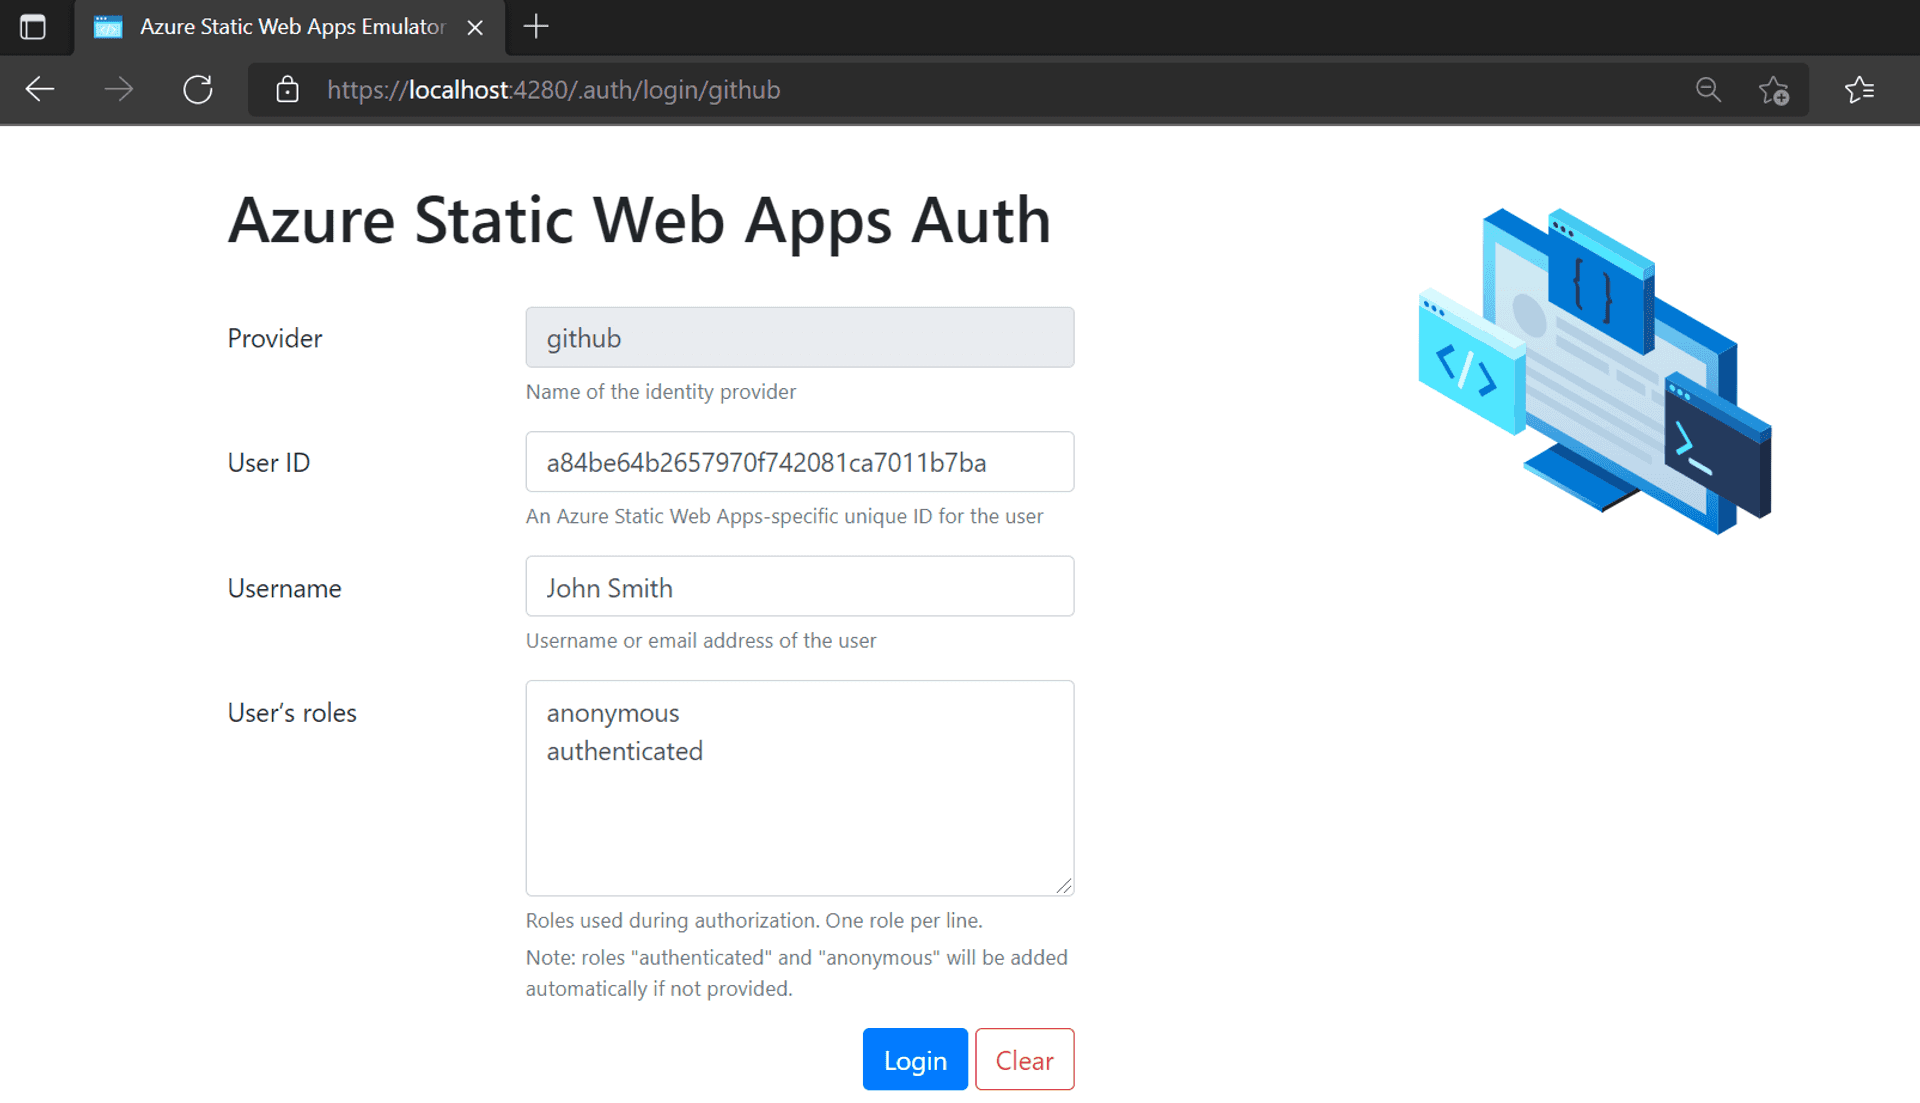
The provider is pre-filled with the one we have in our path in the .auth link above, with a text box for the user name and a text area for Roles[for now, we leave it untouched]. Clicking on the Login button will lead you back to the index page with the Login link replaced with a message welcoming the username entered in the emulator page and a logout link.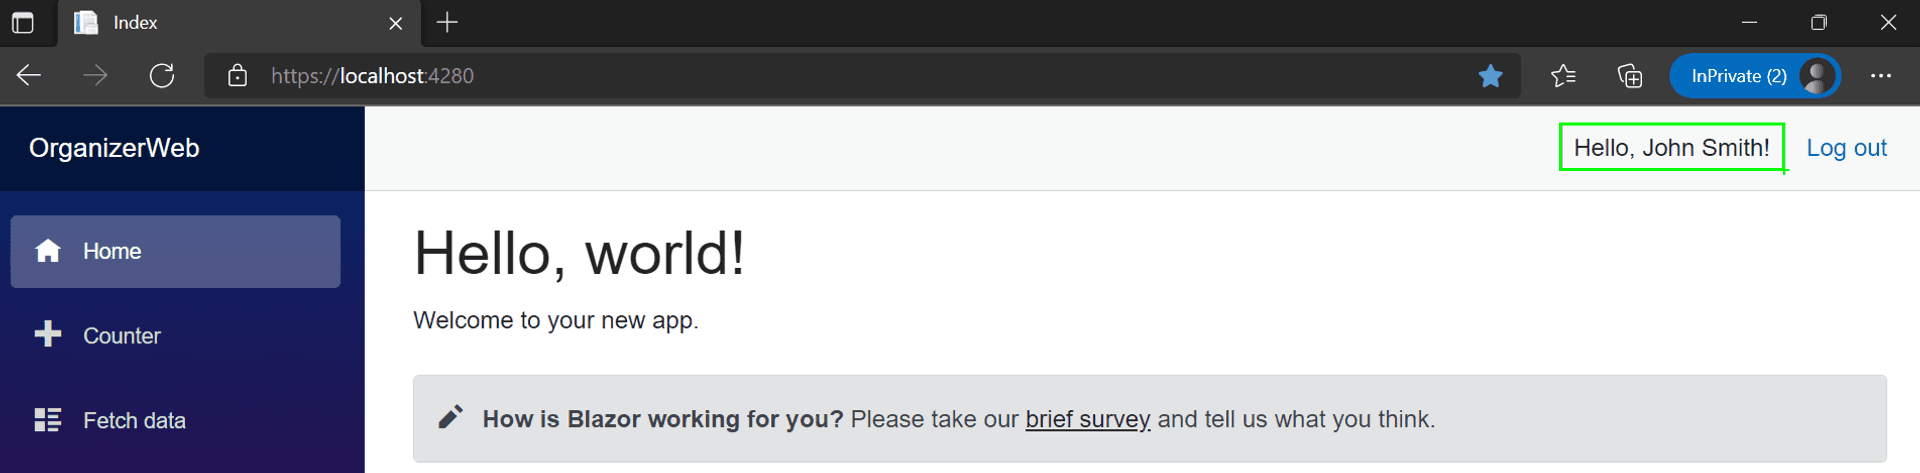
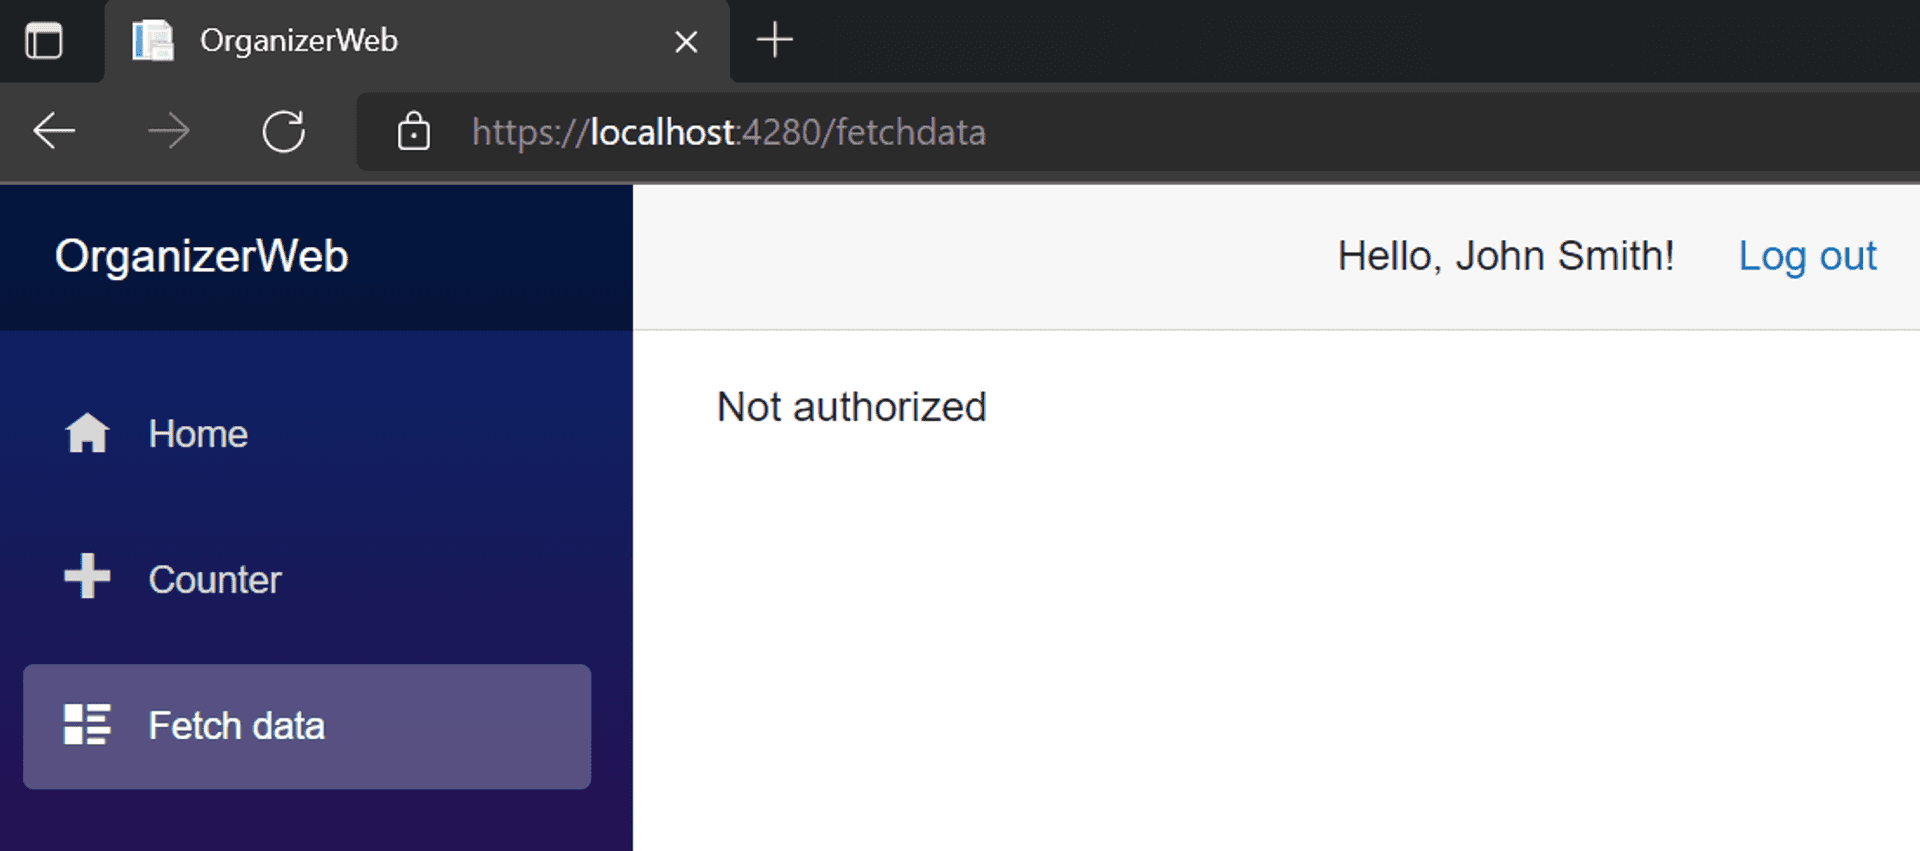
Presently, anyone can access the Weather Forecast page [reachable at the /fetchdata route].
Let's change that. Adding just two lines in your FetchDate.razor file and a restart should make that happen.
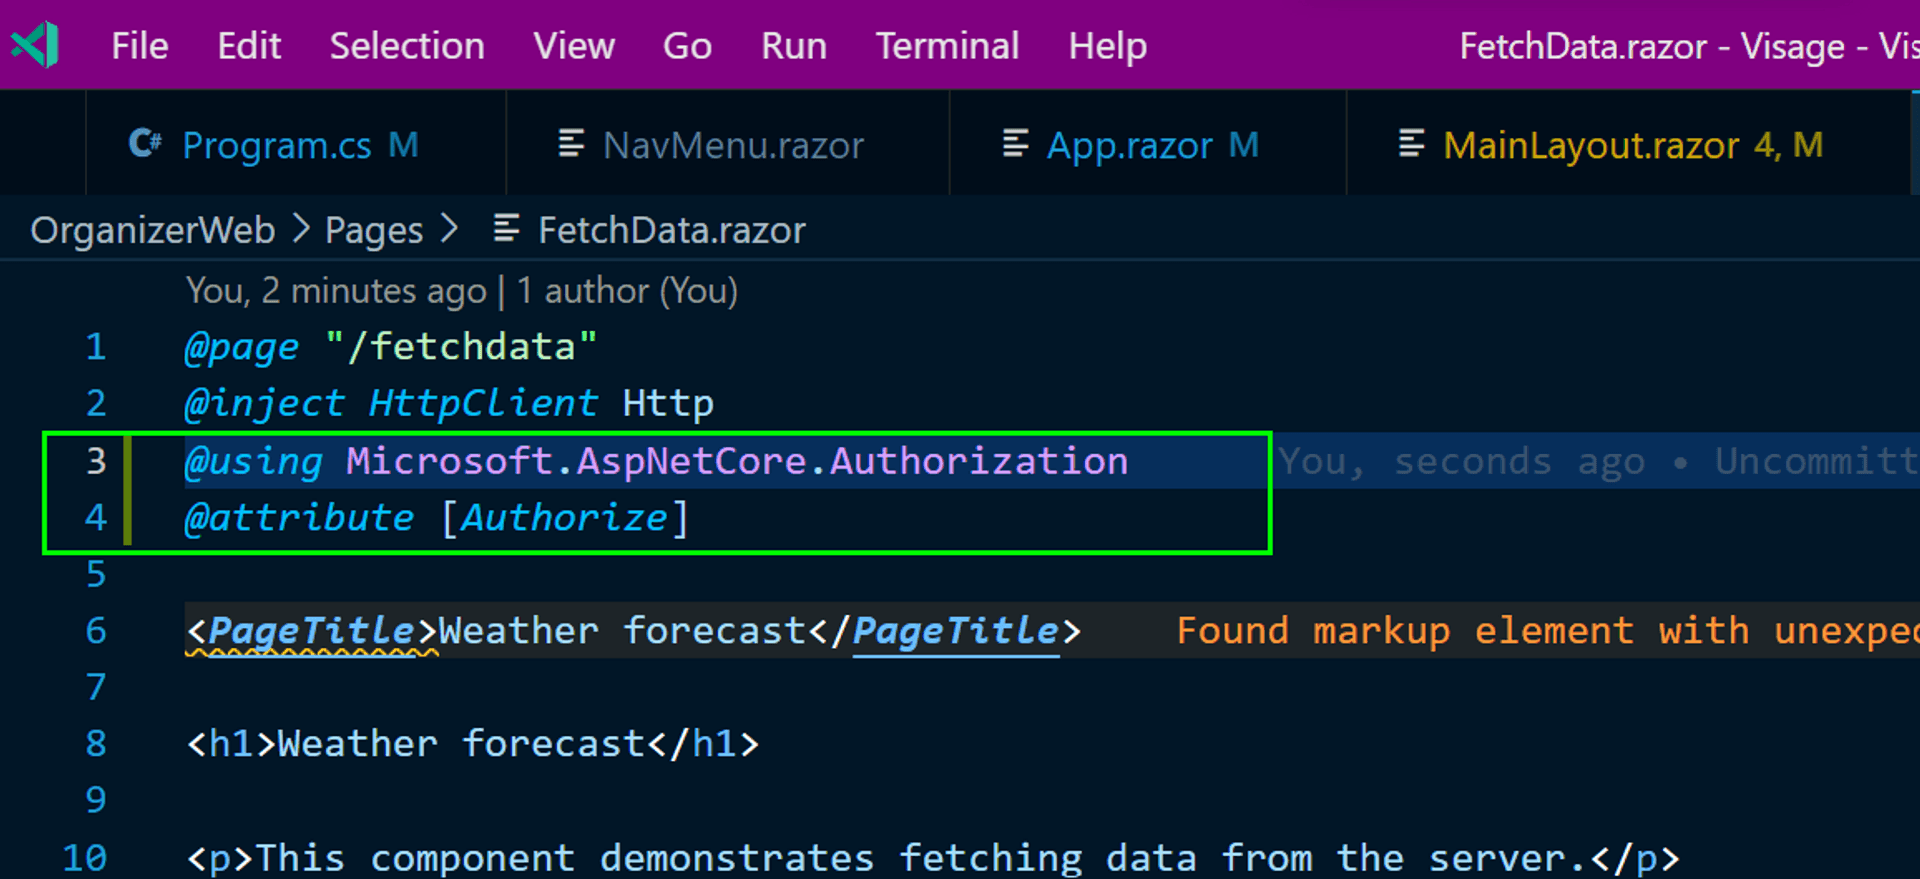
Now, when an unauthenticated user clicks on the Fetch Data link in the navbar, the page will display a terse message instead of the weather forecast. "Note to self: It would be cool if the famous MC Hammer U can't touch this gif plays when an un-authenticated user clicks that link."
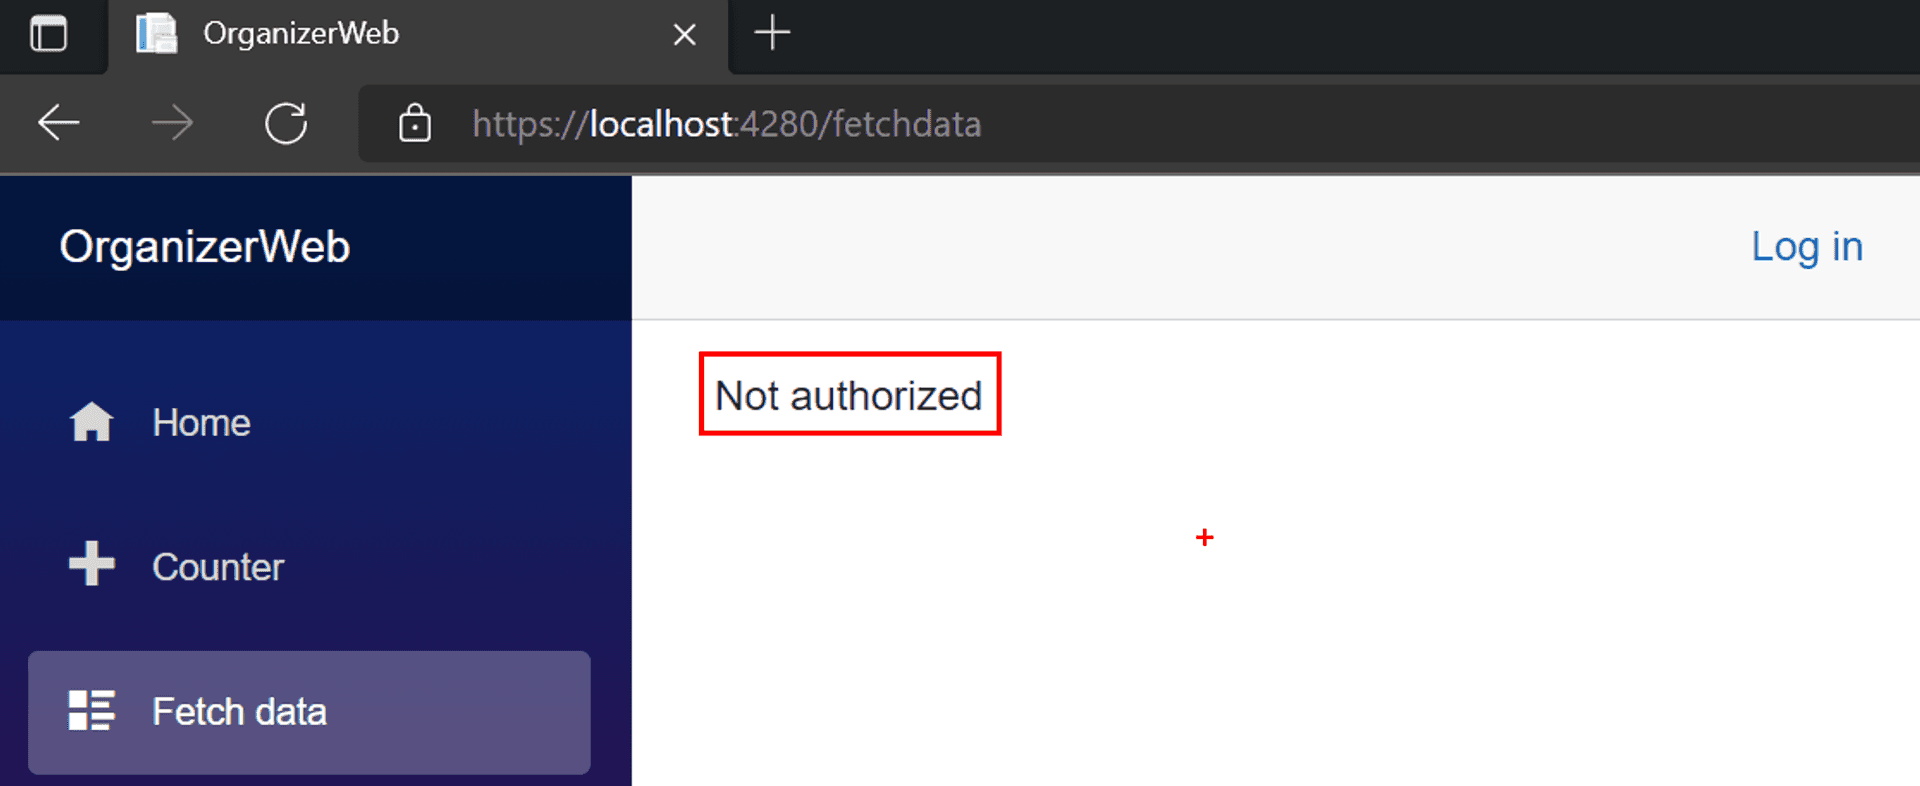
Hey, wait a minute, even John Smith from earlier can access the Weather Forecast page?!! Quite right, and here's the thing with "attribute [Authorize]" as it is, it only restricts anonymous access; once you are authenticated(doesn't matter as who), you are through.
So let's ensure only weather reporters can access the forecast page; we are now introducing Role-based Access Control[RBAC]. It requires a mere amendment to the Authorize Attribute.

And now, our authenticated but not having the requisite role(i.e. unauthorized) user can't access the forecast page.
#TIL: David Letterman started his career as a weather reporter in the 70's.

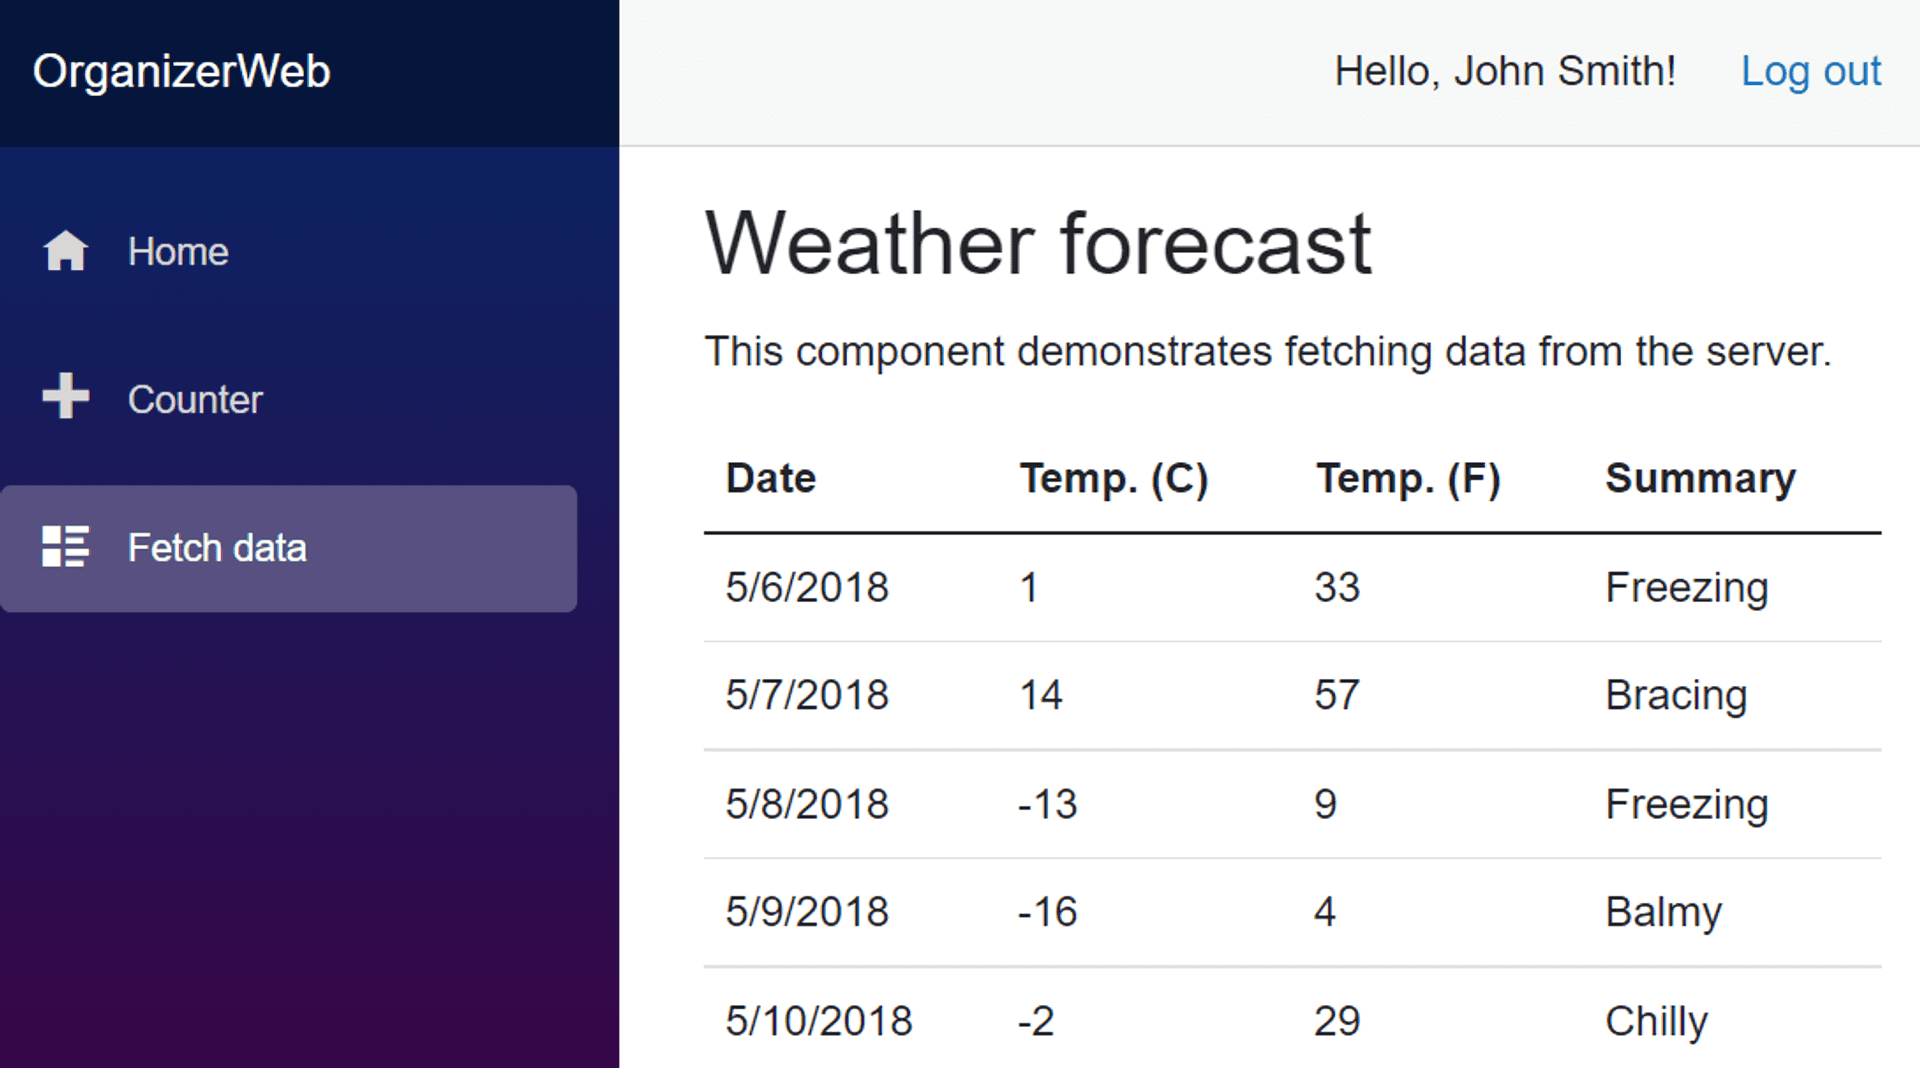
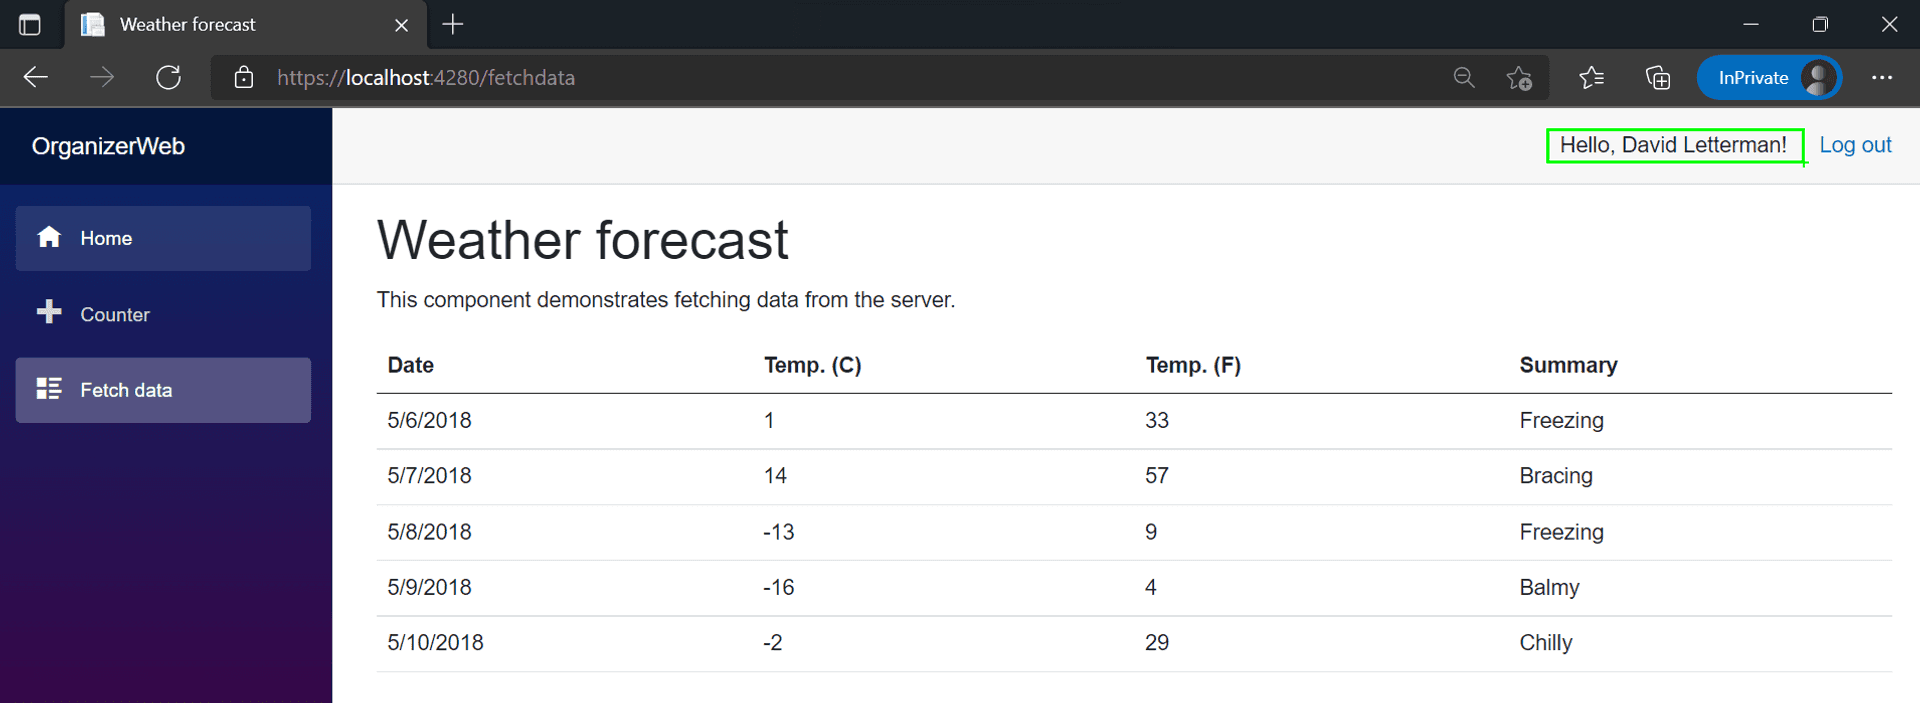
So let's logout and then click on the Login link again to bring us back to the emulator. Only this time, we masquerade as David Letterman in the role of a weather reporter.
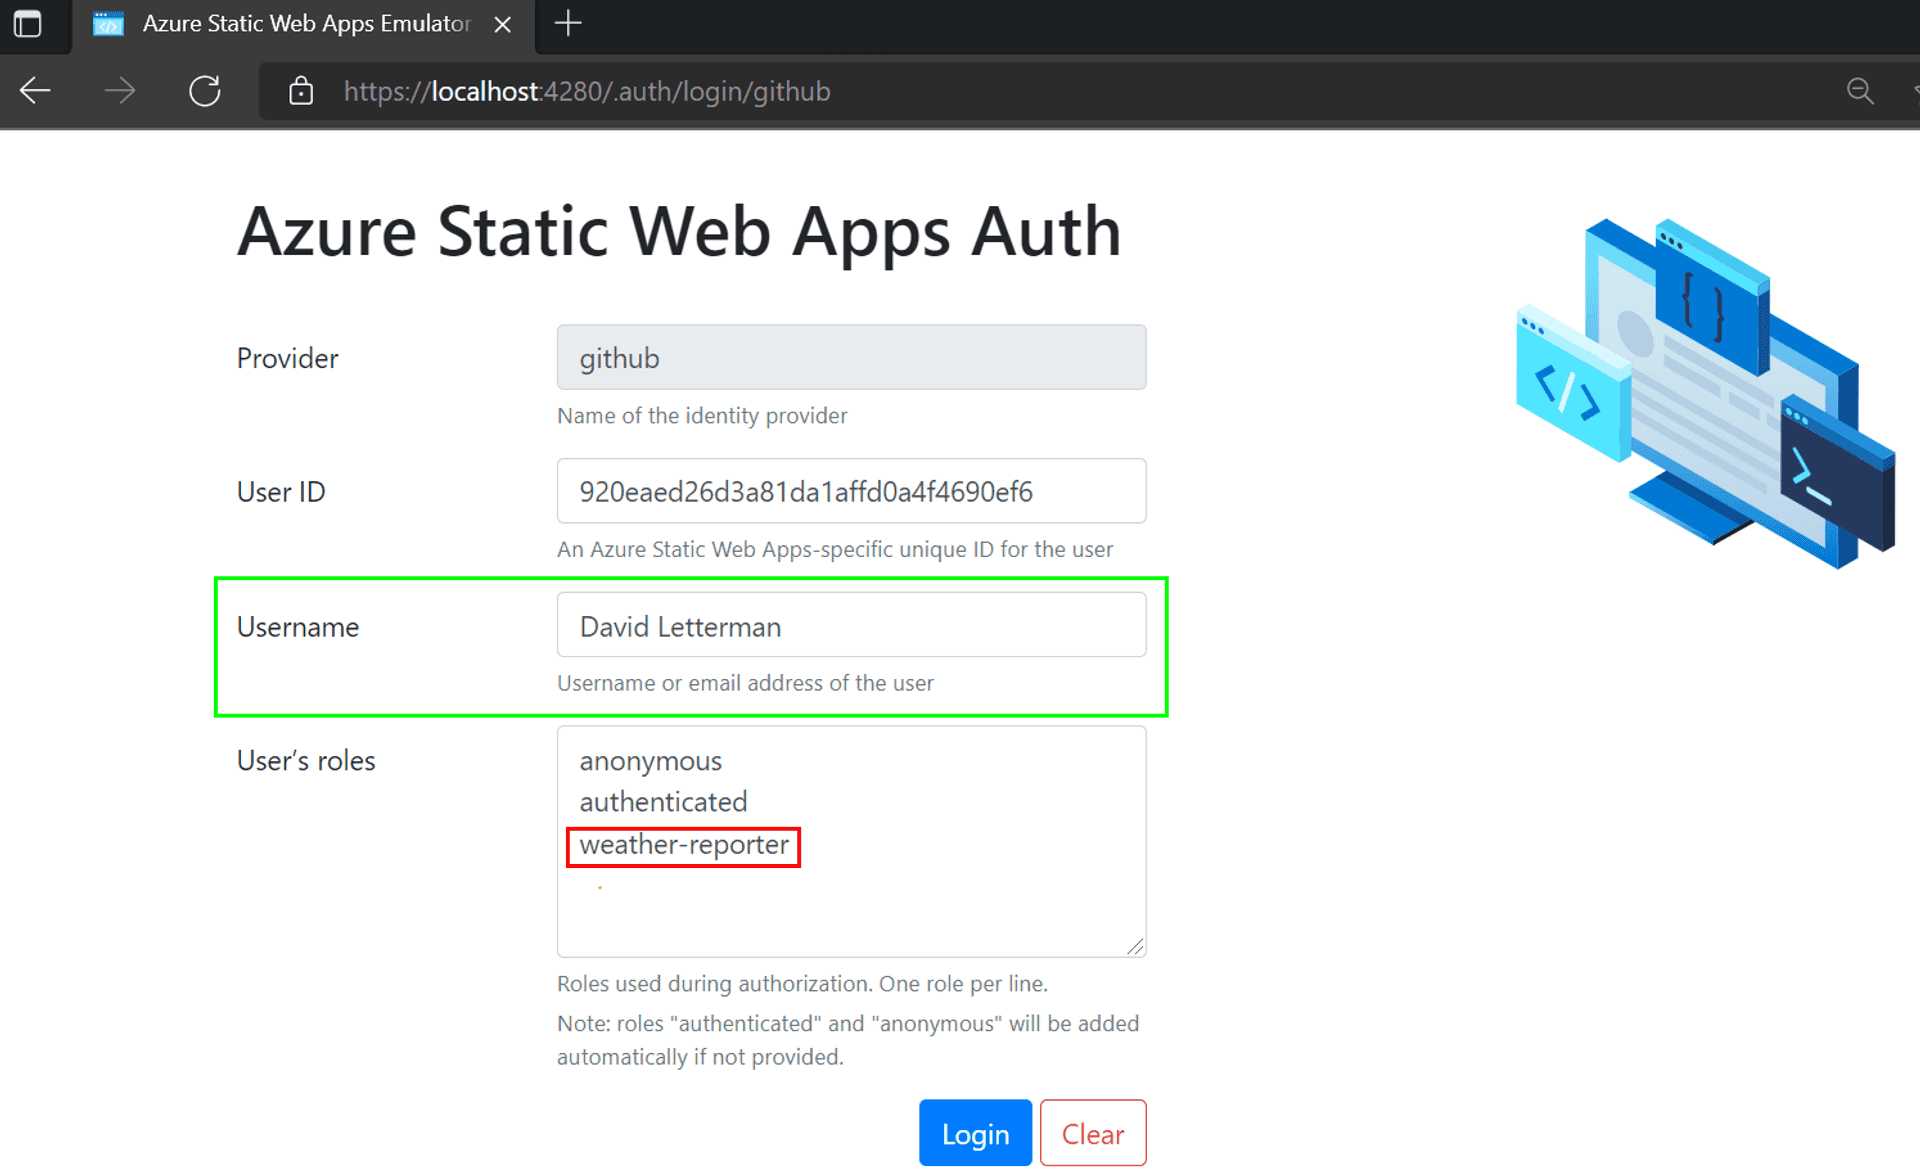
And lo and behold, David Letterman can access the weather forecast.
Pull Request in Pre-Production #
Great, now that we have corroborated, on our workstation, that the web app has a functioning IAM; let's validate it after deploying it on Azure.
Push the branch to GitHub.
git push -u origin CustomAuthOn the GitHub dashboard for the project, a helpful message is displayed persuading us for a Pull Request.
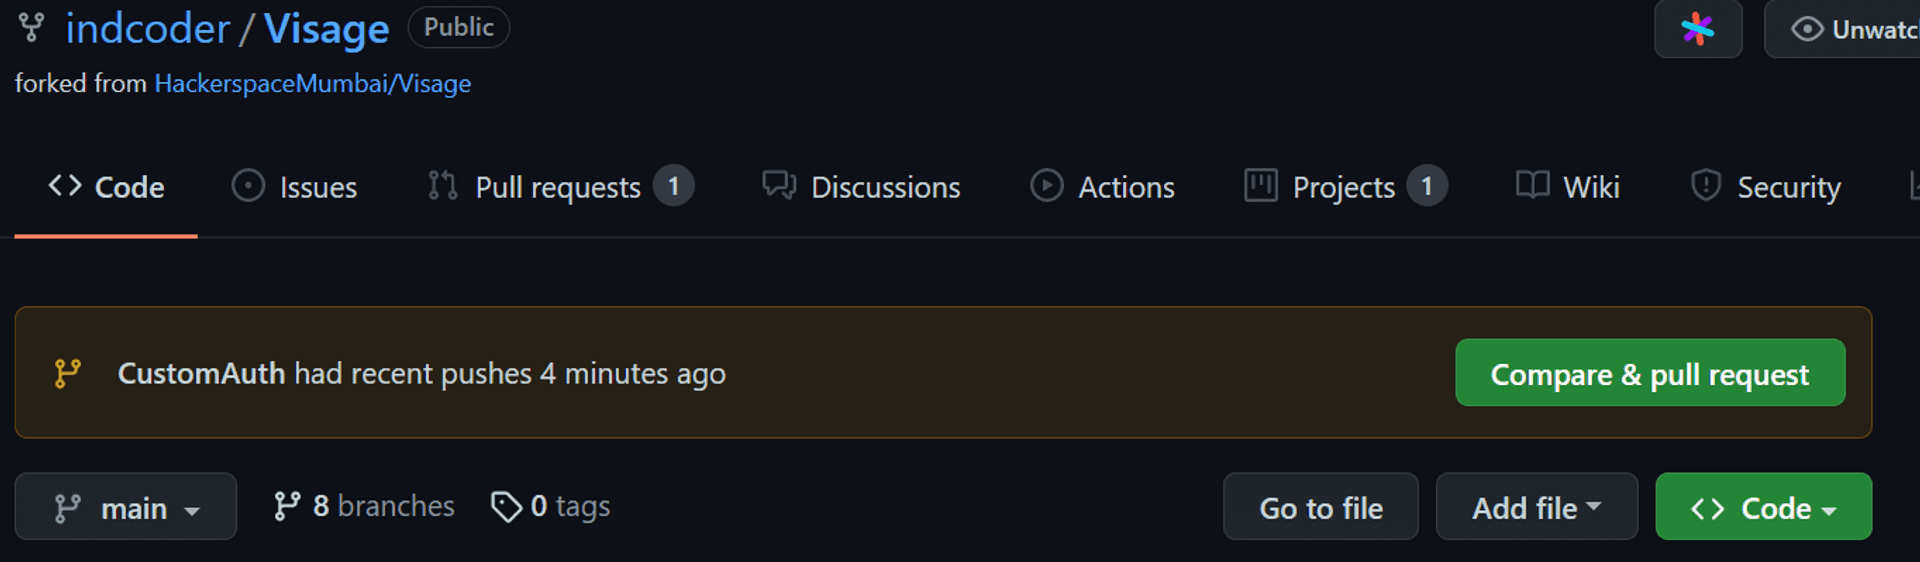
And this is a best practice for merging a code into an upstream or main branch.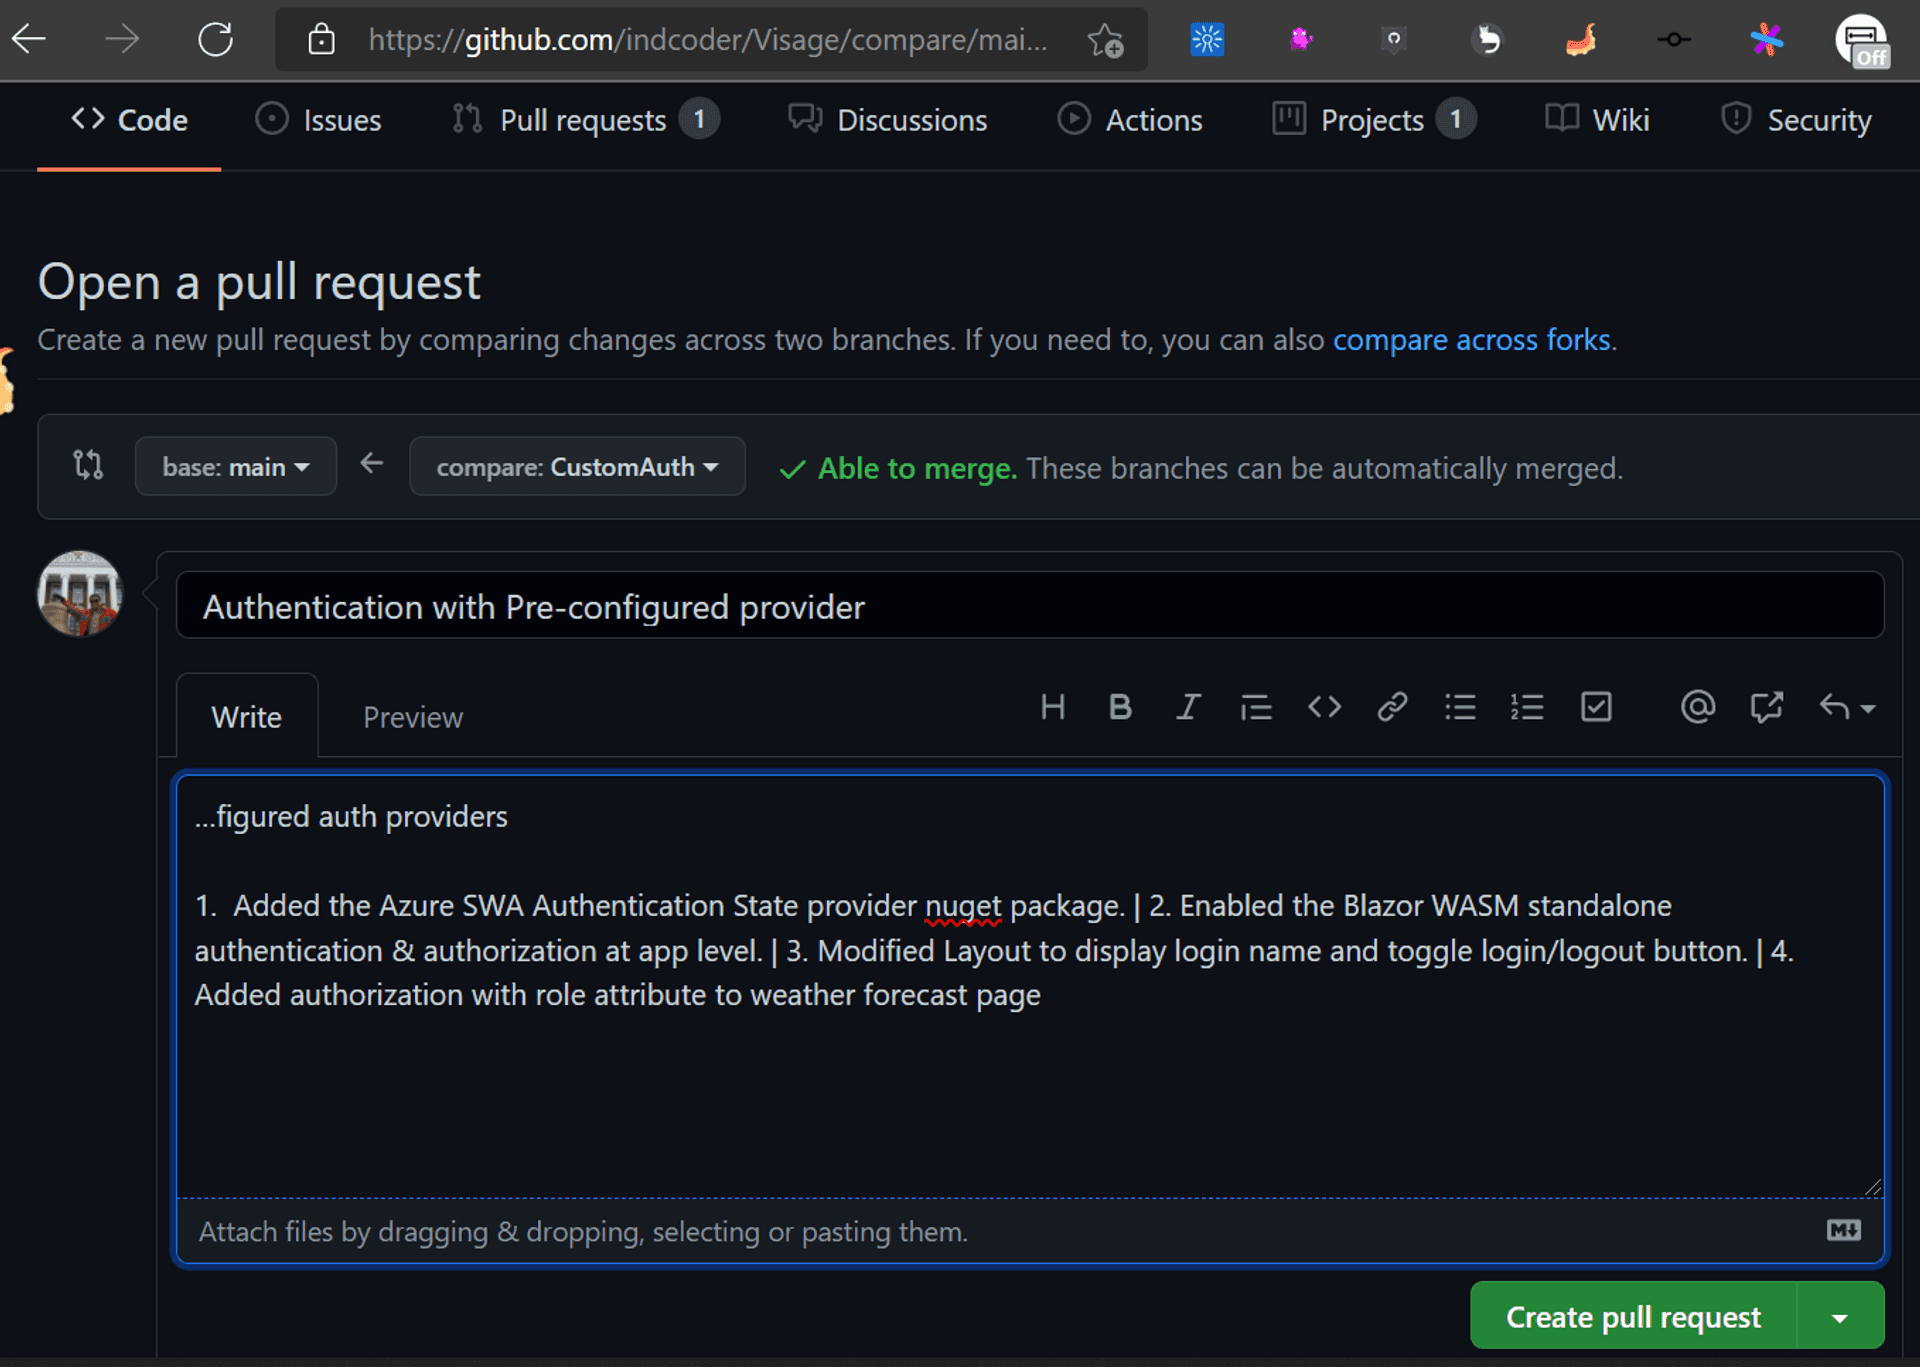
Remember the GitHub Actions created by Azure SWA? It also gets triggered for any Pull Request on the main branch.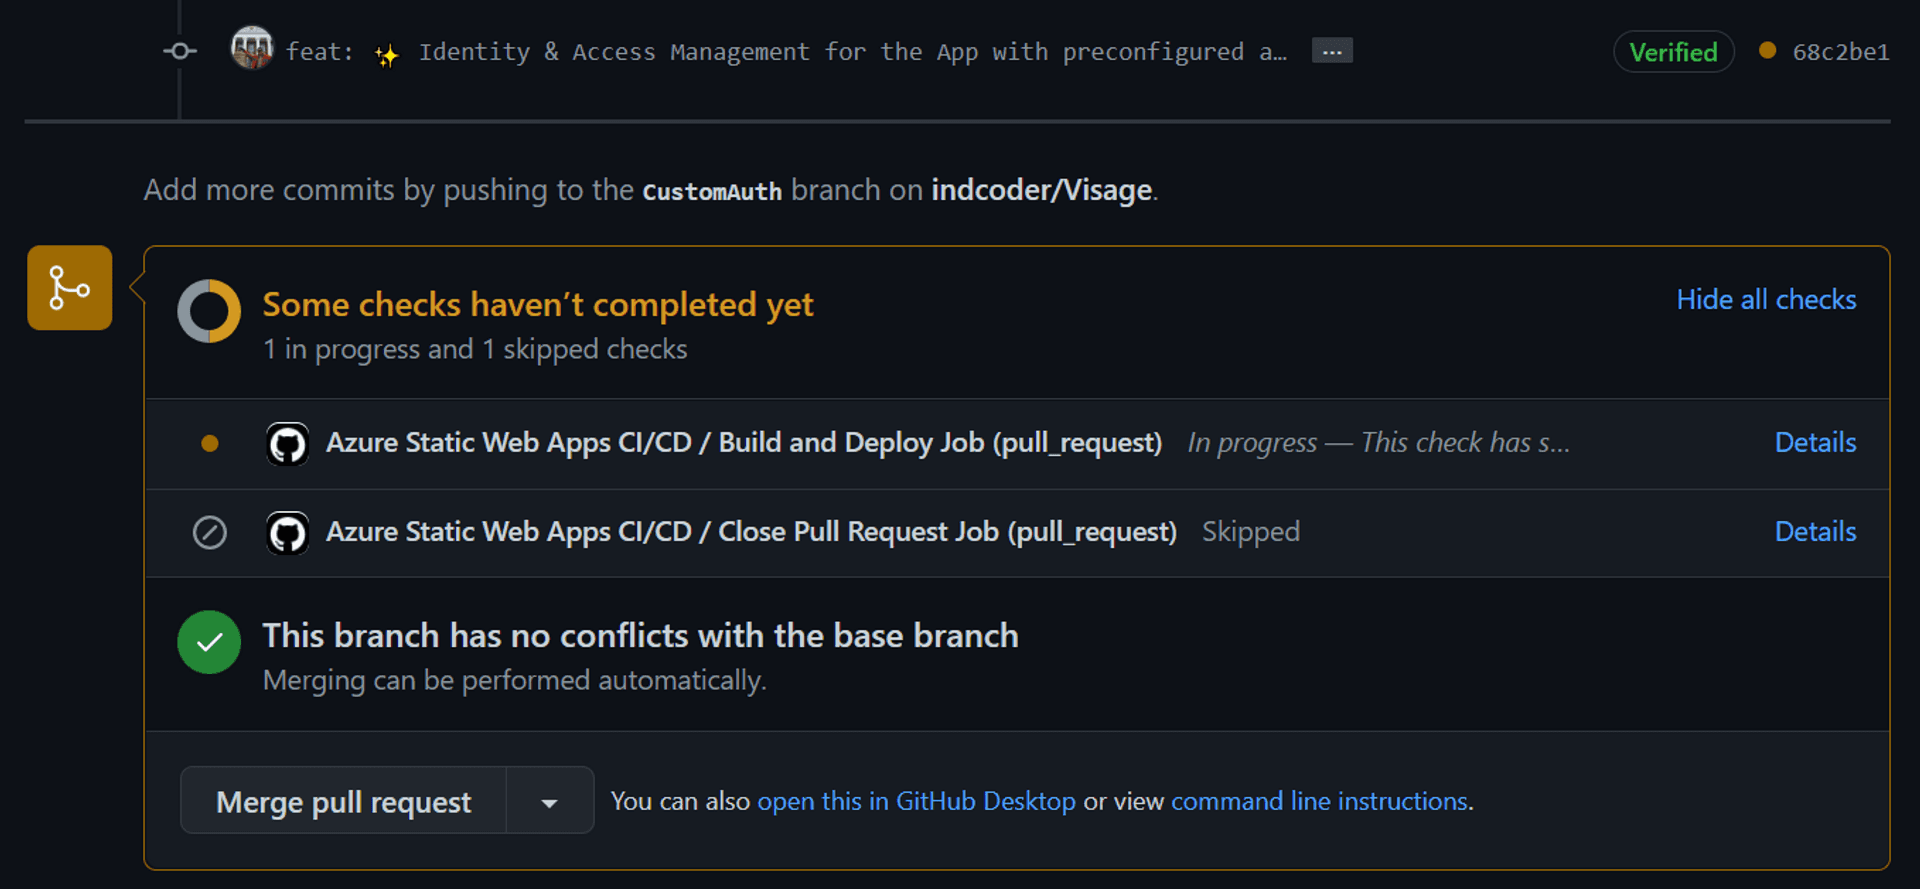
And here's one small but crucial productivity feature of Azure SWA: at the end of the successful processing of the GitHub action, the code will be available at a dedicated Stage URL. The Stage URL is almost identical to the production[main/master] branch URL, except for the subdomain appended with the GitHub Pull Request Number and Azure region.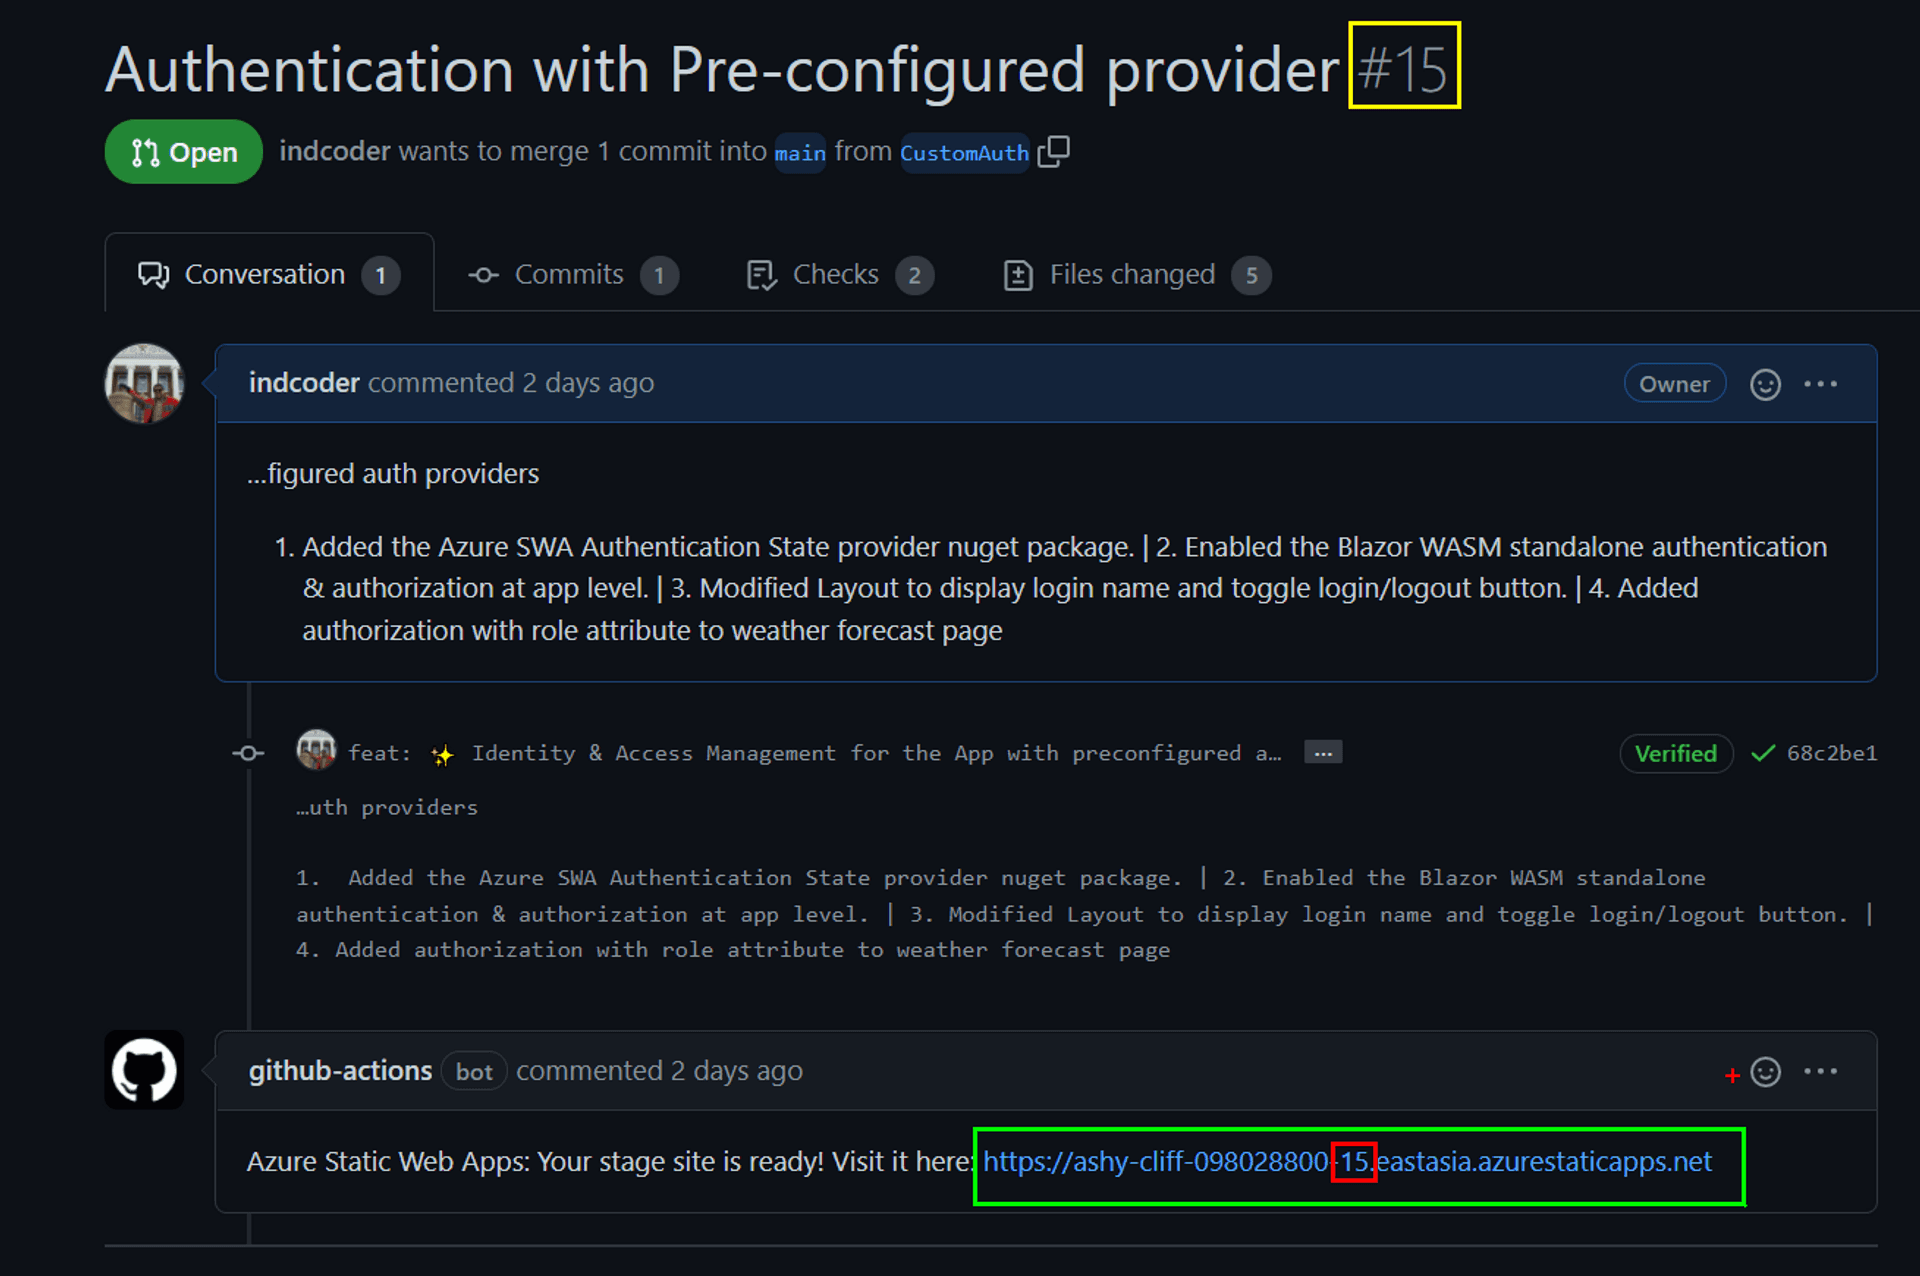
You can test your stage URL independently and also make a side-by-side comparison with the production branch.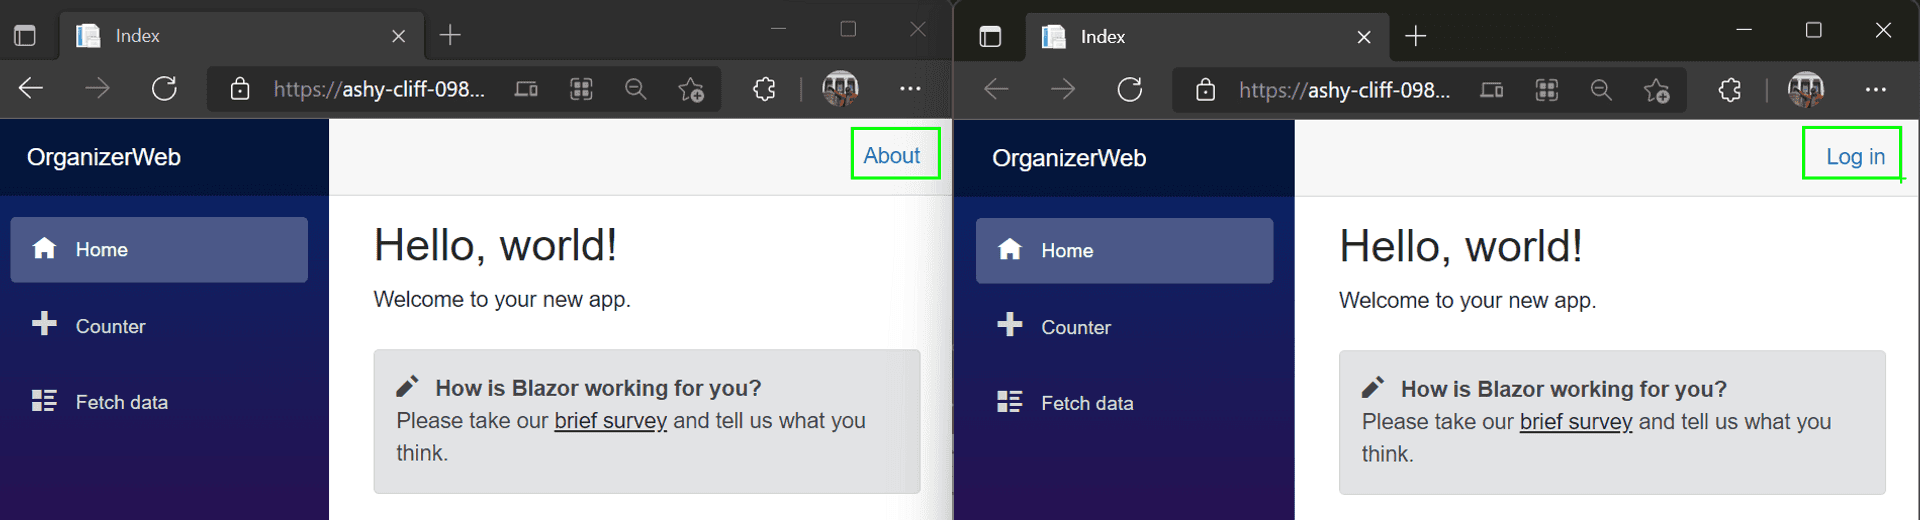
Click on the login link[at present only available in the stage URL], and immediately you realize the training wheels are off when the browser is redirected to the GitHub Sign-in page.
On successfully logging in for the first time, you need to consent to your personal information being shared with the app.[Yup, privacy is taken seriously.]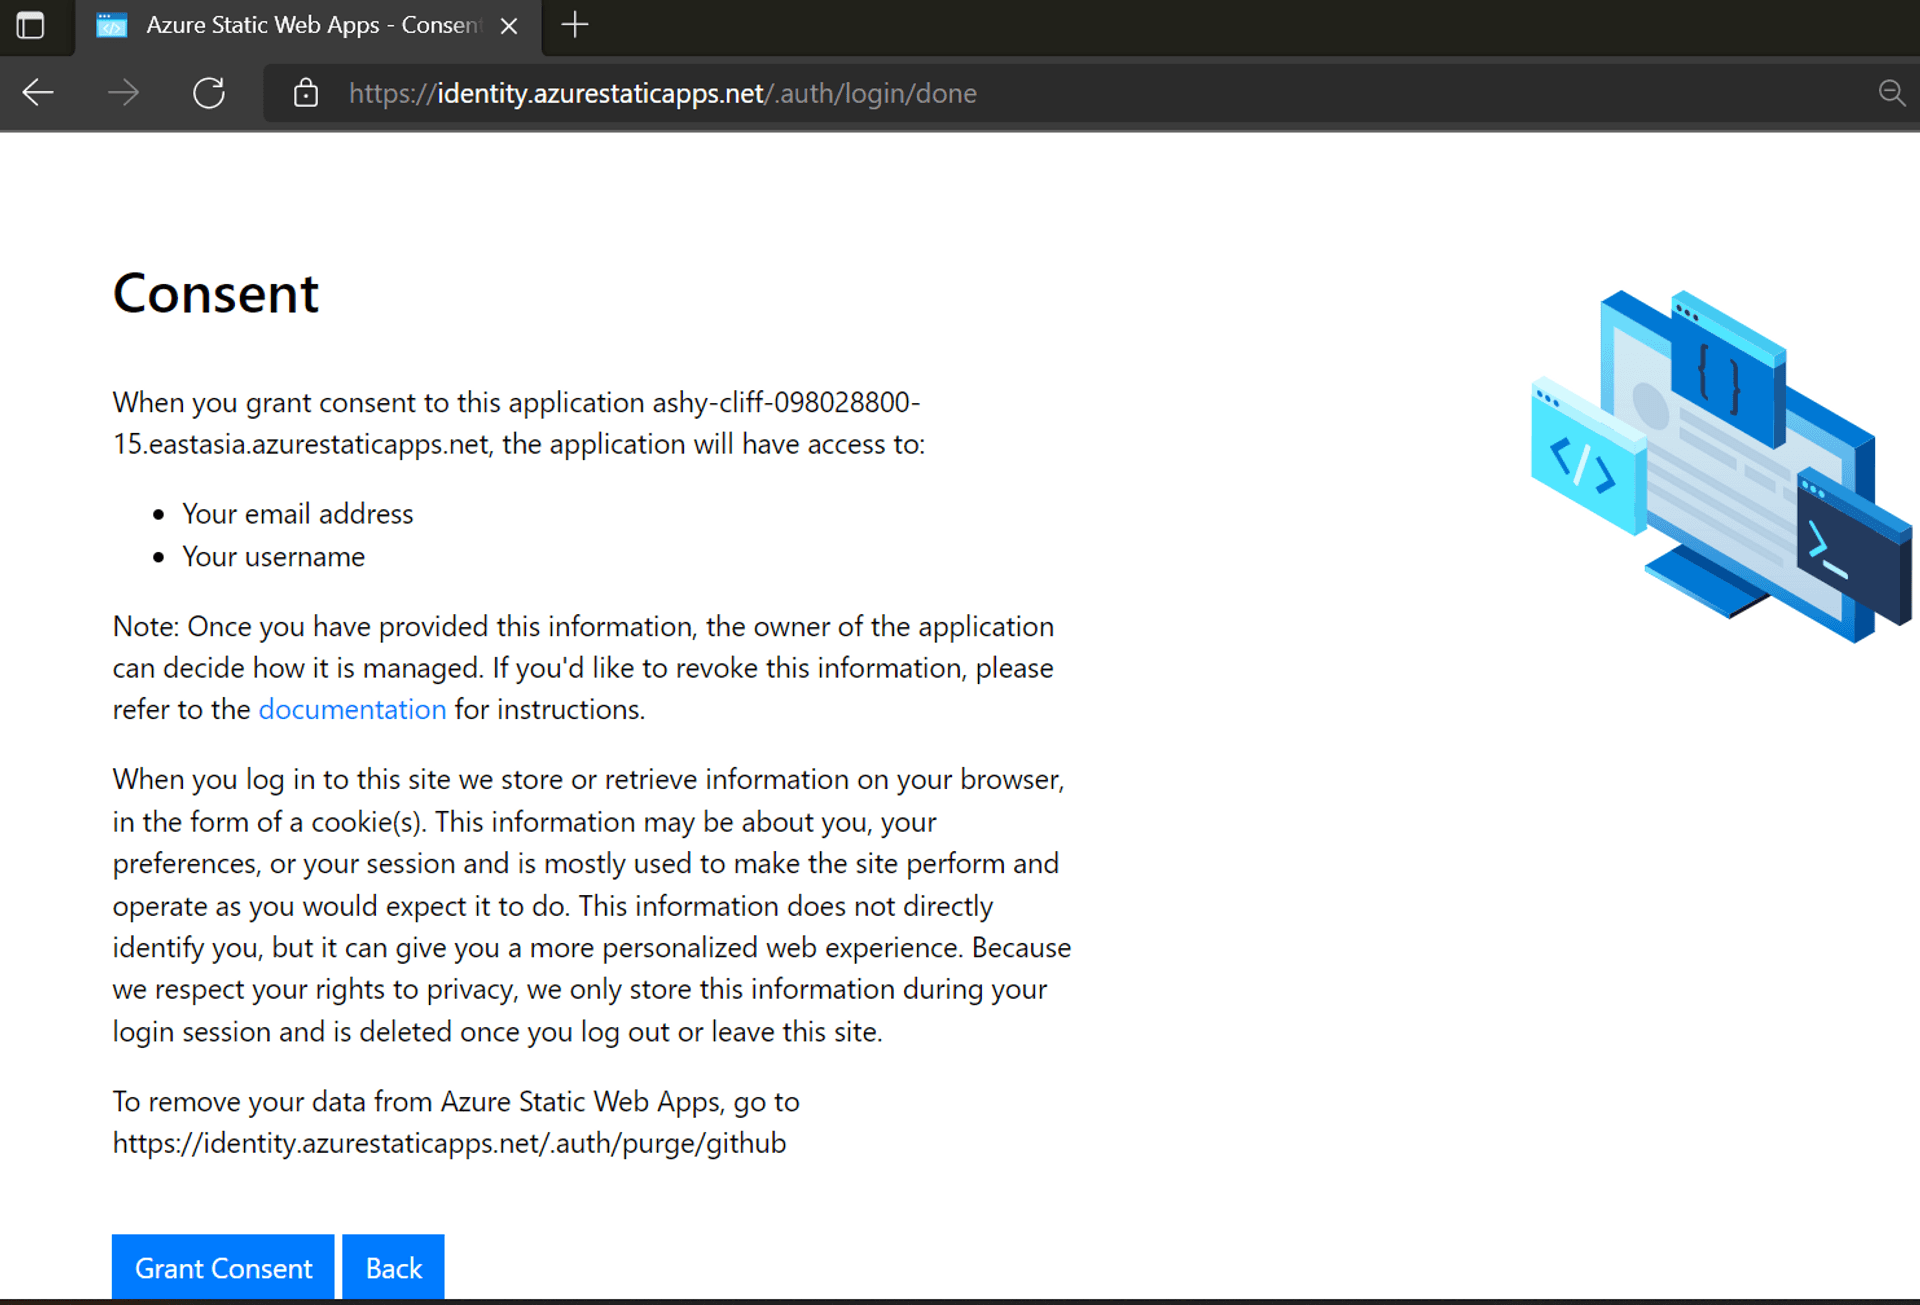
We are authenticated but we do not have access to the Weather Forecast page.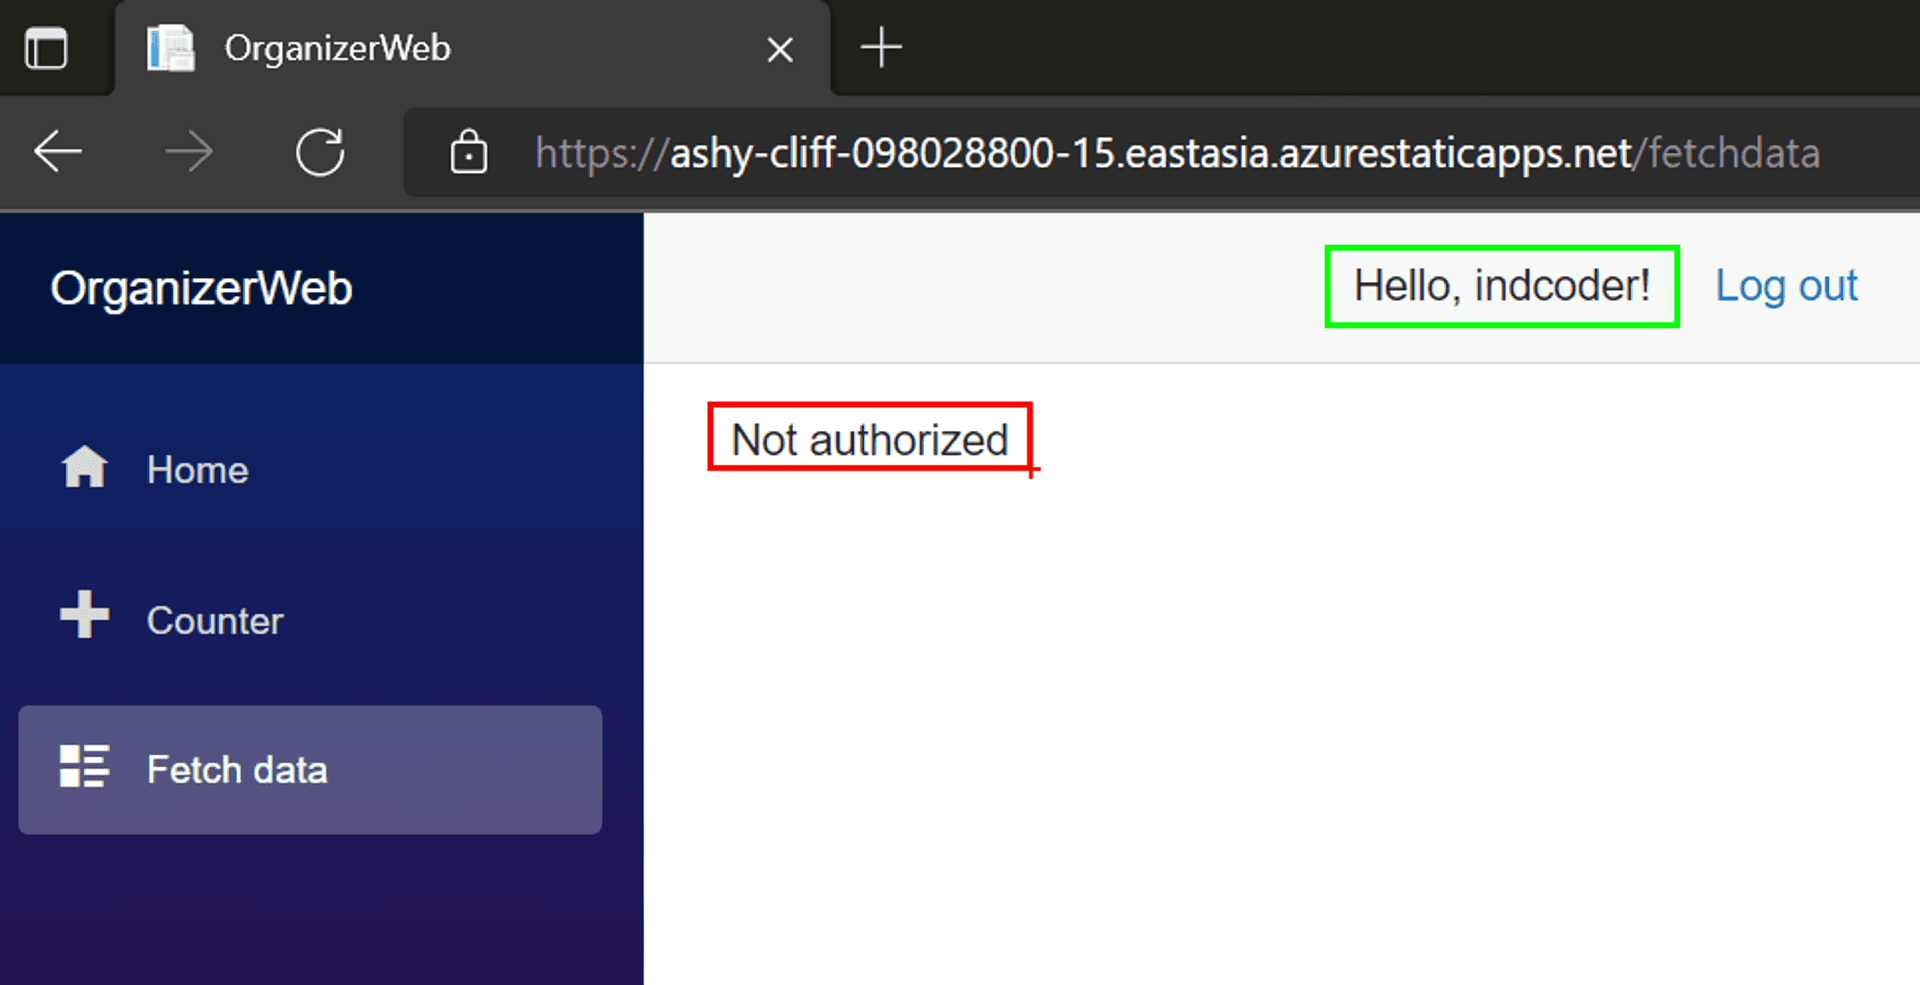
Why? David was doing a standup job as a weather reporter on our local development [SWA CLI], but on the Azure Portal my GitHub profile is unknown. Anyway since David has a flourishing career as a late night host, its time we bid him Adieu and have me, or to be precise my GitHub profile take over his weather reporting duties on the app. Head on over to the Azure portal and visit the Role management page.
Can you grasp the significance of the last statement? We created an Azure SWA app, developed it locally, deployed it on Azure, created another branch to incorporate the IAM feature, hosted on its own stage URL, and we did not have to visit the Azure Portal till now. All this accomplished from the comforts of the tools you are most familiar with: VS Code, and GitHub. Remarkable win for developer productivity.
Azure SWA uses a built-in invitation system to assign roles to users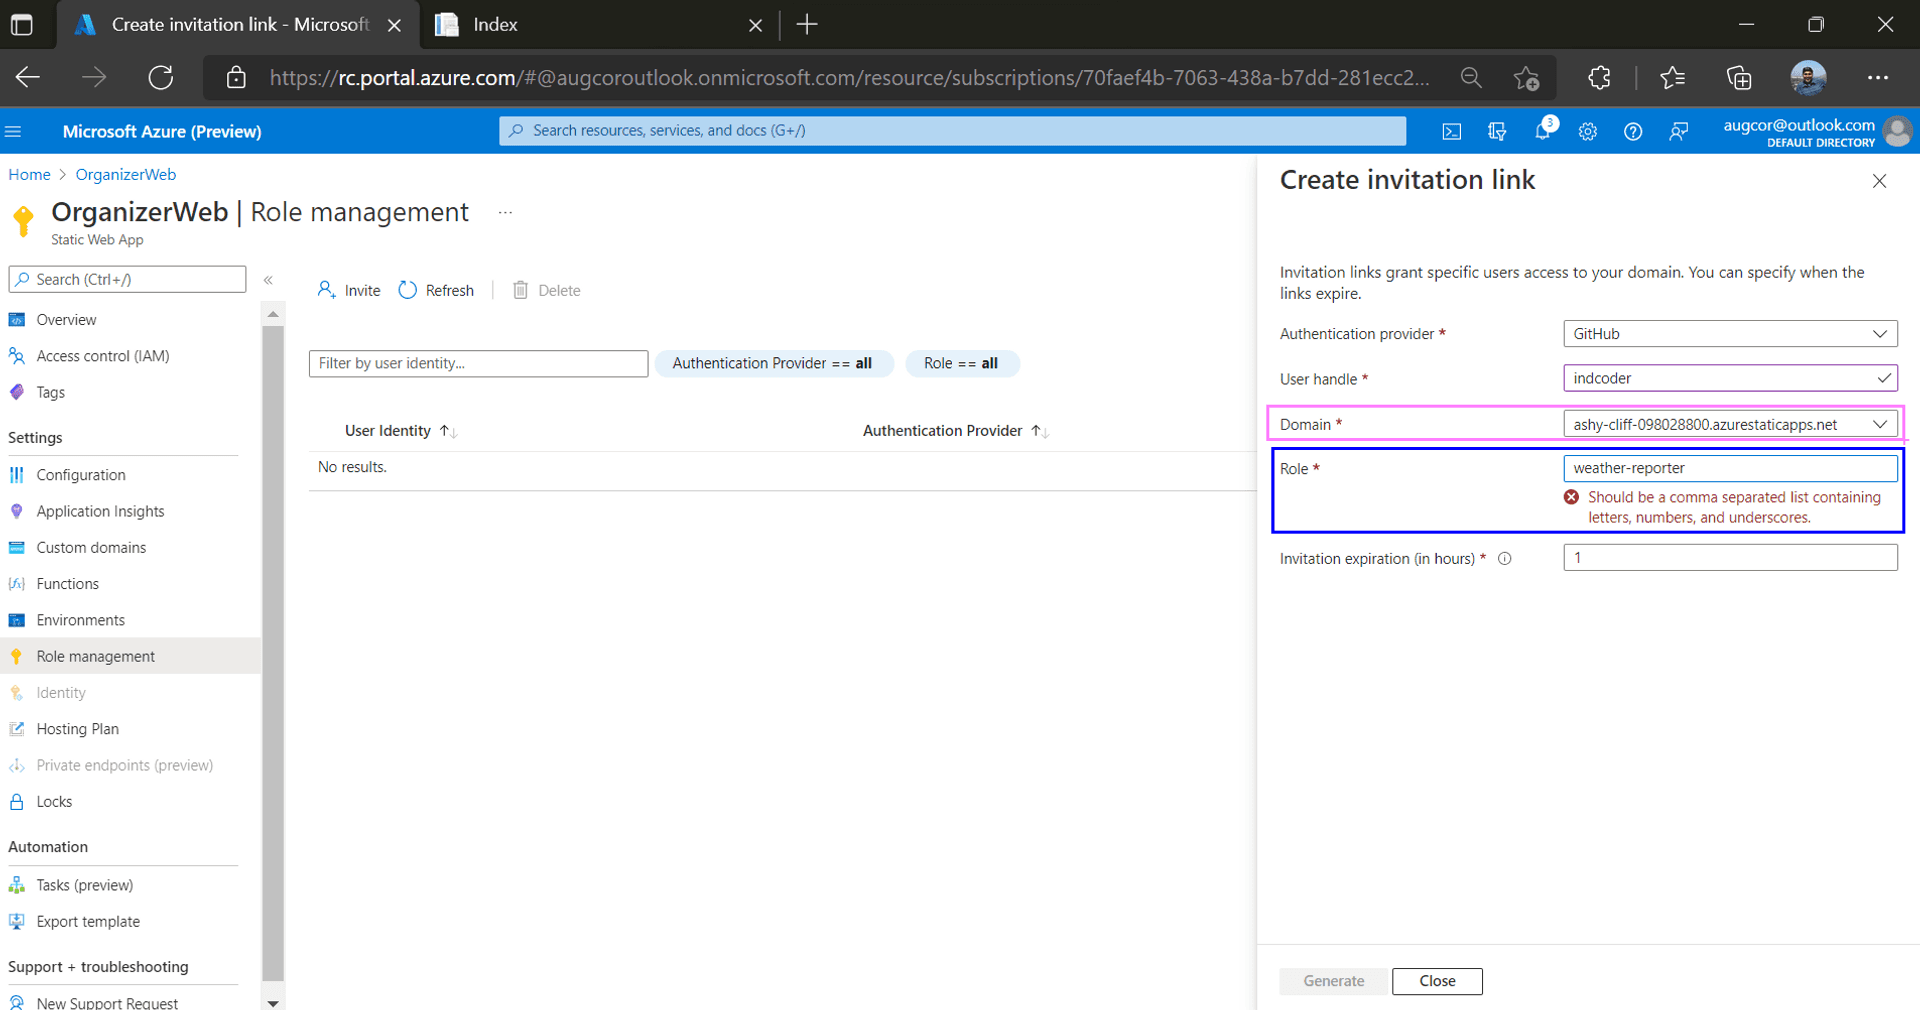
Oops, looks like we need to revisit our code. Roles in Azure cannot contain hyphens. Replace the old role with "weathercaster".
Lets test it locally like we had done earlier.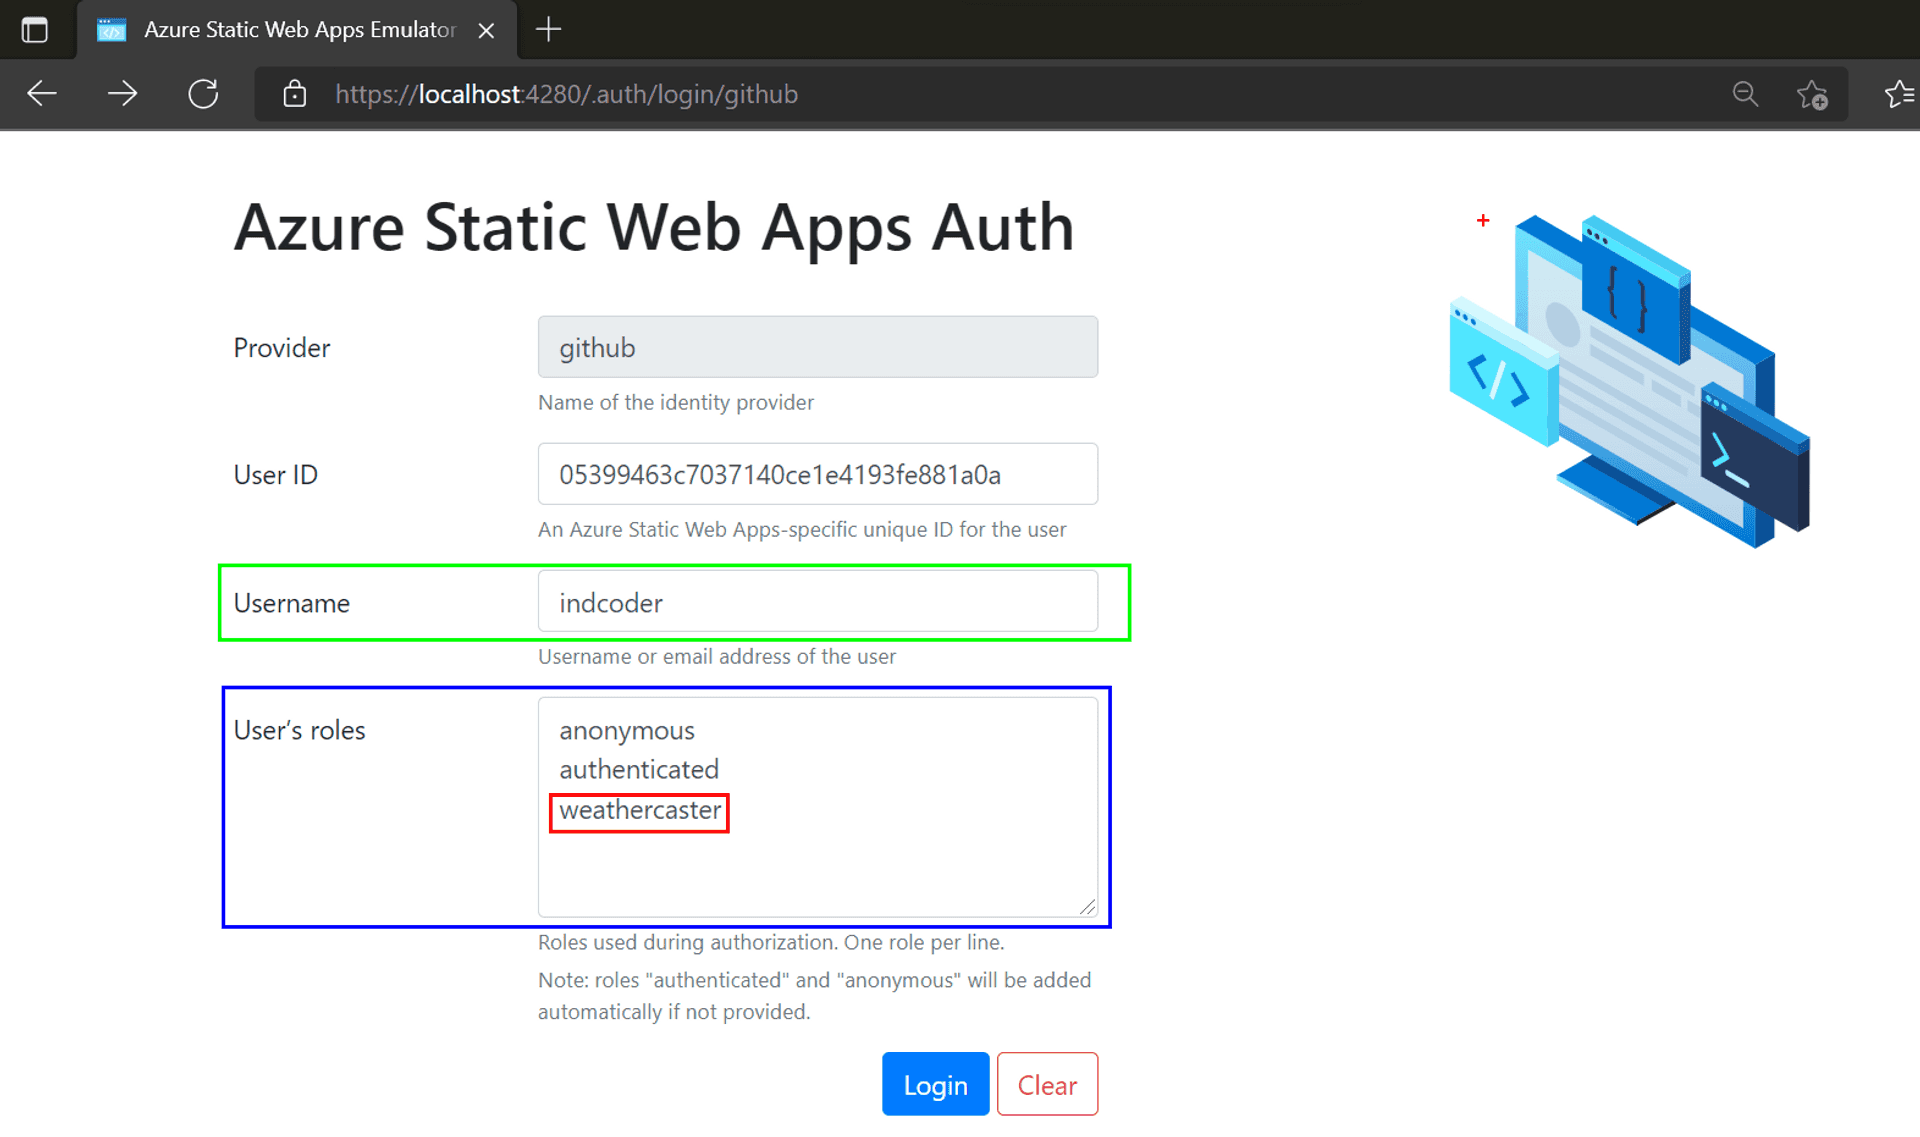
Looks good.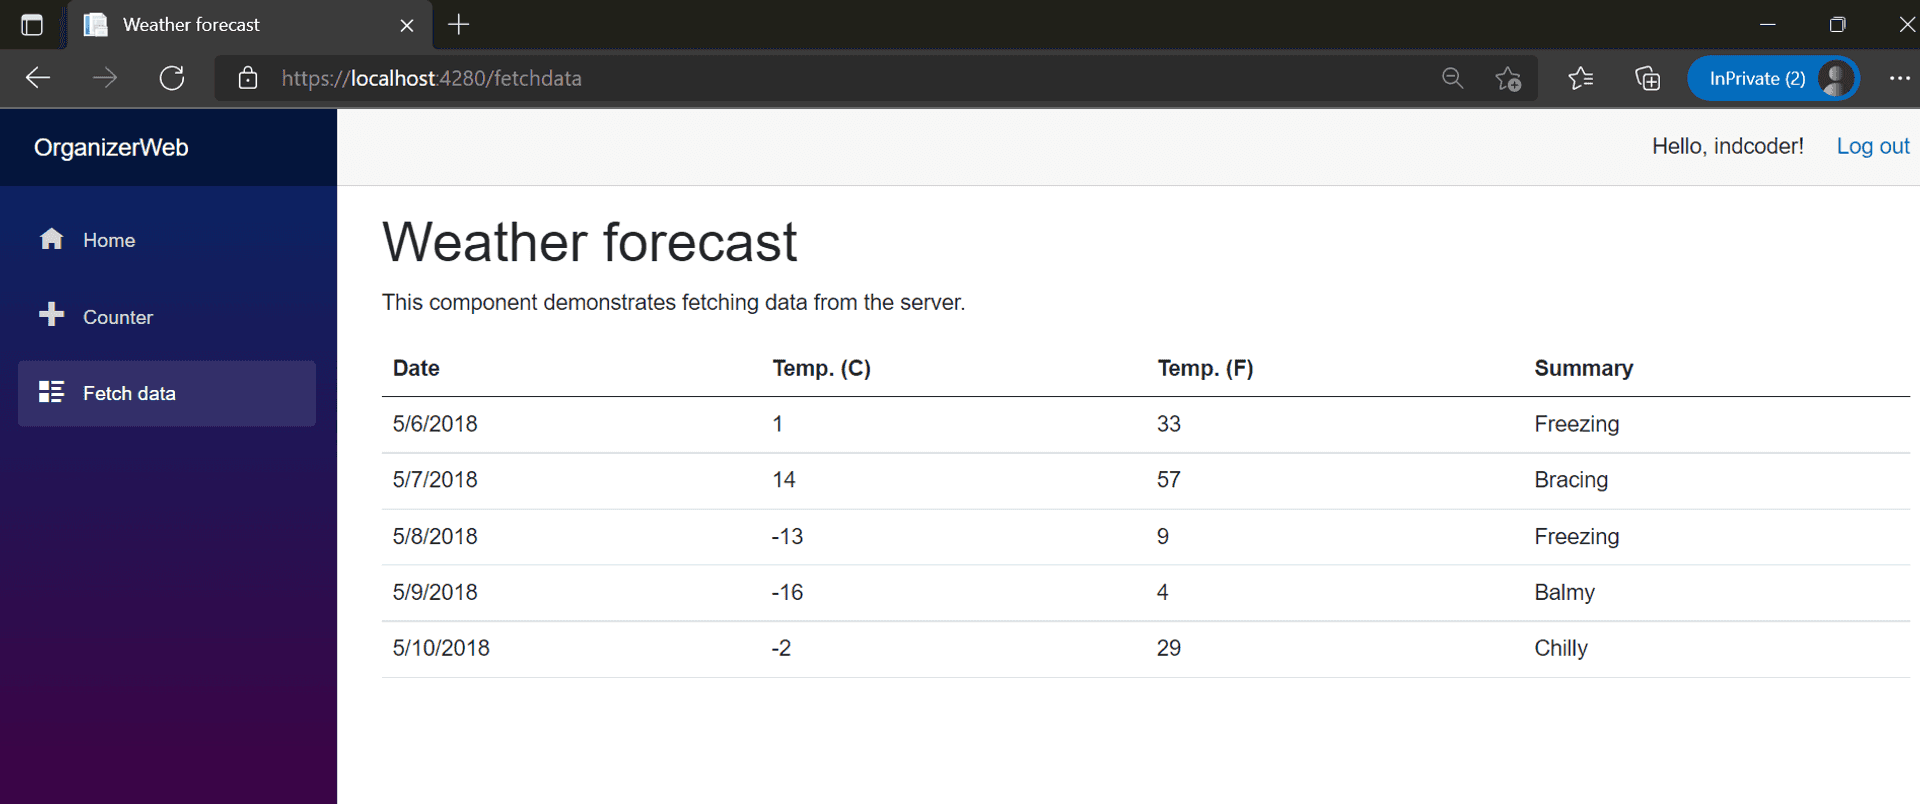
In the interim, lets add the "weathercaster" role to my GitHub Profile name in the Azure Portal. And click on the invitation link generated below, which will redirect you to the web app of the main branch version.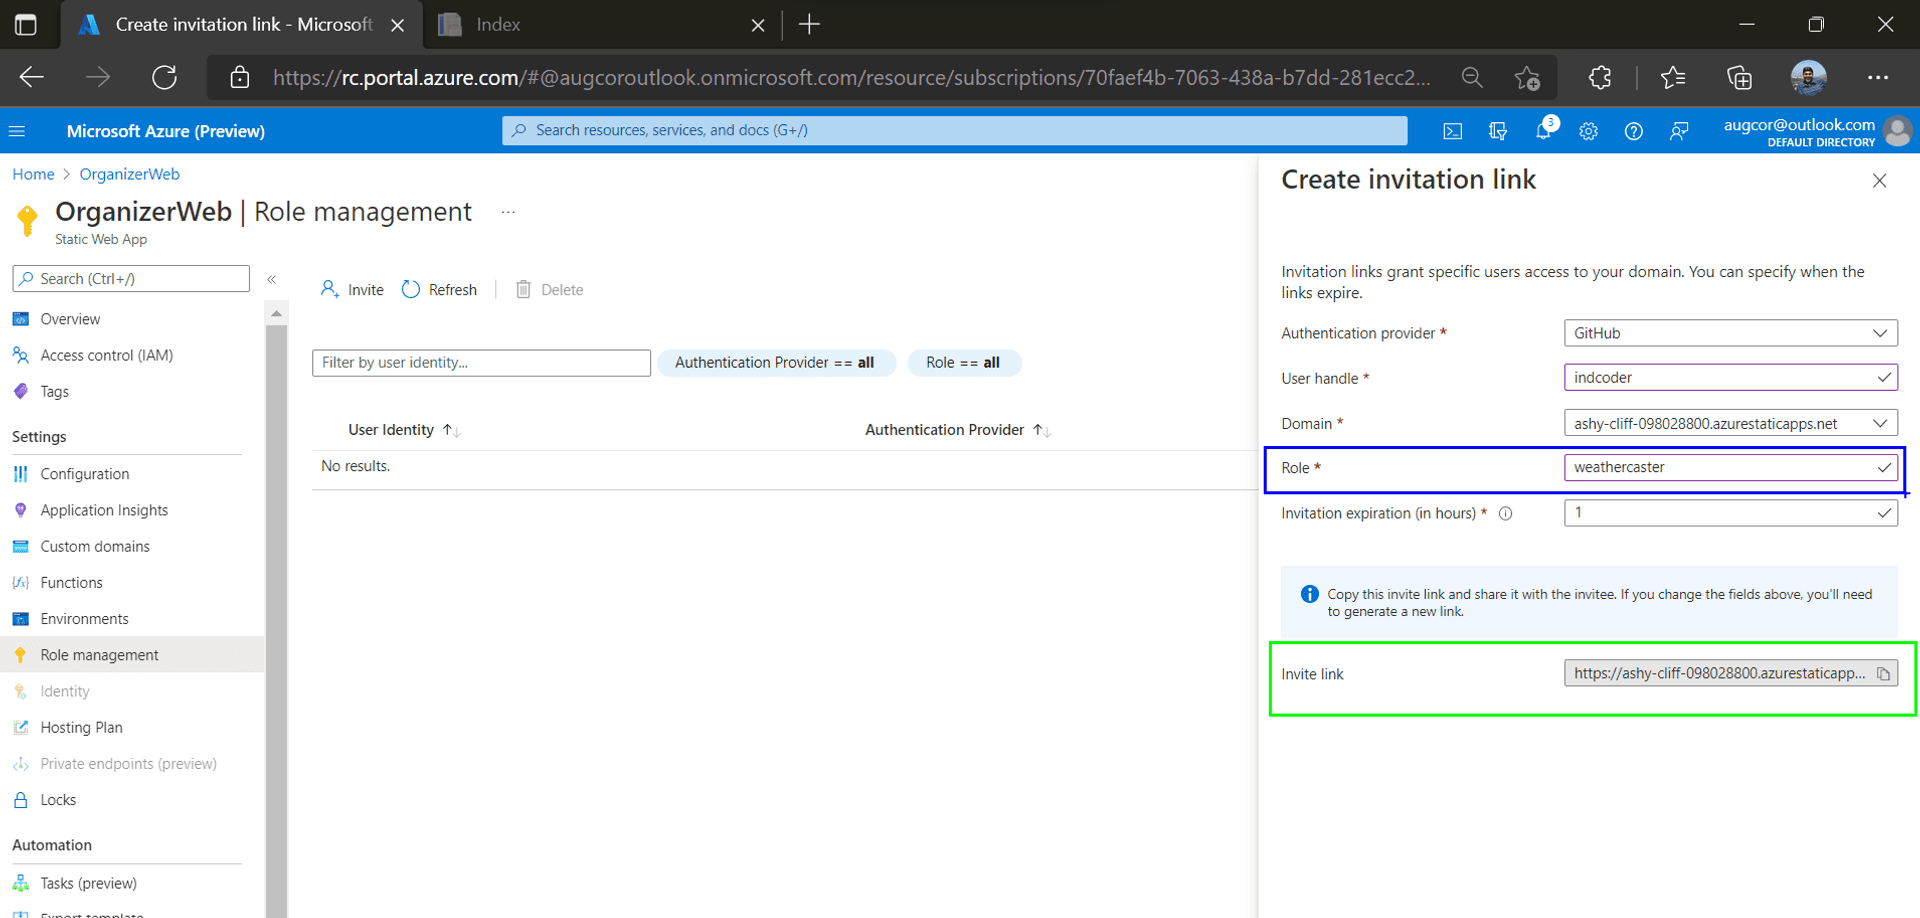
Push the changes to GitHub. Doing so, will once again trigger the GitHub Actions, and the end of its successful processing, it will generate a new comment with the same Stage URL.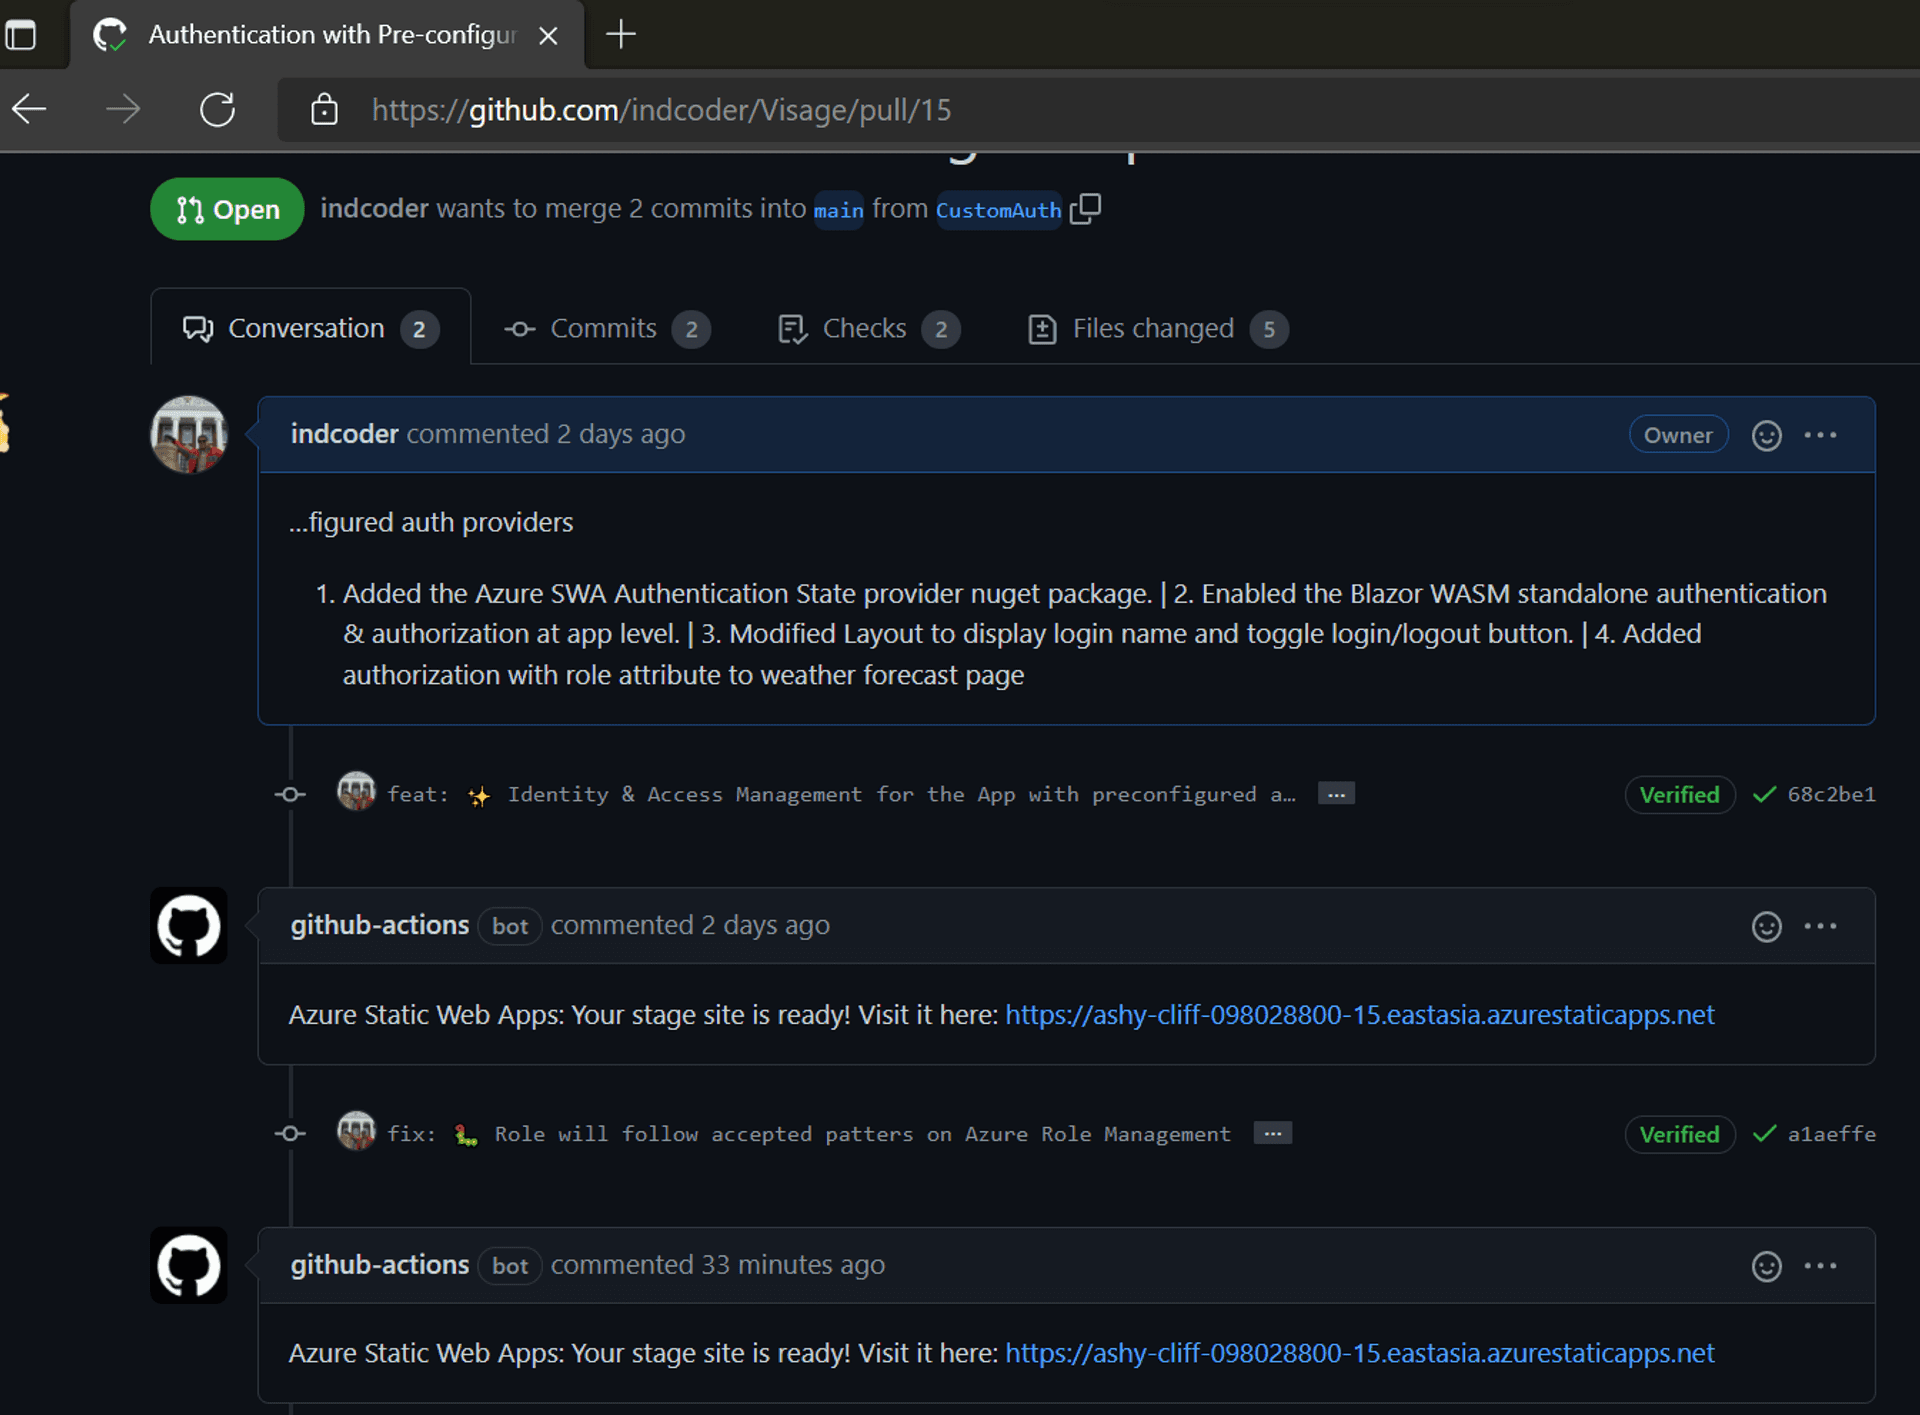
Yay, my Github profile has finally got access to the Weather Forecast page.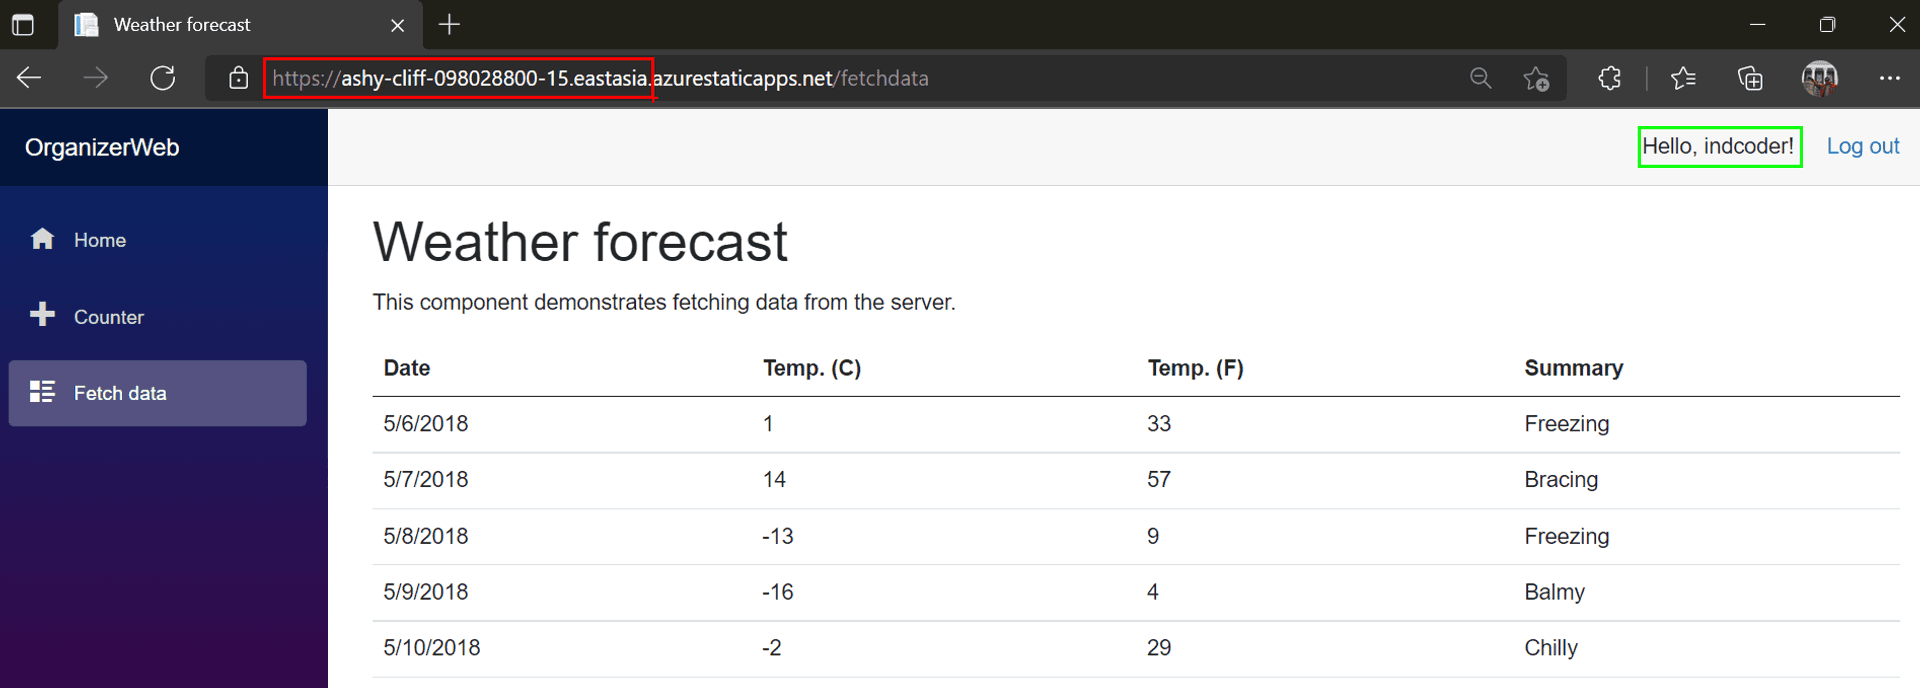
Finishing touches #
Before we wrap up, let's prepare our codebase for our next post on Custom Authentication.
Custom Routing #
It's a good practice that the login link on our web pages has no reference to the authentication provider involved. And since we do not intend to use the other pre-configured providers[Twitter & Azure Active Directory], it's prudent from a security standpoint to have them disabled.
You can control aspects of the Azure SWA via a JSON configuration file named staticwebapp.config.json. I like to create this file at the root of the Blazor WASM project.
{
  "routes": [
    {
      "route": "/login",
      "rewrite": "/.auth/login/github"
    },
    {
      "route": "/.auth/login/twitter",
      "statusCode": 404
    },
    {
        "route": "/.auth/login/aad",
        "statusCode": 404
    },

    {
      "route": "/logout",
      "redirect": "/.auth/logout?post_logout_redirect_uri=/"
    }
  ]
}
Startup the SWA CLI and replace the .auth links in MainLayout accordingly. You can see the hot reload in action too.
Main layout with custom routes highlighted in red

Verify the change on your browser's dev tools.
Clicking on the Login link should bring you to the SWA CLI emulator. Rinse & repeat.
Secure Routes by Roles #
To be consistent with our code, we have to ensure that a direct request to the server for /fetchdata route of the Weather Forecast page is accessed only by authenticated users with the weathercaster role.
{
        "route": "/fetchdata",
        "allowedRoles": ["weathercaster"]
}
But, there's a caveat. Suppose we allow only folks with the role of "LordCount" to access the /counter route.
{
        "route": "/counter",
        "allowedRoles": ["LordCount"]
}
If there is an anonymous direct request to this route, then the platform will not serve the request.
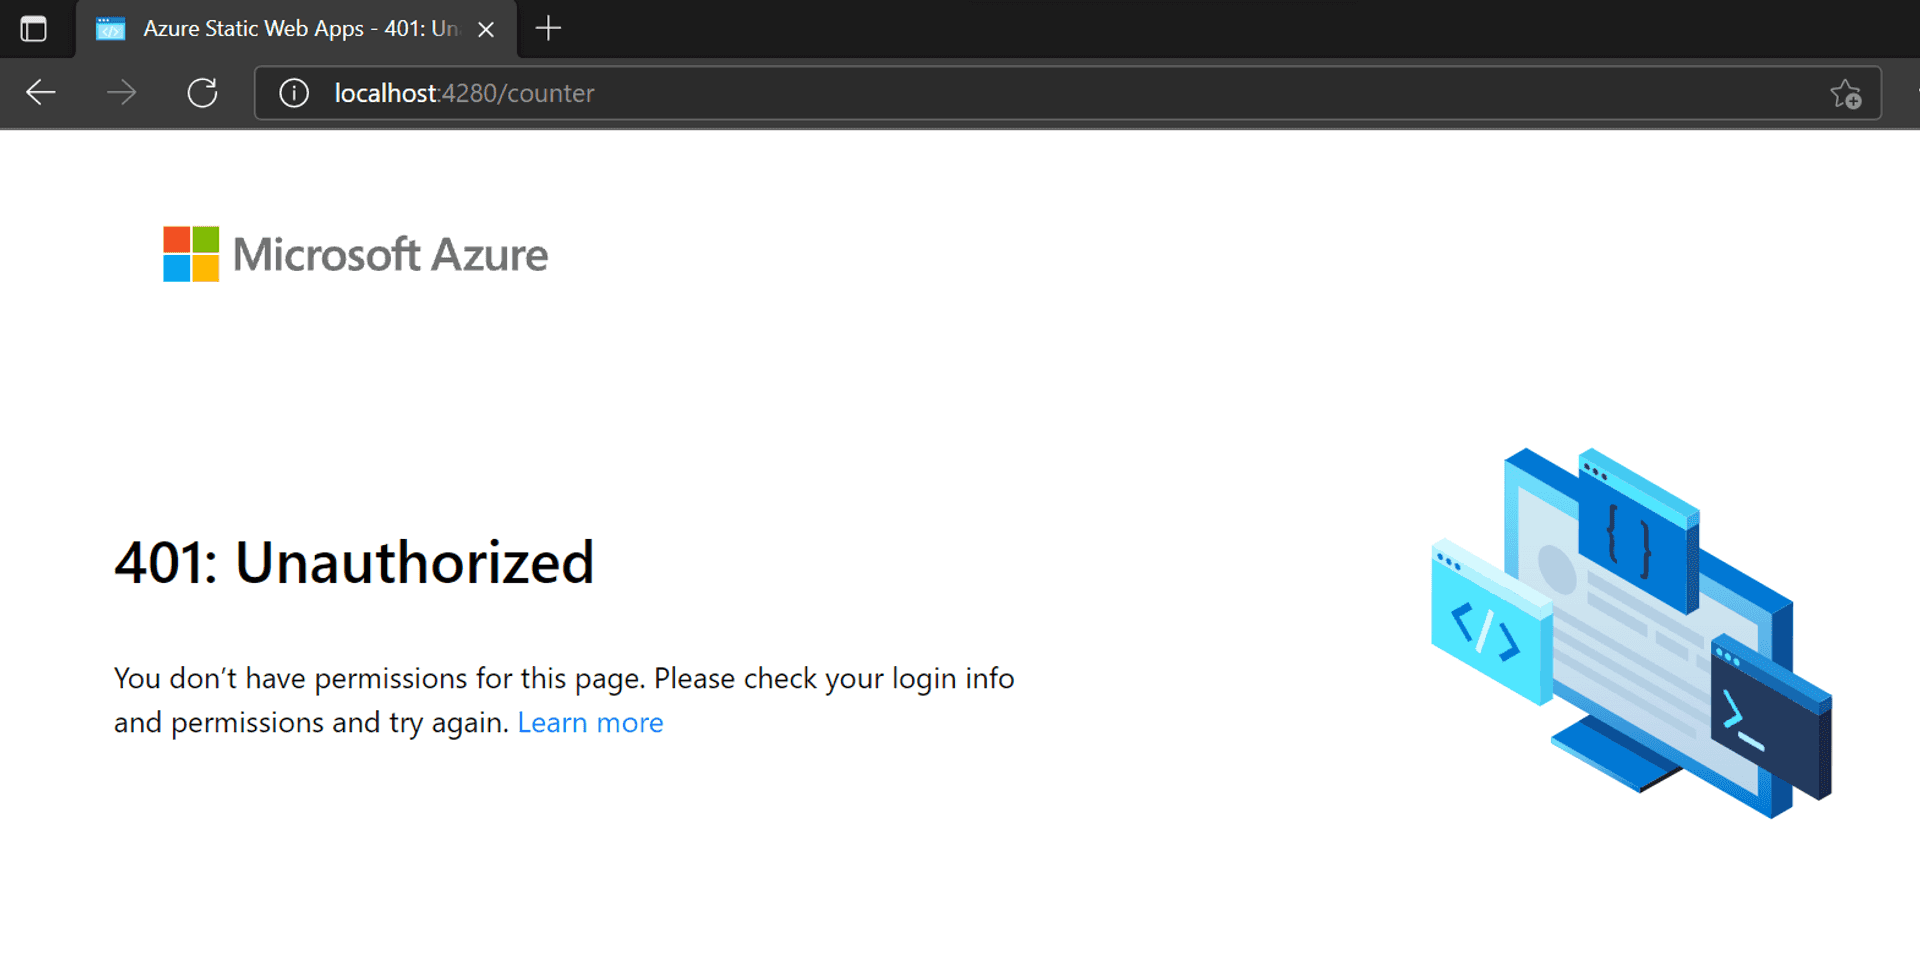
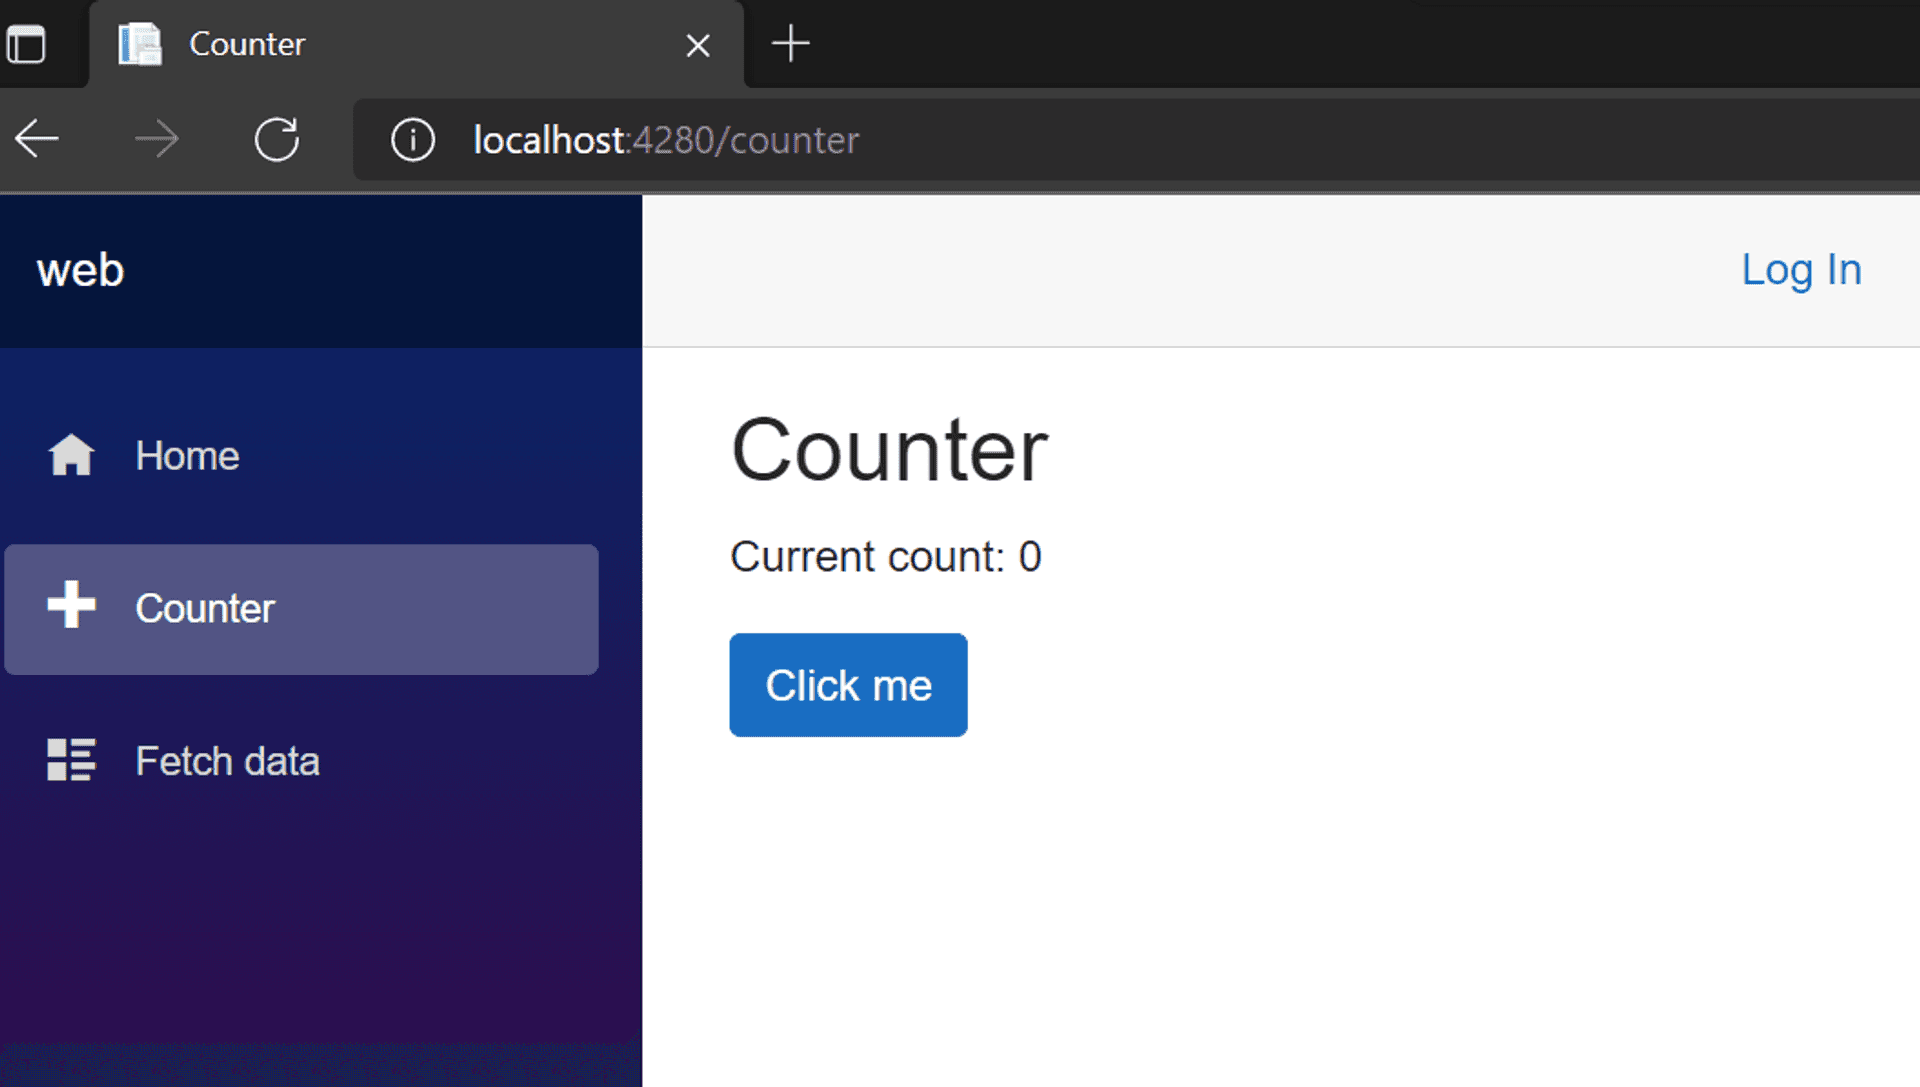
But this does not prevent folks from accessing the route if the first request is to the index file [which is open to anonymous access]. It, in turn, ensures the whole WASM app gets loaded onto the user browser, and now anyone, including the unauthenticated, can access the counter page. [Y? The nature of the beast!!! Once a Single Page Application[SPA] is loaded onto the browser, the routes are traversed locally without invoking the Azure infrastructure]. And, unlike the fetchdata page, we have not secured the counter page via the Blazor Authorization implementation.
Fallback Routes #
And because it's a SPA, we also need to serve those requests asked of the server for a route that does not adhere to any of the routing rules. [just like a default statement in a switch clause 😁]
"navigationFallback": {
      "rewrite": "/index.html"
  }
We will be revisiting this file as we implement more features in the coming weeks. It is worth your while to familiarize yourself thoroughly with different aspects of the config file. During my research, I found that one of the reasons that the CSP for the global header was somewhat lax was because of the browser refresh feature, which, coincidentally I raised just before the meltdown caused by the Hot Reload announcement.
Conclusion #
What we accomplished in this blog post?
- Created a Blazor WASM app on our local workstation.
- Installed and used the Azure SWA CLI emulator to test the app locally.
- Configured the app for authentication and authorization.
- Validated via the SWA CLI the above IAM configuration on our local workstation.
- Pushed our feature branch to GitHub, which was automatically deployed on Azure SWA via GitHub Actions.
- A dedicated stage URL was created for us to test the feature of the app.
- Refactored our code, and configured the Azure SWA on the Azure Portal to use the roles given to our GitHub profile.
🙏🙏🙏
Since you've made it this far, sharing this article on your favorite social media network would be highly appreciated 💖! For feedback, please ping us on Twitter.
Published