In our previous post, we secured our Blazor WASM app, deployed on Azure Static Web App, with a pre-configured authentication provider, GitHub.
Change the Plan #
Now we need to replace GitHub with our production authentication provider, Auth0. A question might be swirling up in your mind: if the goal was to have Auth0 as our authentication provider, why did we invest so much into GitHub in the previous post? Here's the rub, custom authentication is part of the paid Standard Plan of Azure Static Web App. Our strategy was to ensure we got the nuts and bolts of our frontend's IAM right, without incurring any costs, and the Free Plan provided the perfect foil for us.
The original blog post has been amended and is split into two, since we were waiting on a fix for a bug on Azure SWA blade, for which we now have a workaround. For the original versions, please refer to Dev, or hashnode
Getting custom authentication to work requires perfect synchronization amongst the three principals involved: code[Blazor WASM], infrastructure[Azure SWA],and the Identity/Authentication Provider[Auth0].
Readying our app on Auth0 #
Auth0 is a free, open source authentication provider that allows you to integrate with your existing identity provider. We have been using Auth0 for the last 5 years and it has been our mainstay for IAM on all of our production apps. Aaron Powell's post has been a big help in configuring the Auth0.
- Create an application on the Auth0 portal, and note the following properties which we will need later on:
a. Client ID
b. Client Secret
c. Domain Authority URL

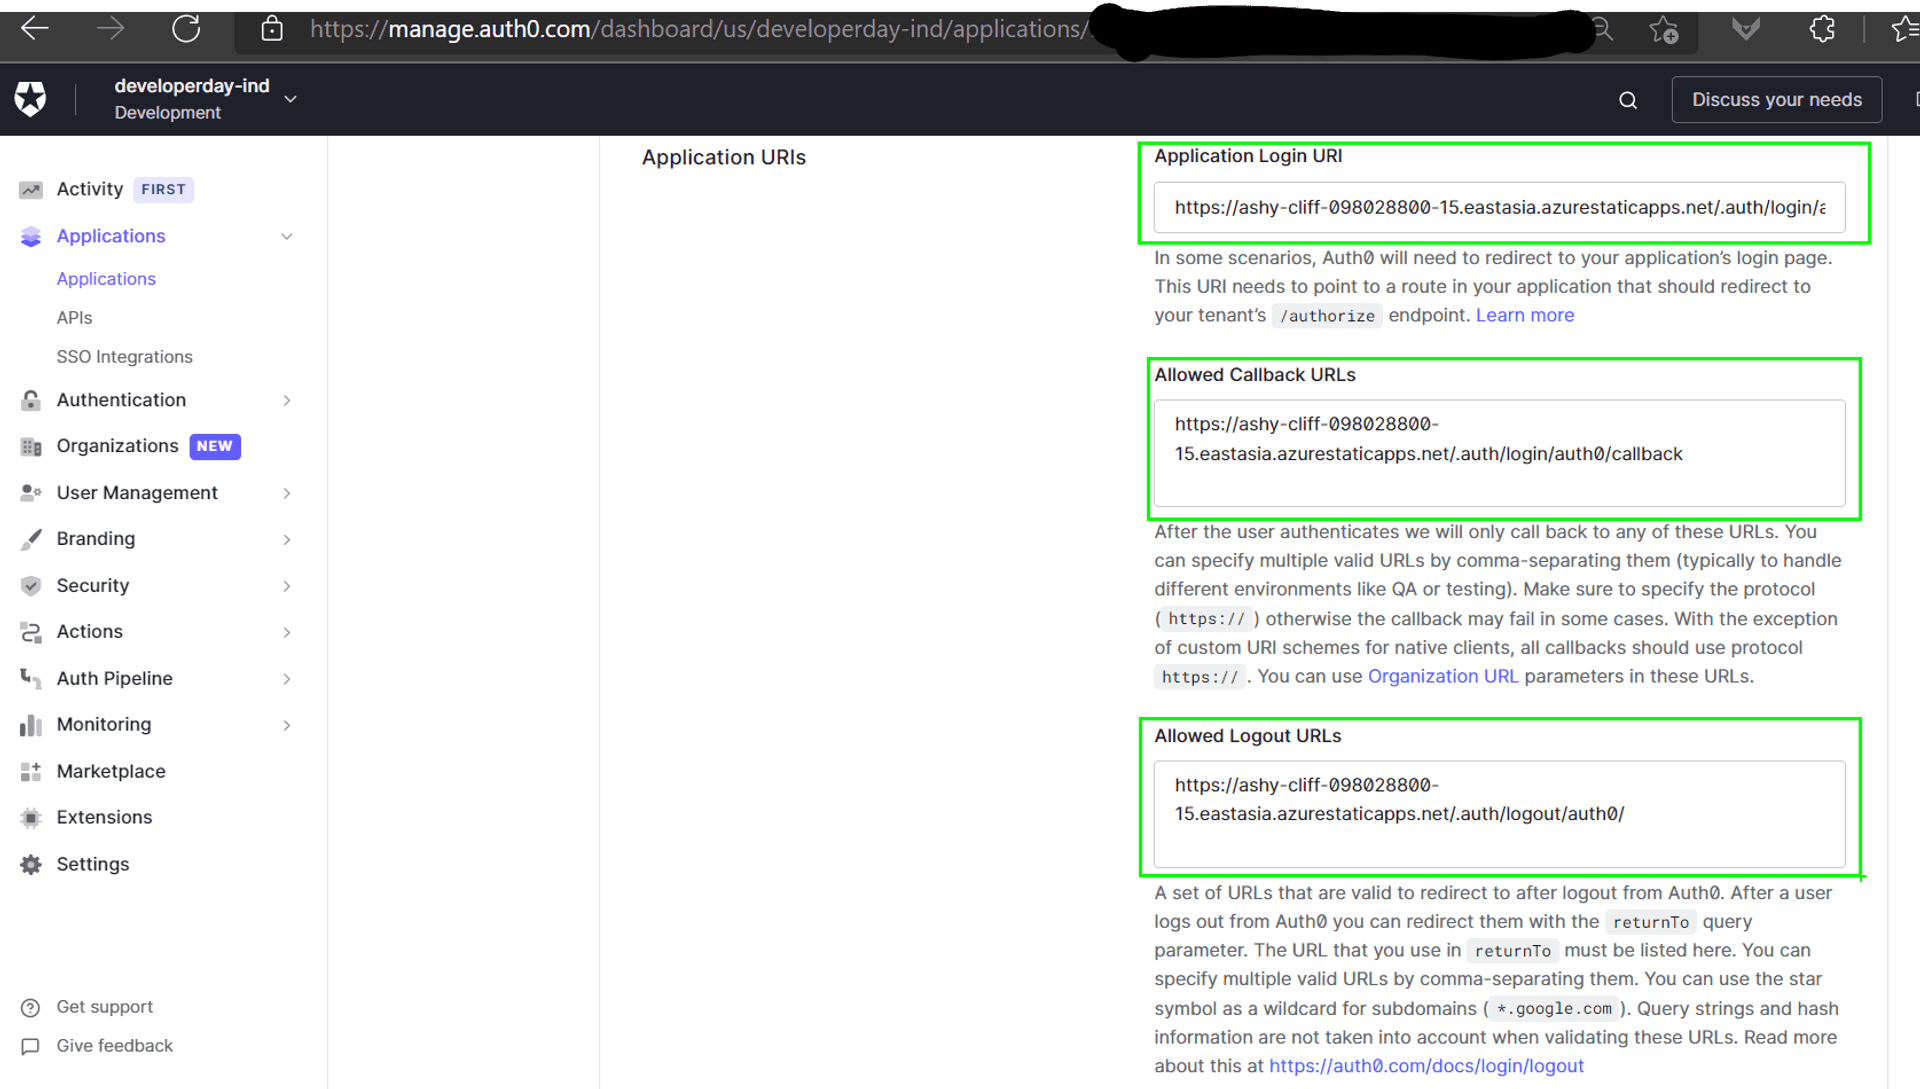
- As the OIDC authentication rides piggyback on OAuth2 authorization flow, we have to configure the endpoints that Auth0 needs to redirect to, post the login process.
Preparing Azure SWA to accept Auth0 as our authentication provider #
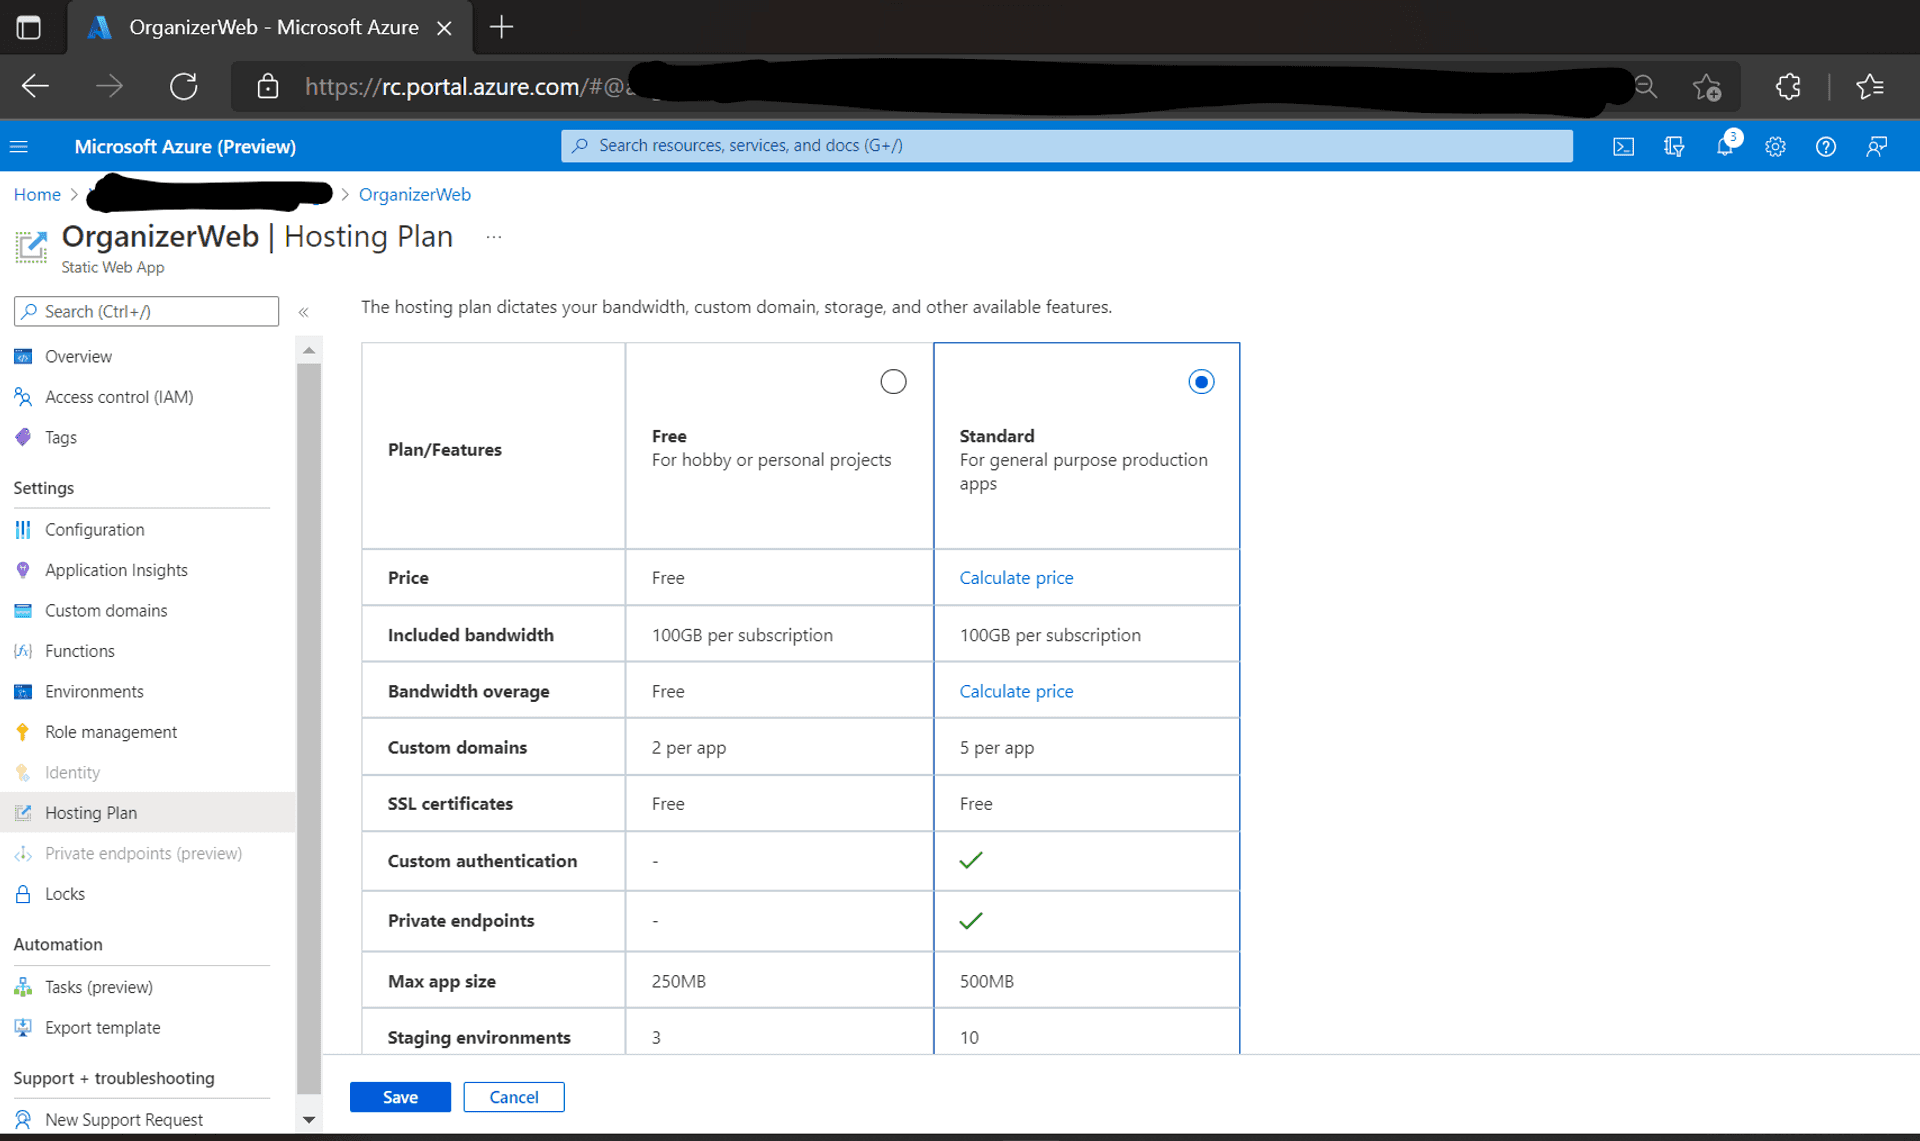
Visit the Hosting Plan tab under the Static Web App in the Azure Portal to convert the plan from Free to Standard.
Click on the Configuration link within the navigation pane, choose the stage environment and add two application secrets, namely AUTH0_CLIENT_ID, & AUTH0_CLIENT_SECRET, with the values from step 1 of the Auth0 subsection above.

Configuring our code for custom authentication #
Back to our code, we provision custom authentication in our static web app config file.
{
  "auth": {
    "identityProviders": {
      "customOpenIdConnectProviders": {
        "auth0": {
          "registration": {
            "clientIdSettingName": "AUTH0_CLIENT_ID",
            "clientCredential": {
              "clientSecretSettingName": "AUTH0_CLIENT_SECRET"
            },
            "openIdConnectConfiguration": {
              "wellKnownOpenIdConfiguration": "https://developerday-ind.us.auth0.com/.well-known/openid-configuration"
            }
          },
          "login": {
            "nameClaimType": "http://schemas.xmlsoap.org/ws/2005/05/identity/claims/name",
            "scopes": [],
            "loginParameterNames": []
          }
        }
      }
    }
  }
}
Three things of note in the above code snippet:
a. Named our custom provider as auth0; which we will use to configure the custom login route below.
b. The application secrets we provisioned in the settings on the Azure SWA blade of the Azure portal above.
c. The well-known OpenID configuration endpoint, available at the Domain Authority URL.
Unfortunately, the Domain Authority URL was not considered sensitive enough to be secured as an application configuration. And since we have to check-in the code into a public GitHub repository, in the interim, I'm constrained to utilize an Auth0 developer tenant. [Tooting a bit of my own horn: This tenant was employed in the Auth0 hackathon in which I was runner-up: Used Auth0 Actions with Yoonik Face Recognition; I'll be expanding on this in the upcoming posts]
Also, we need to update the login route in the static file. And because we have implemented this route rule in the previous post, we don't need to modify the link within the MainLayout page.
{
      "route": "/login",
      "rewrite": "/.auth/login/auth0"
}
In the above code snippet, we replaced github with auth0.
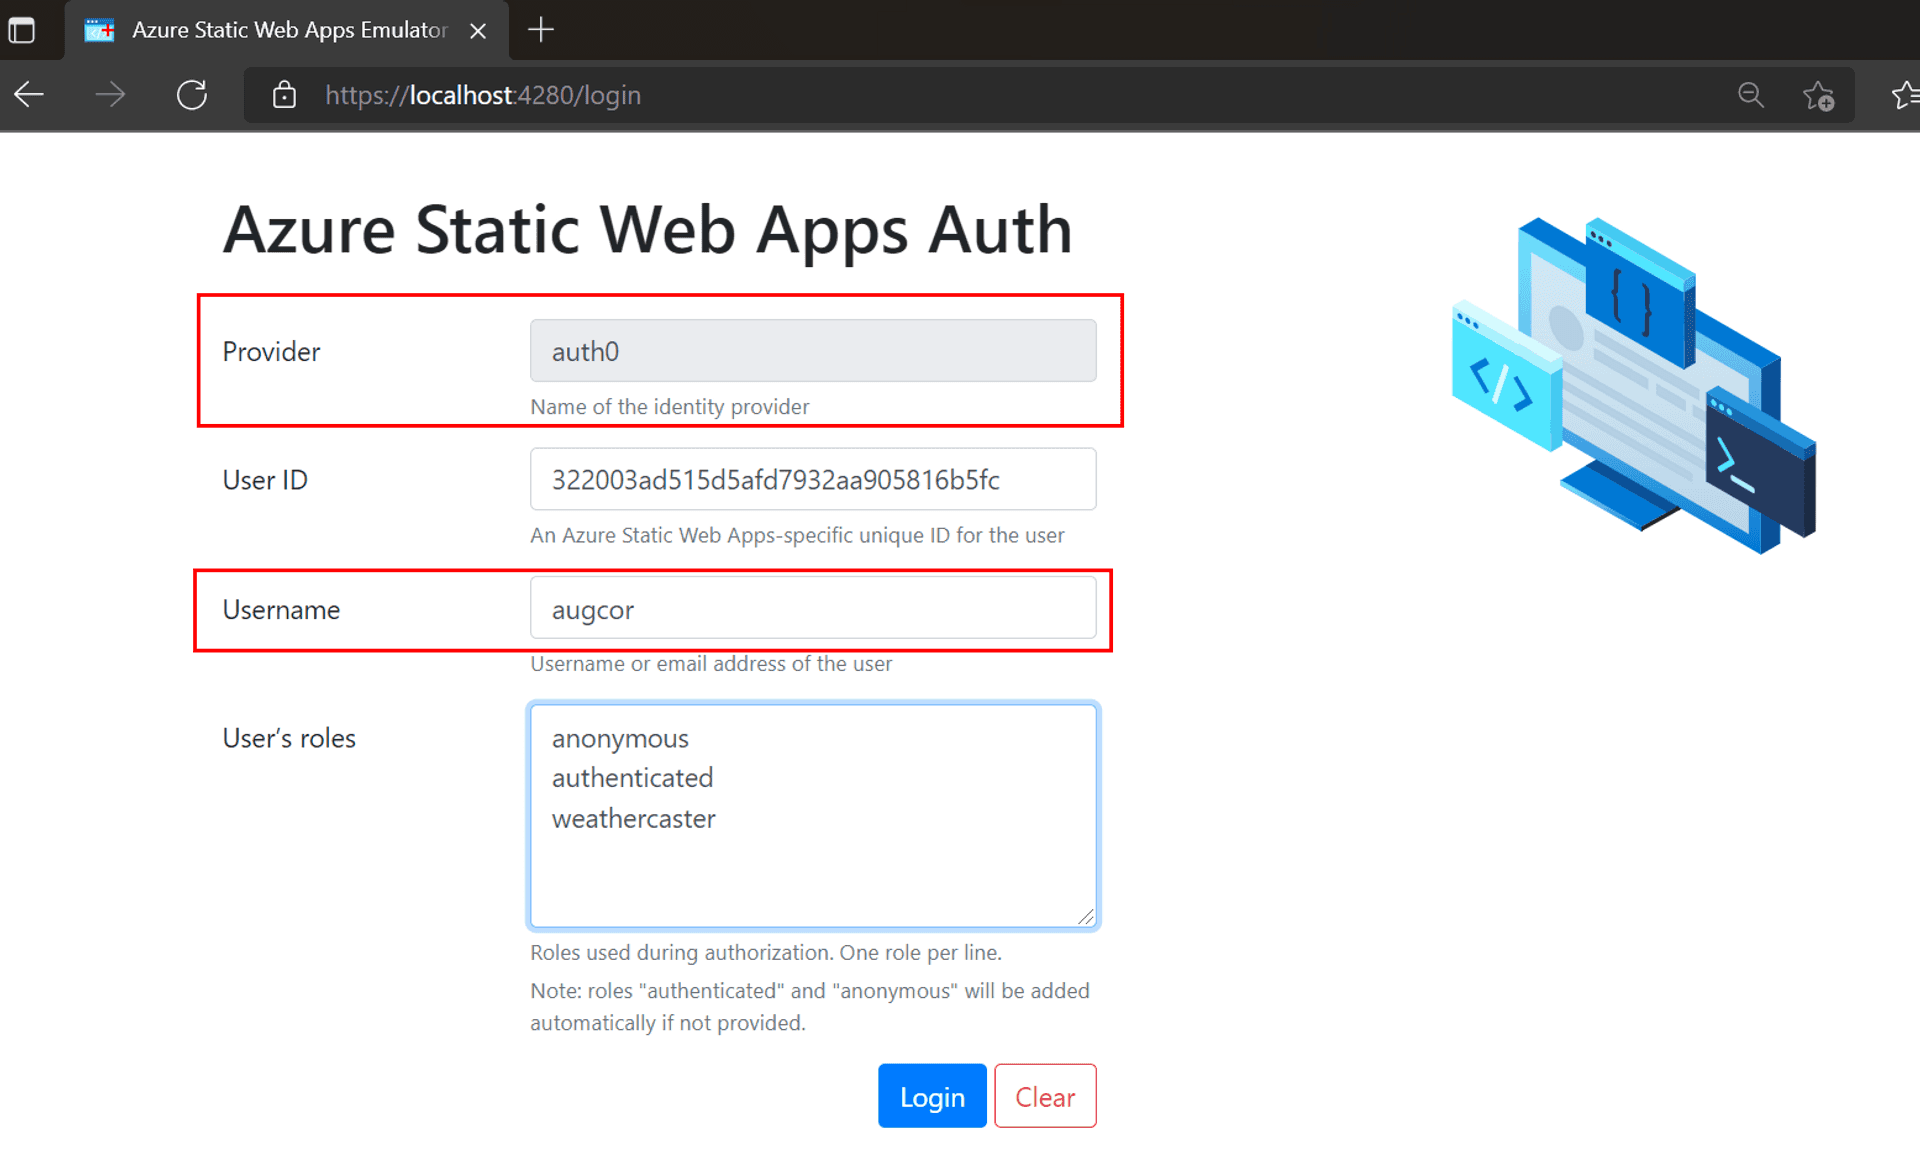
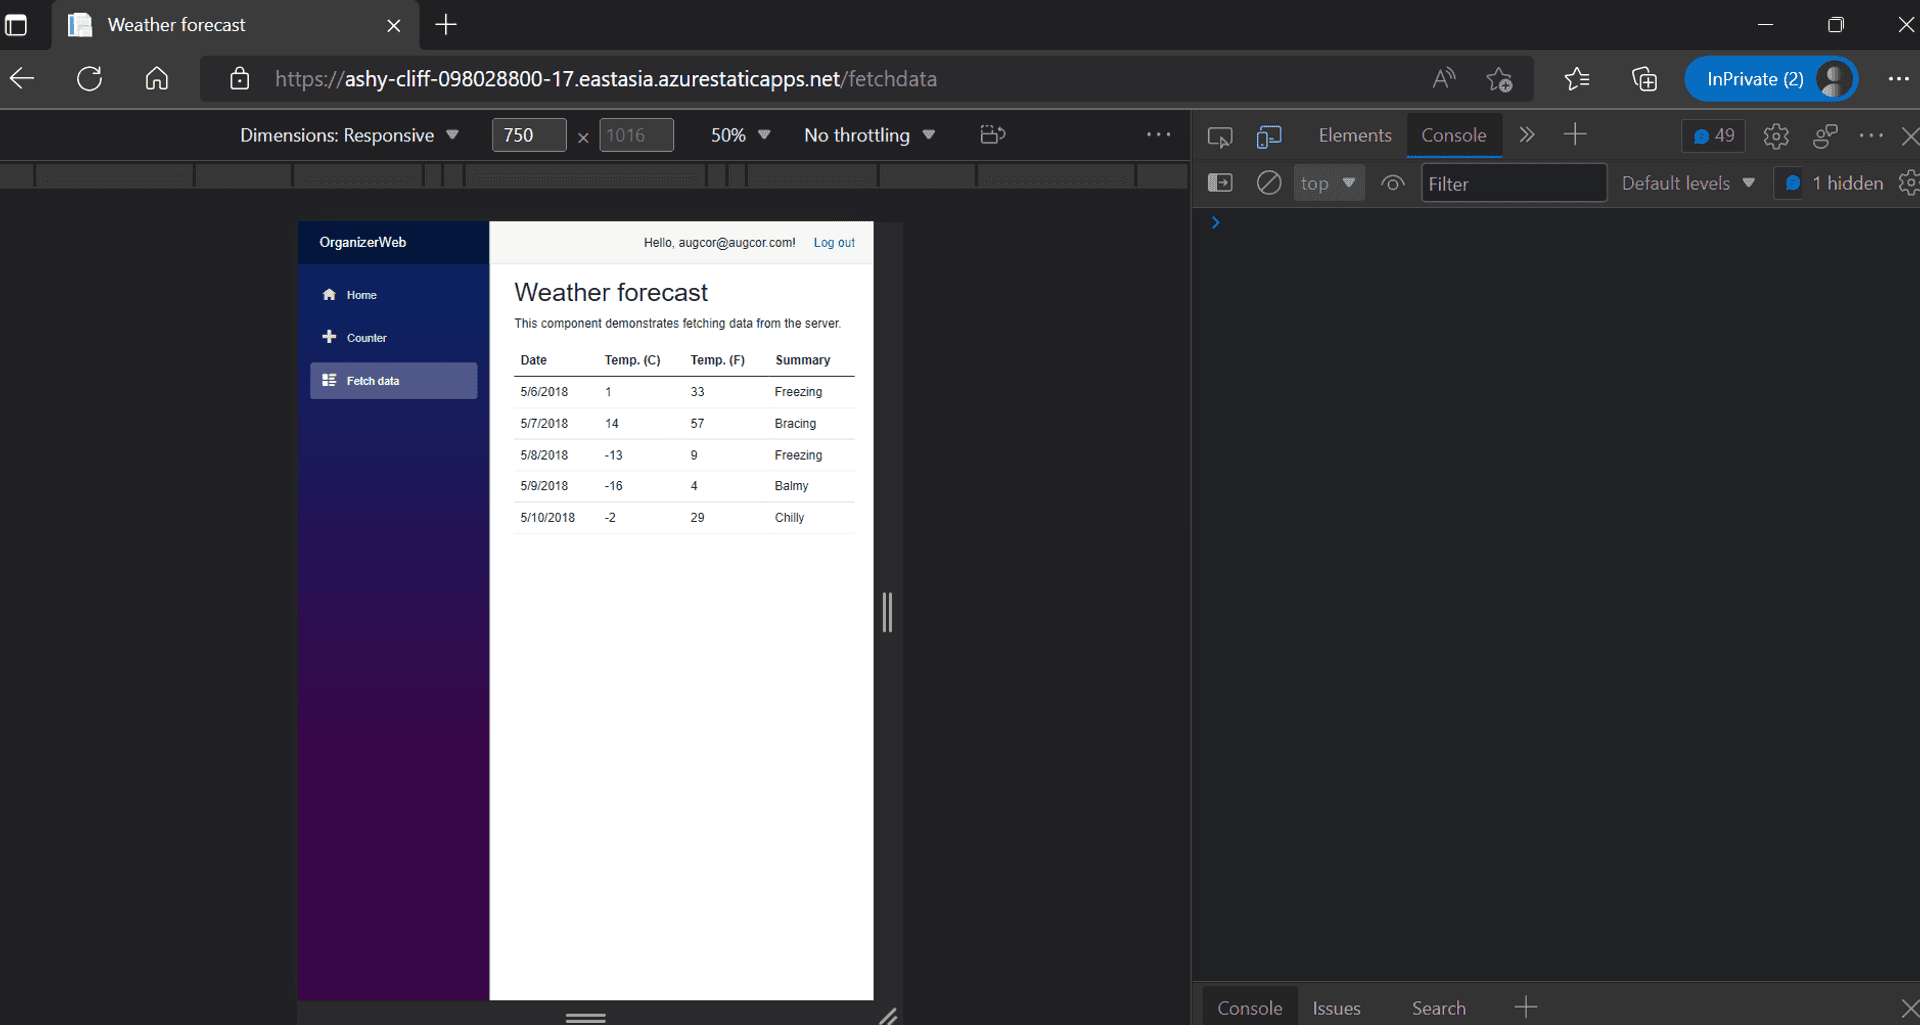
Restart the CLI, and once you click on the Login link, the SWA CLI authentication emulator page comes up. We now see the provider field pre-populated with auth0 [the name we gave in the static config file], and I'm using my username as it is in the Auth0 tenant.
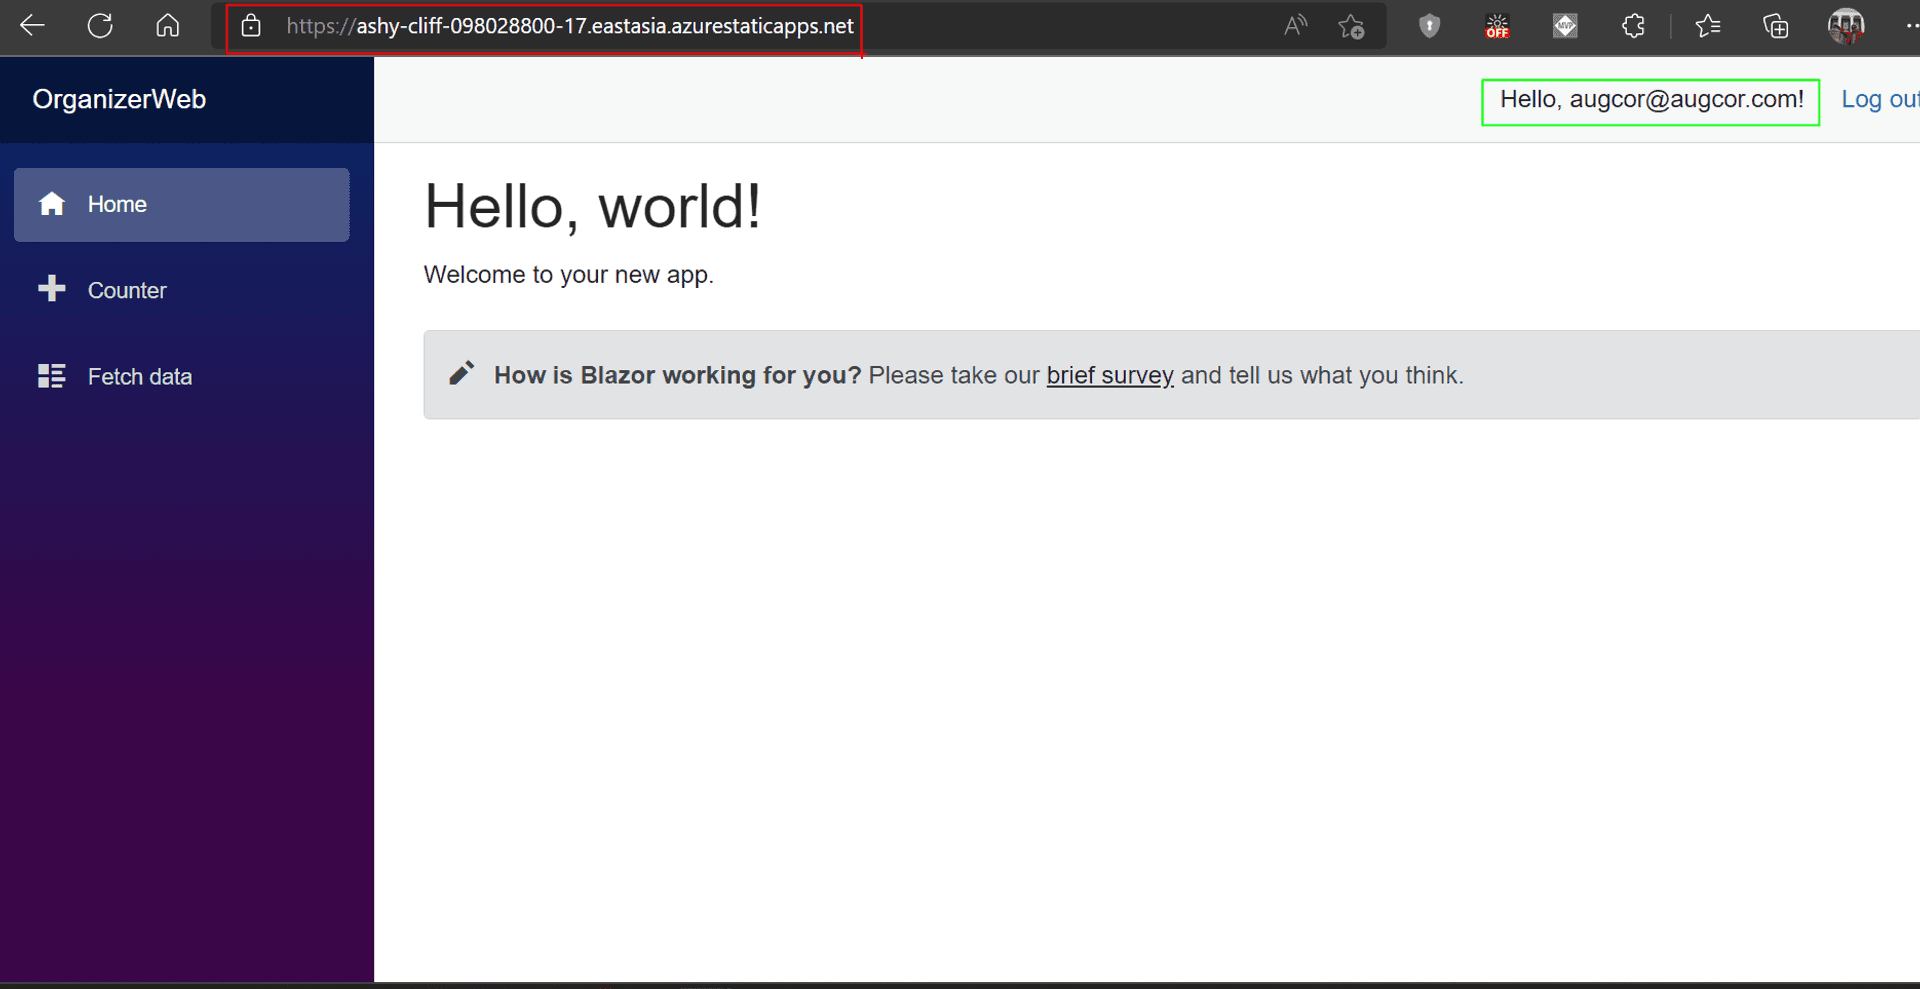
By now, you know the drill. Send up the git commits to GitHub and wait for the GitHub actions to complete. Once done, we should be able to verify, on our Stage URL, that Auth0 is supplying the Username post login.
Custom Authorization #
Great, we got Custom Authentication working, but we have still yet to wire up the authorization bit to go with it.

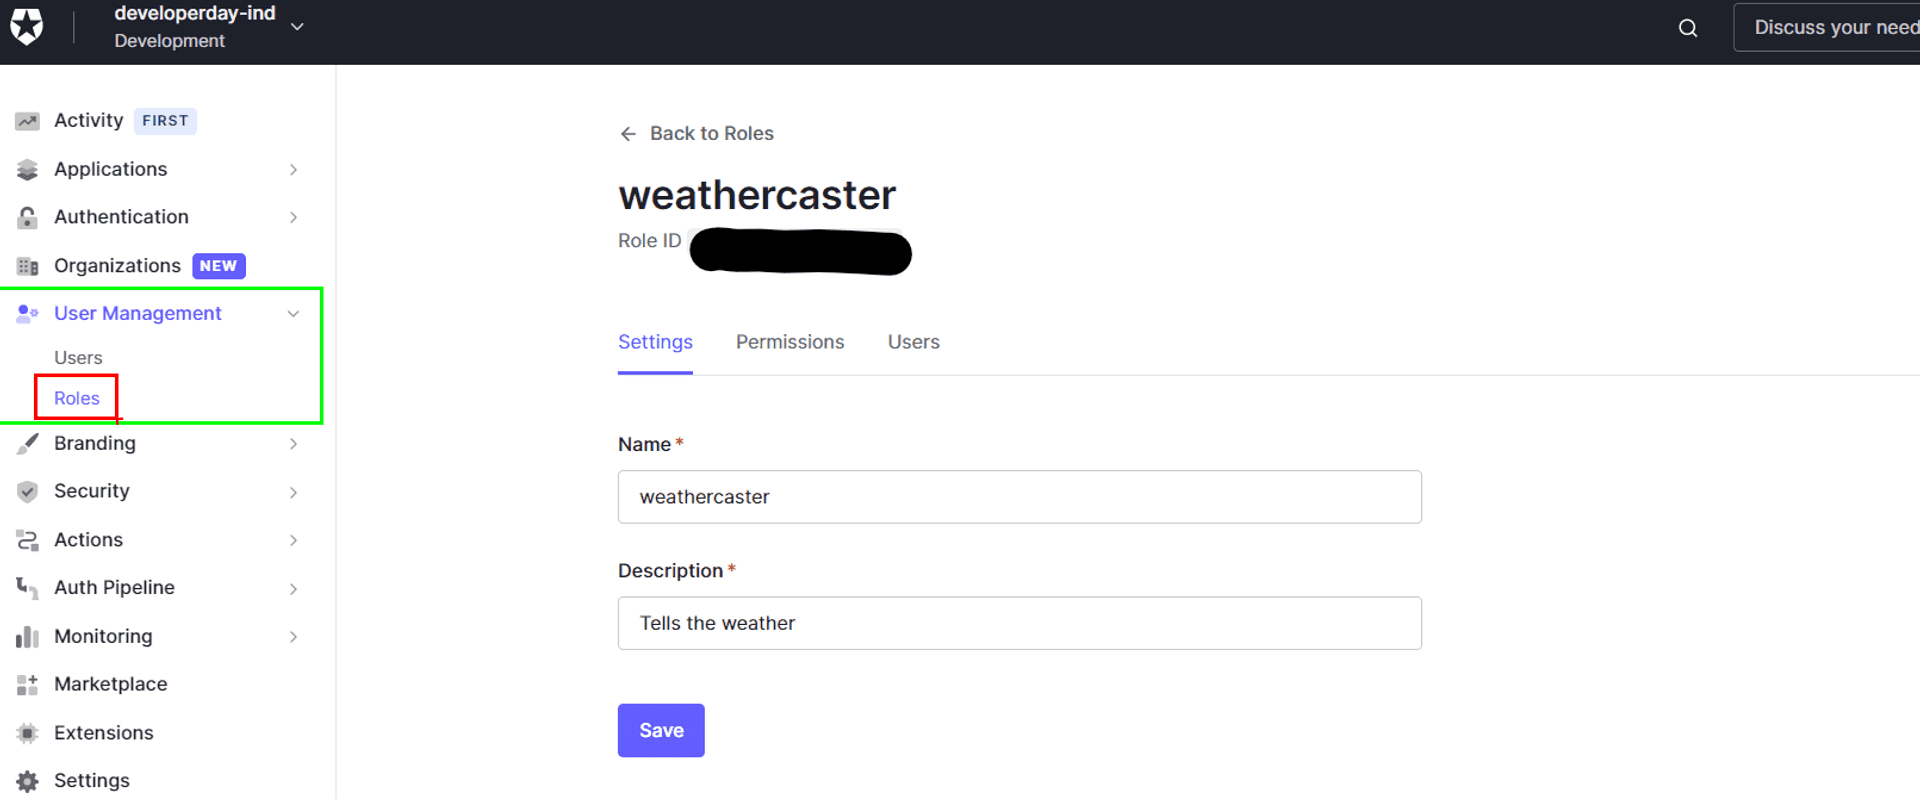
Auth0 Role Management #
On the Auth0 end, we create a Role named "weathercaster".
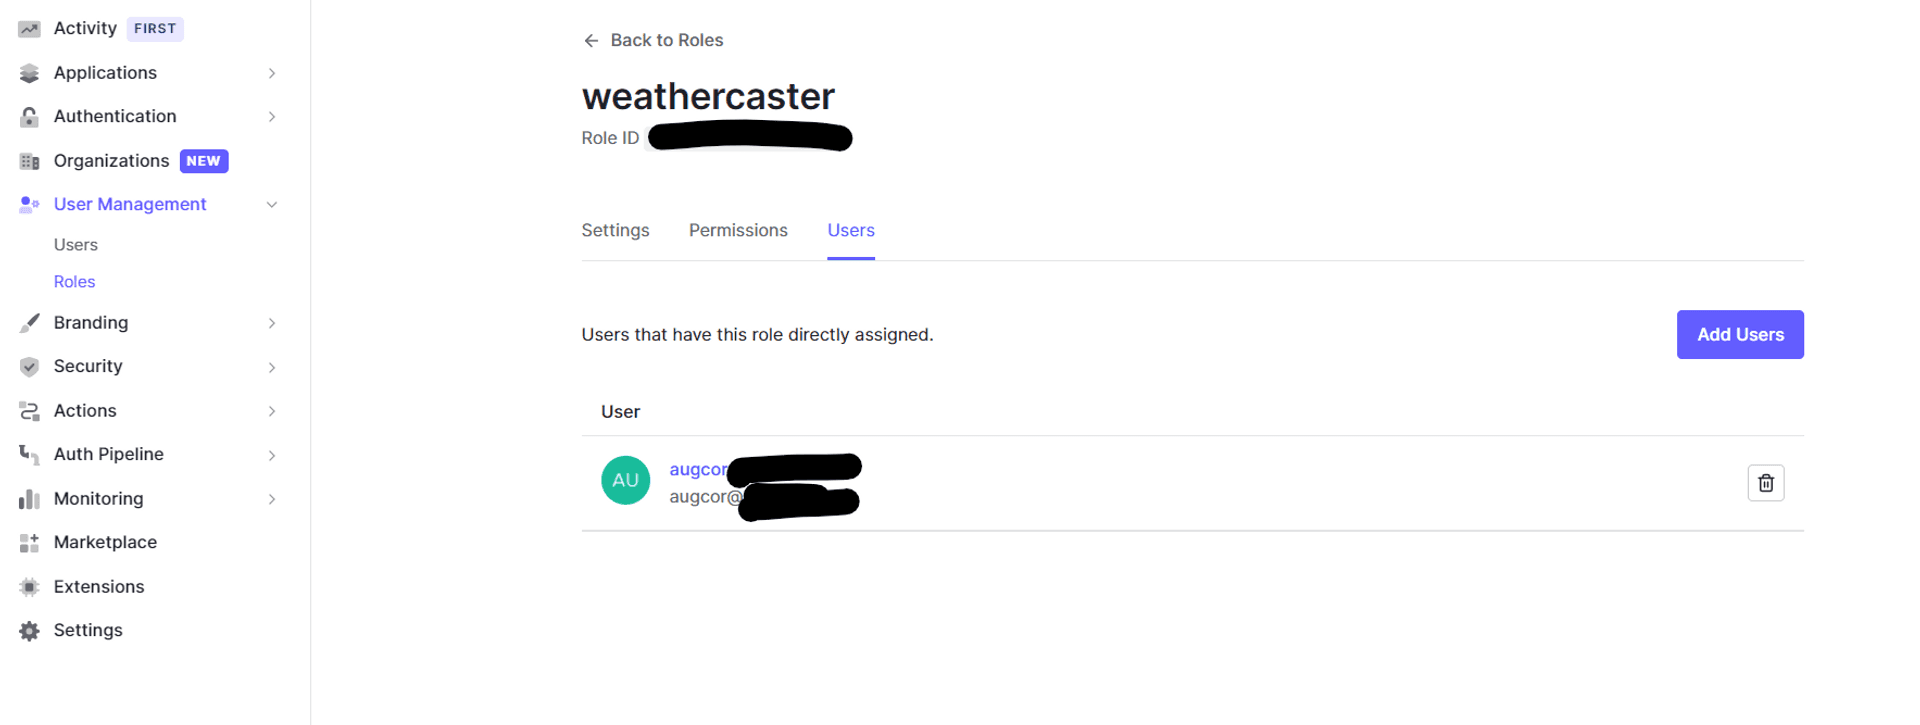
Add my username to the role.
Auth0 Actions #
We need to add the roles to the id token, and just for good measure, I'm also going to add them to the access token. In the past, for my older Auth0 tenants, this was achieved by Auth0 Rules and later by Auth0 Hooks. Last year, Auth0 introduced Actions to supersede them, and it's time we take the new hotness for a ride.
- We are going to need a custom Auth0 Actions
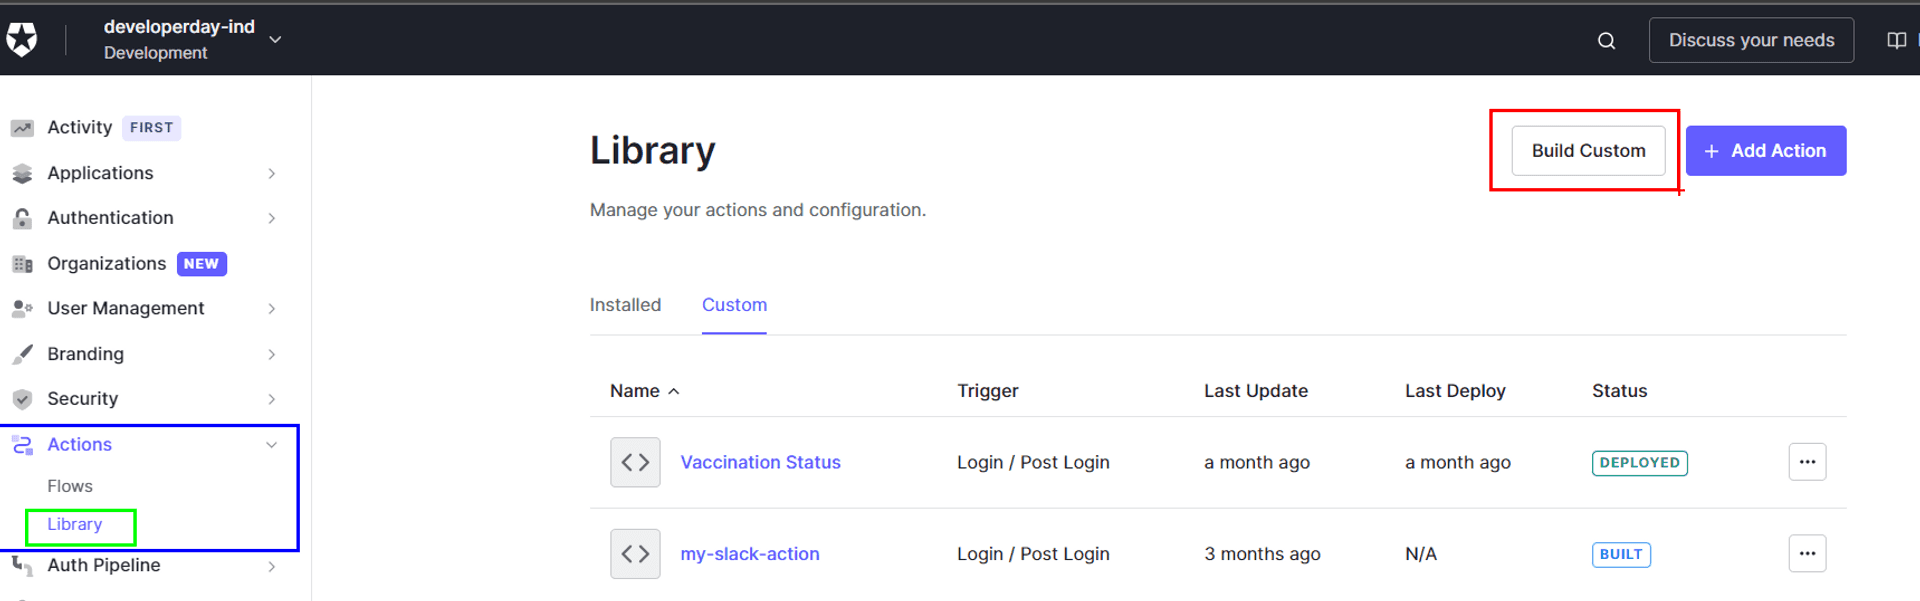
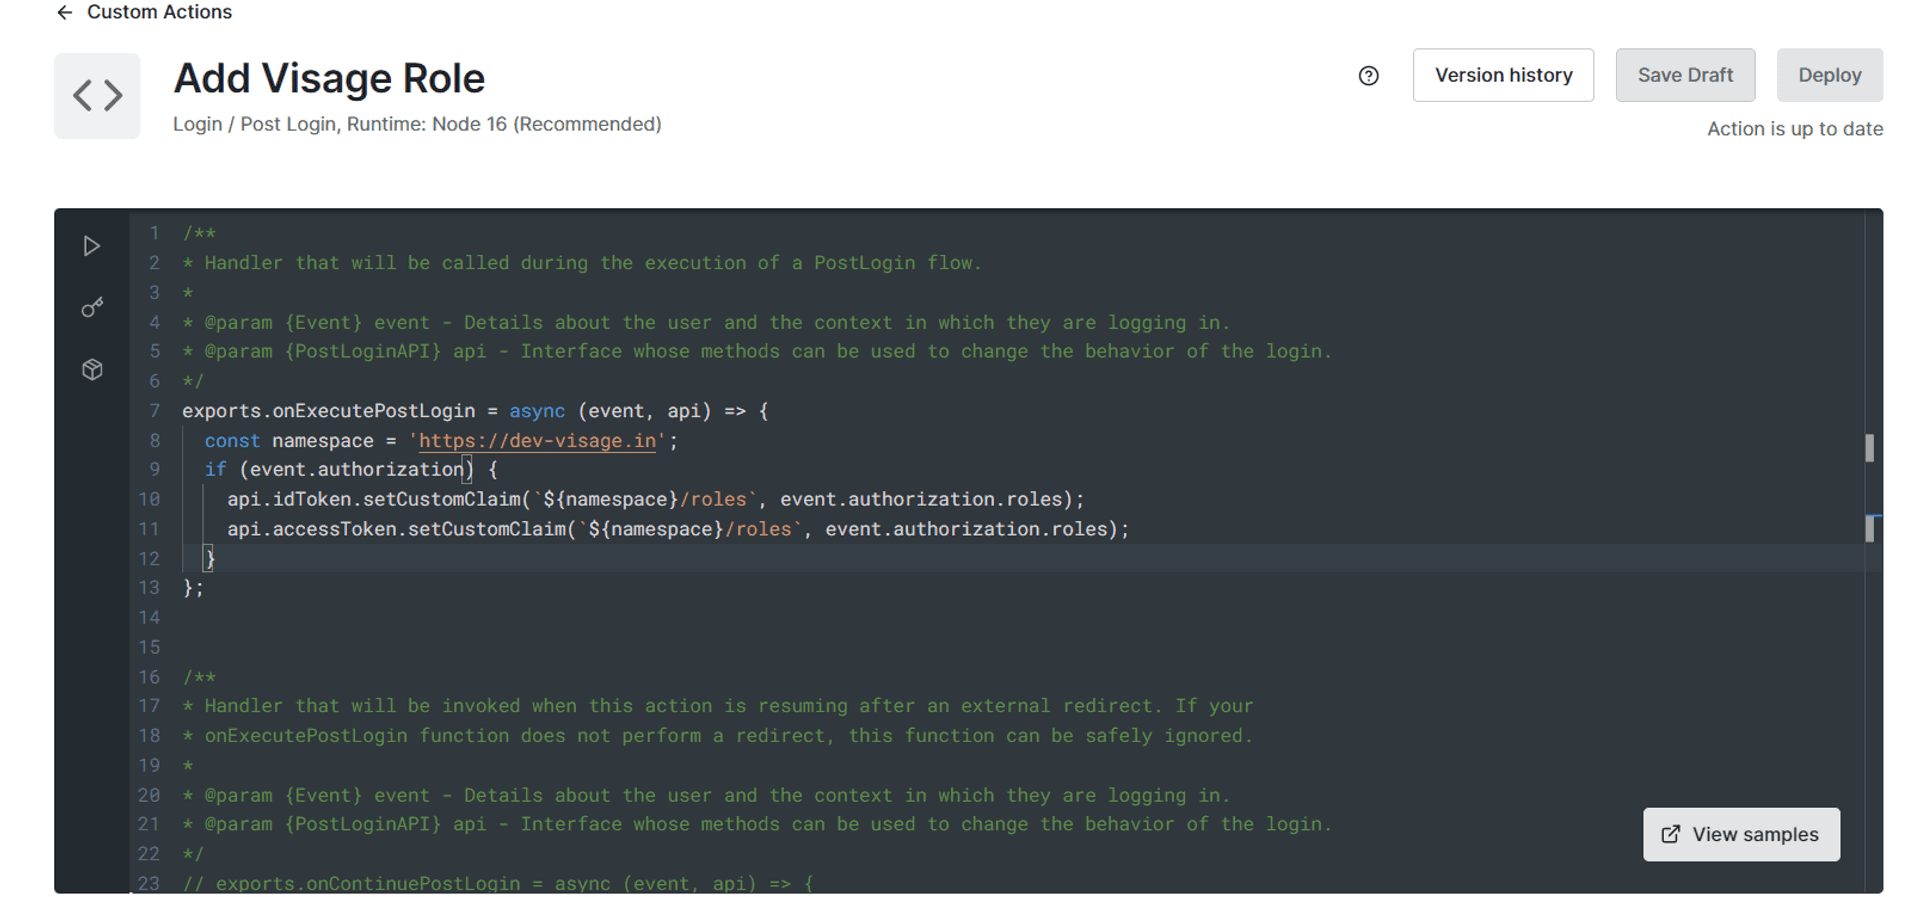
- Create a custom Action.
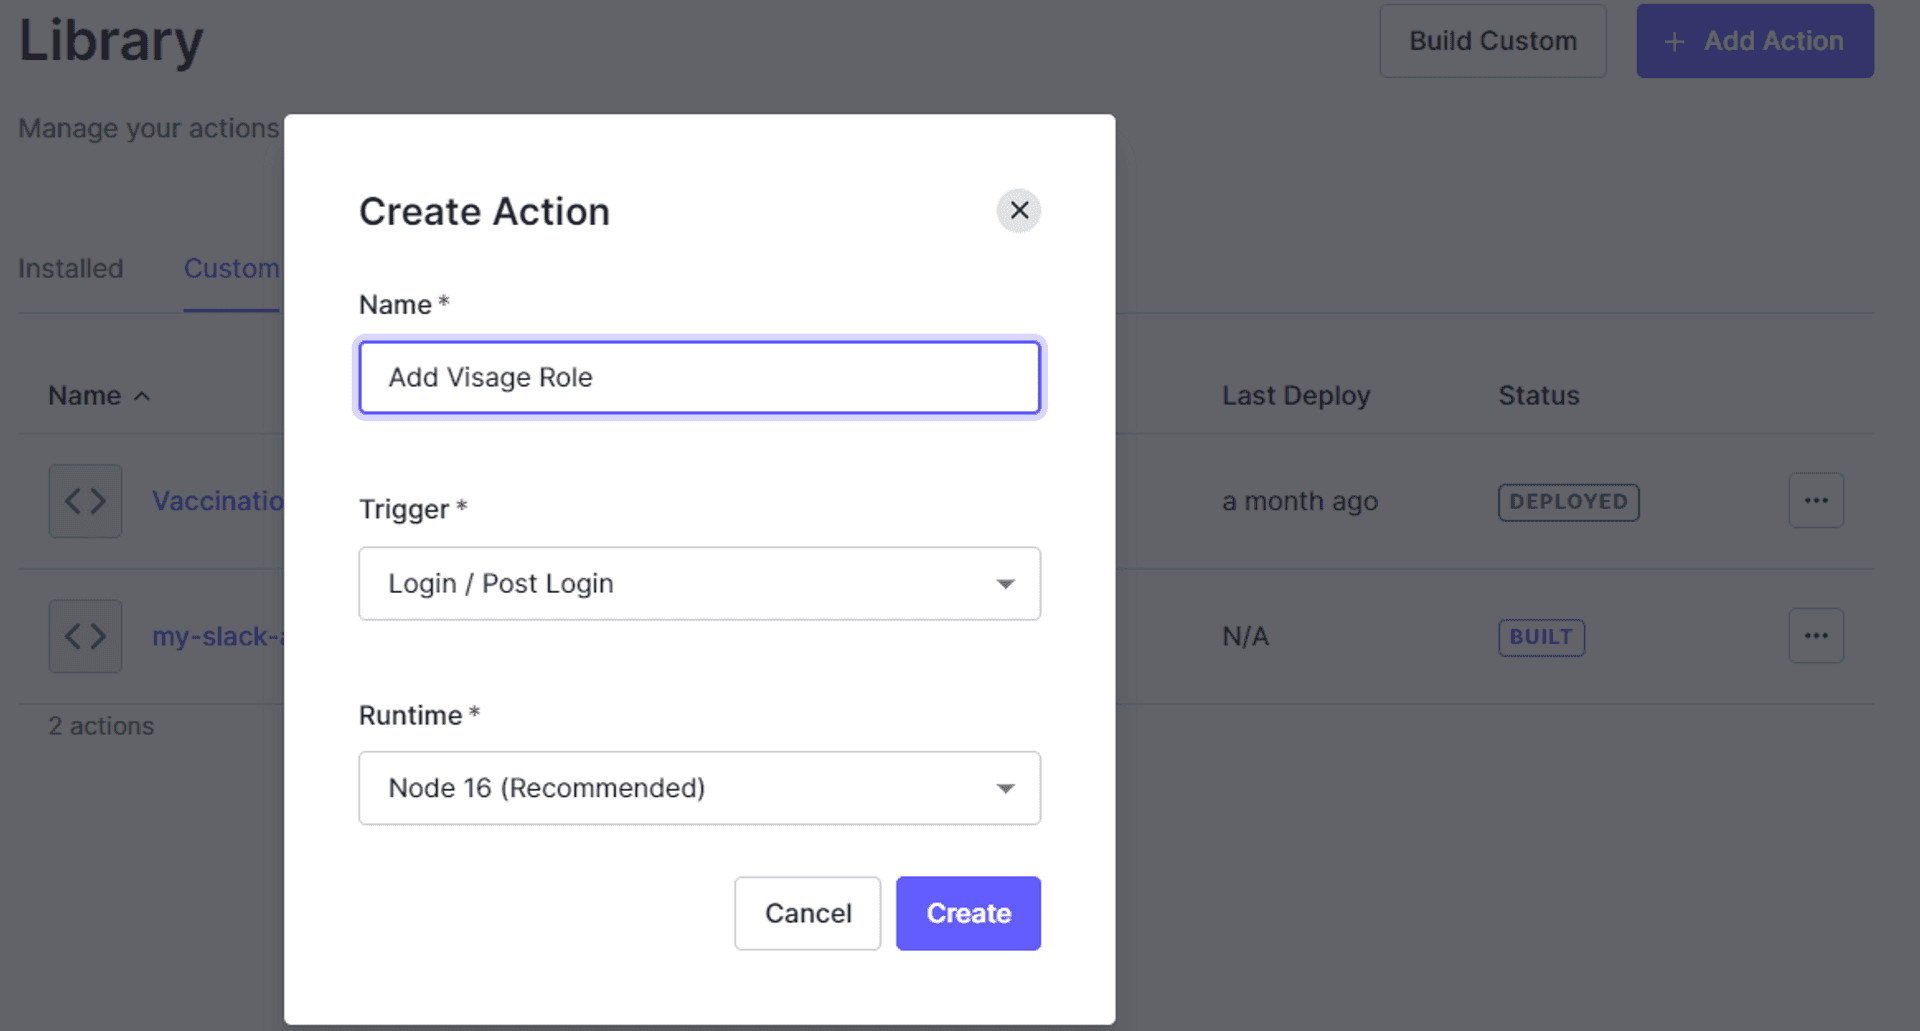
- A familiar Monaco code editor opens up. Because its the same one that powers VS Code. Adding a role to an OAuth2.0 token is such a common use case, that you can find a code snippet for it, amongst others, after clicking the View Samples sticky button at the bottom right of the editor, which like the genius developer I am, have already copy-pasted into the editor.
- We need to add the roles during our Login Flow.
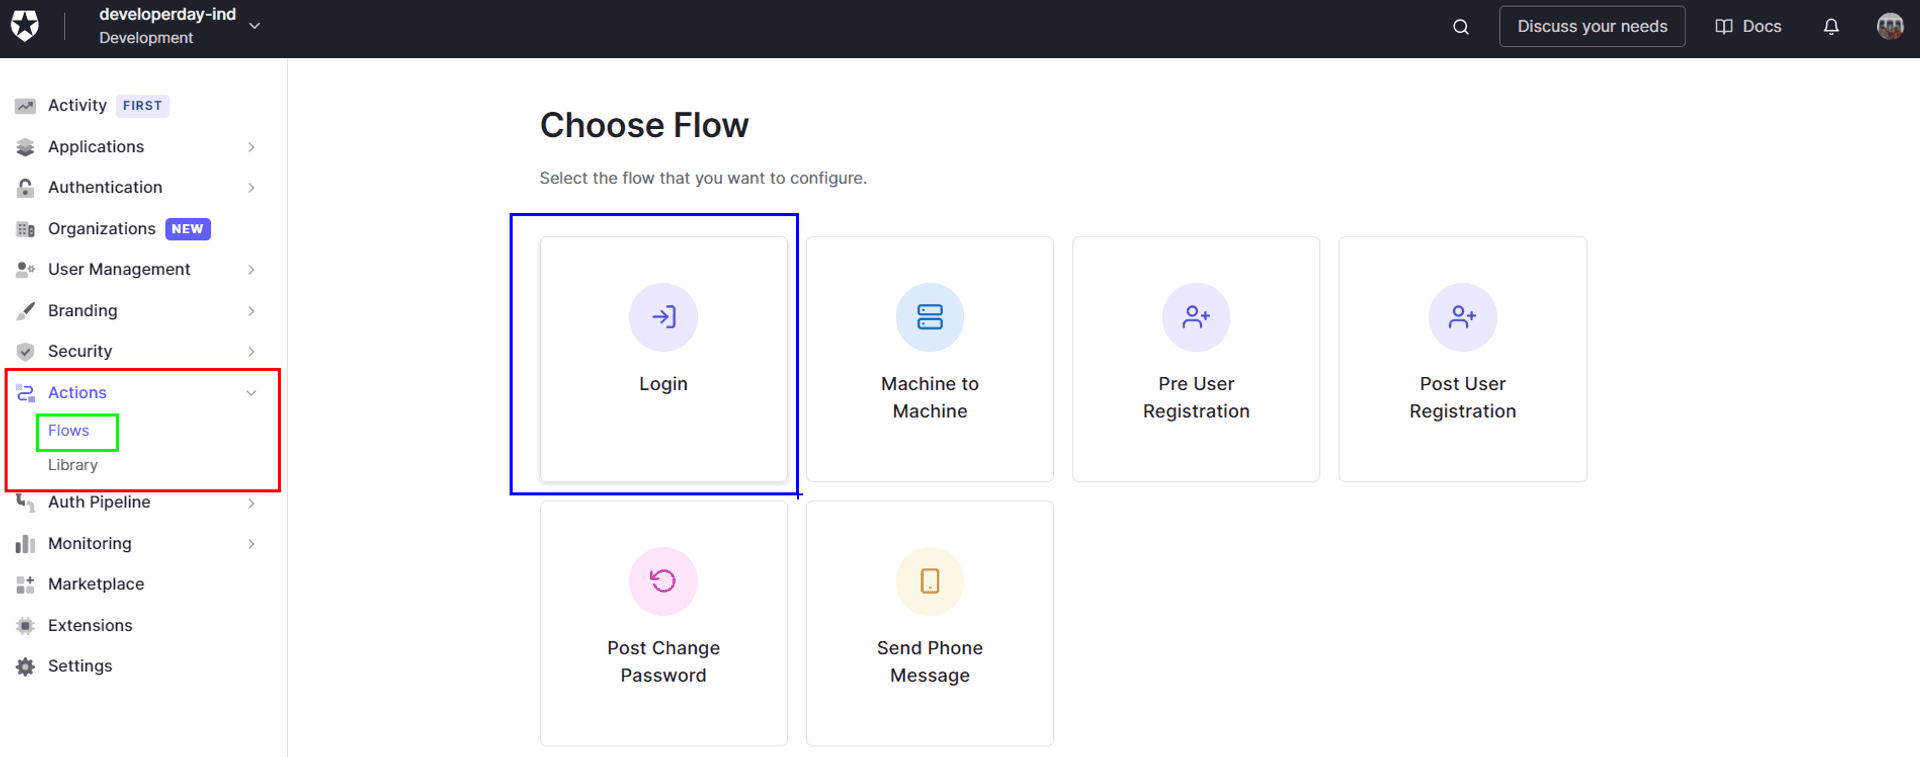
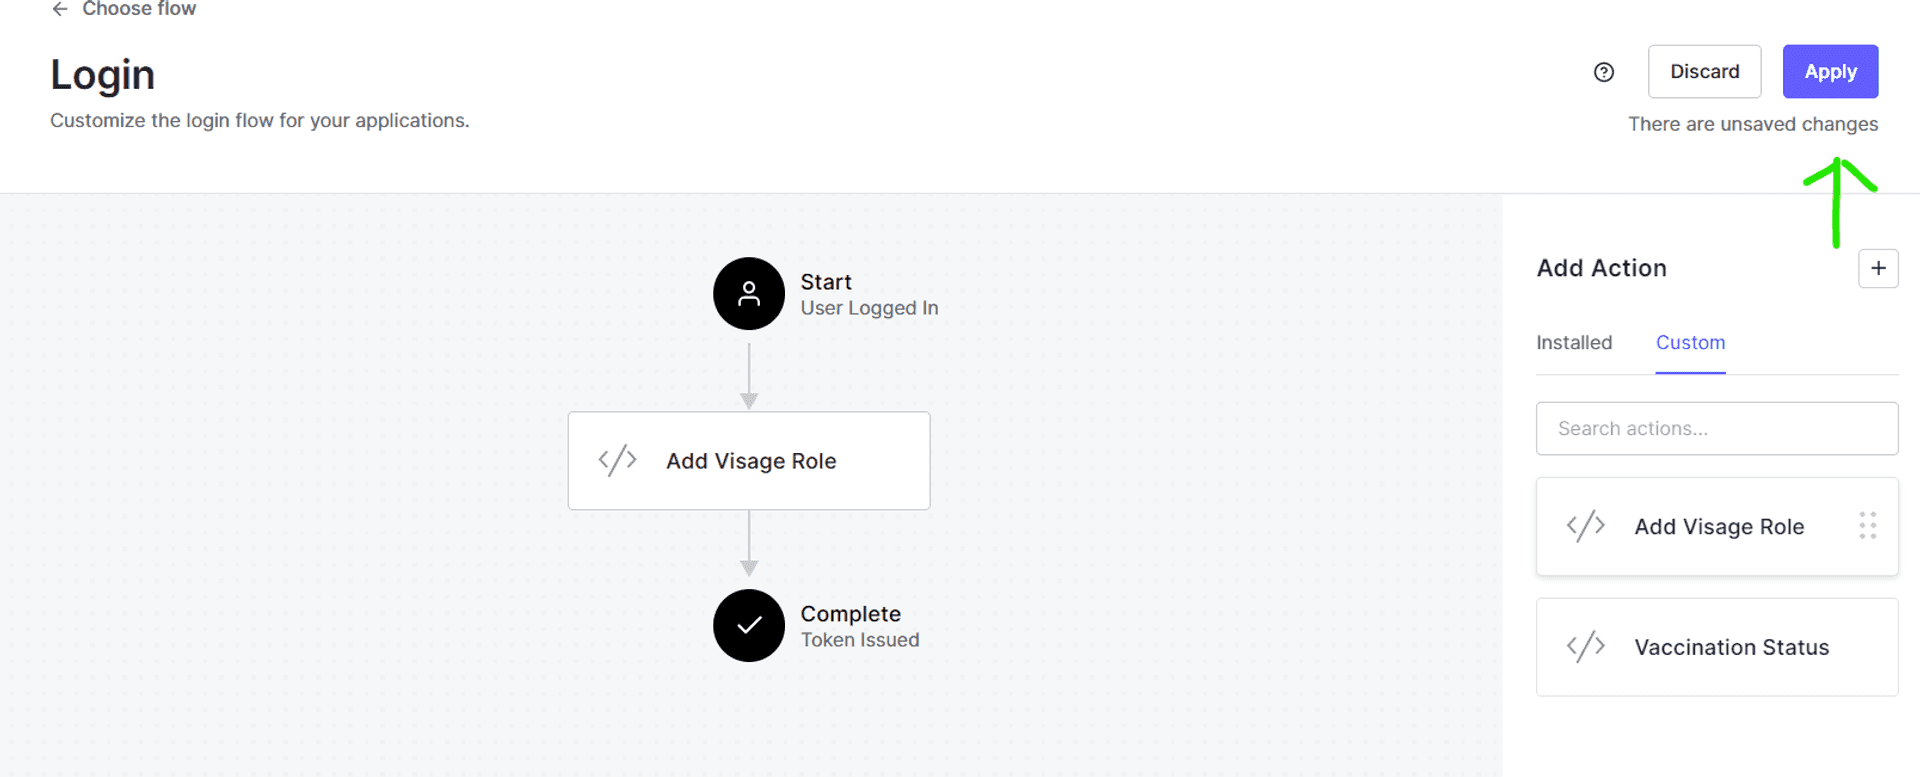
- Drag and drop our Custom Action into the Login Flow.
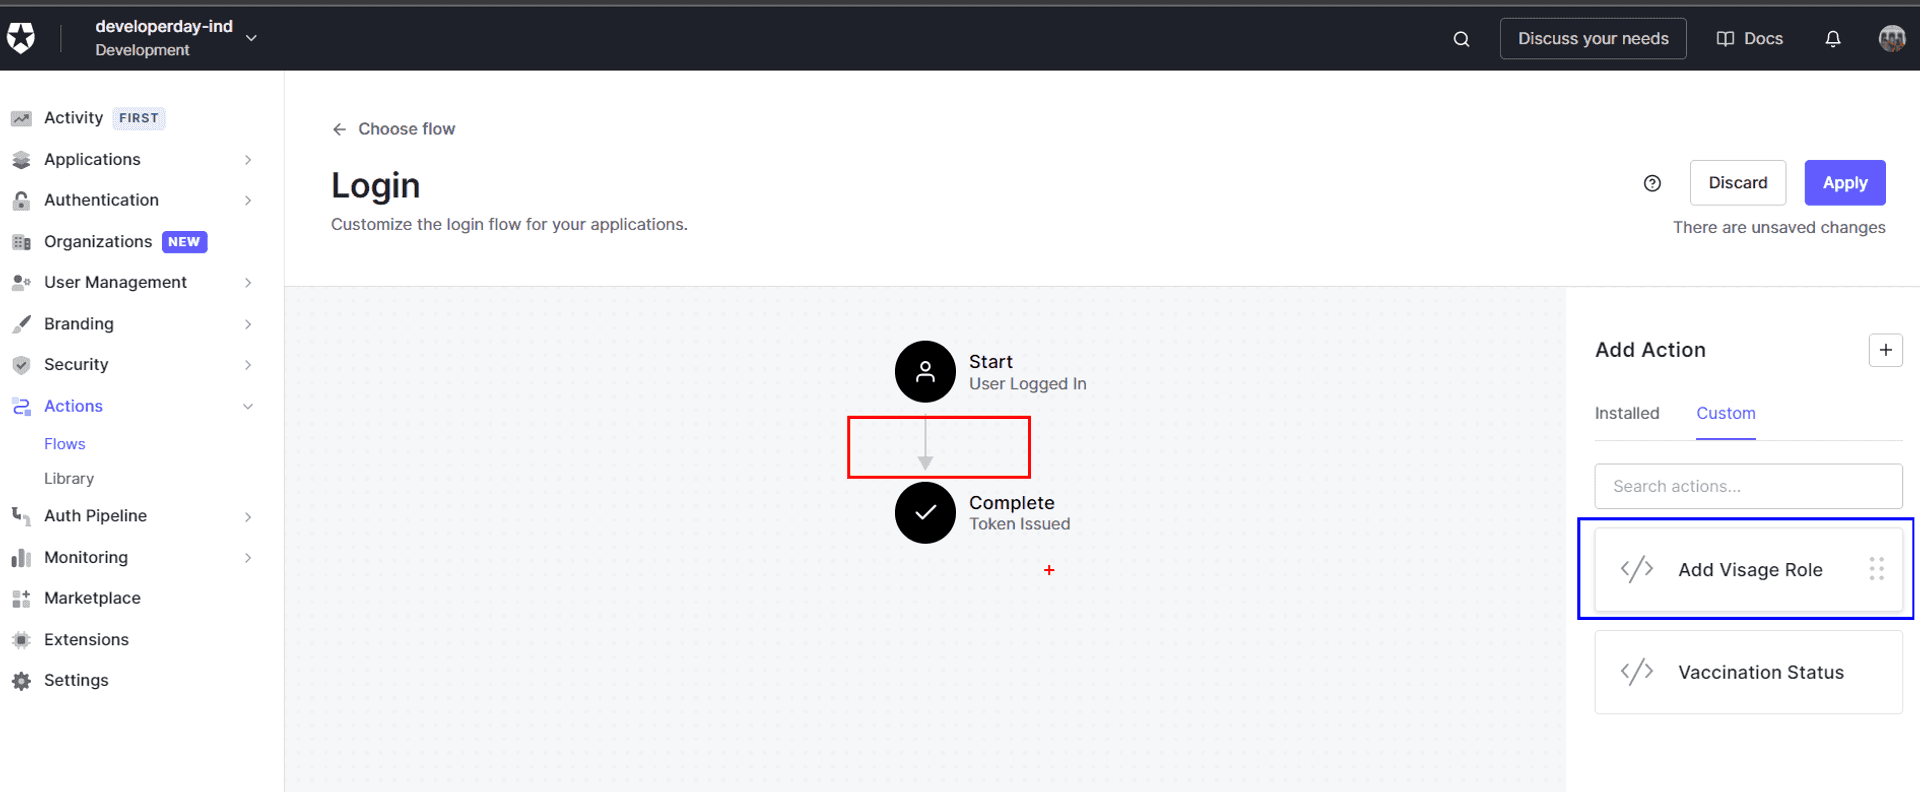
- Apply the changes, and we are done on the Auth0 end.
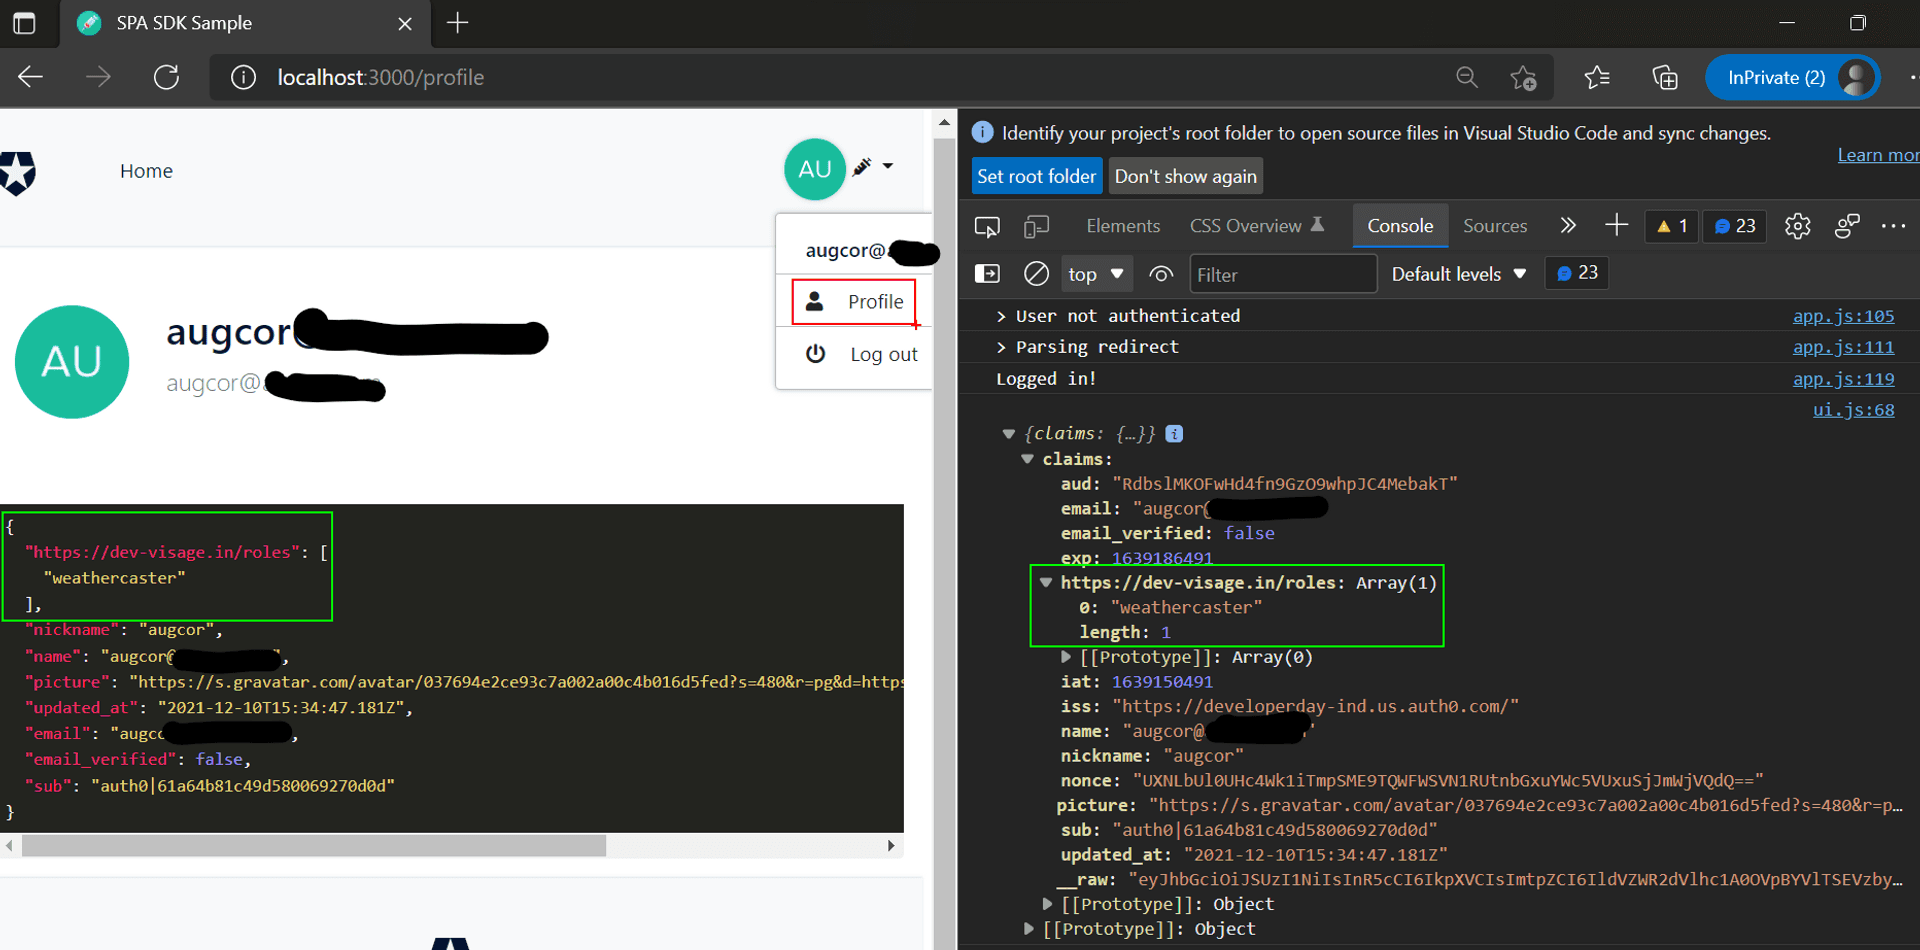
- "Trust, but verify": We used the Auth0 vanilla JS SPA sample to check that the Auth0 Action is indeed adding the roles to the ID Token.
Azure Function in Role Management #
To glean out the custom roles from the response sent by an identity provider post-authentication, Azure SWA has a preview feature of using Azure Function to process the payload from the identity provider.
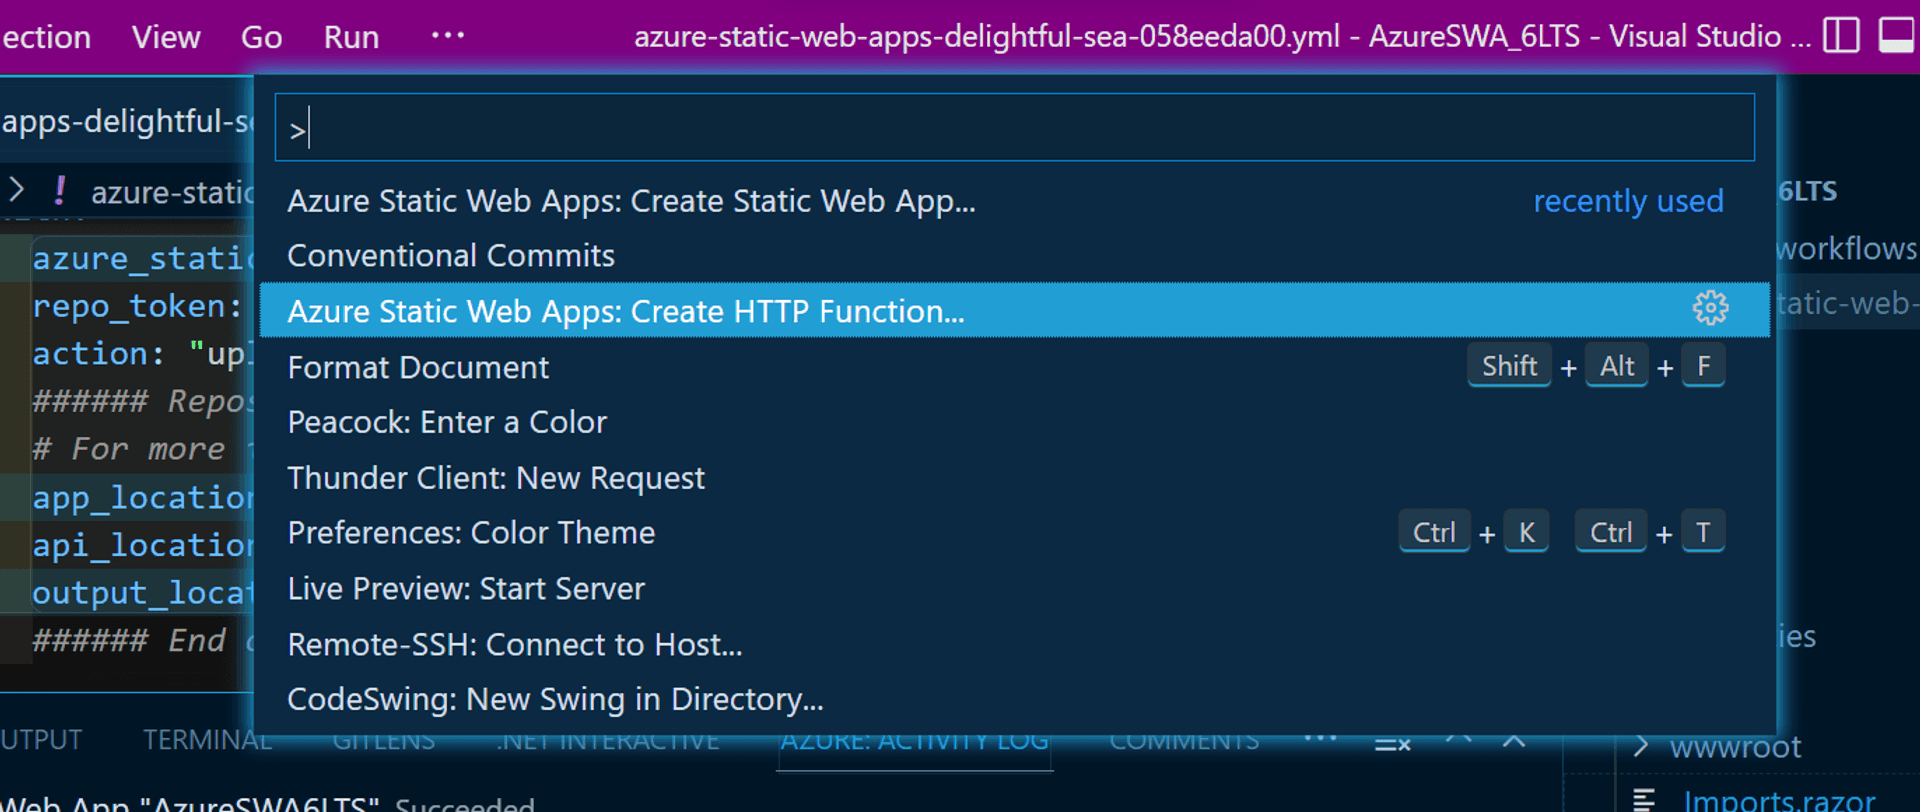
The SWA CLI provides a quick way of creating an Azure Function via the VS Code command palette.
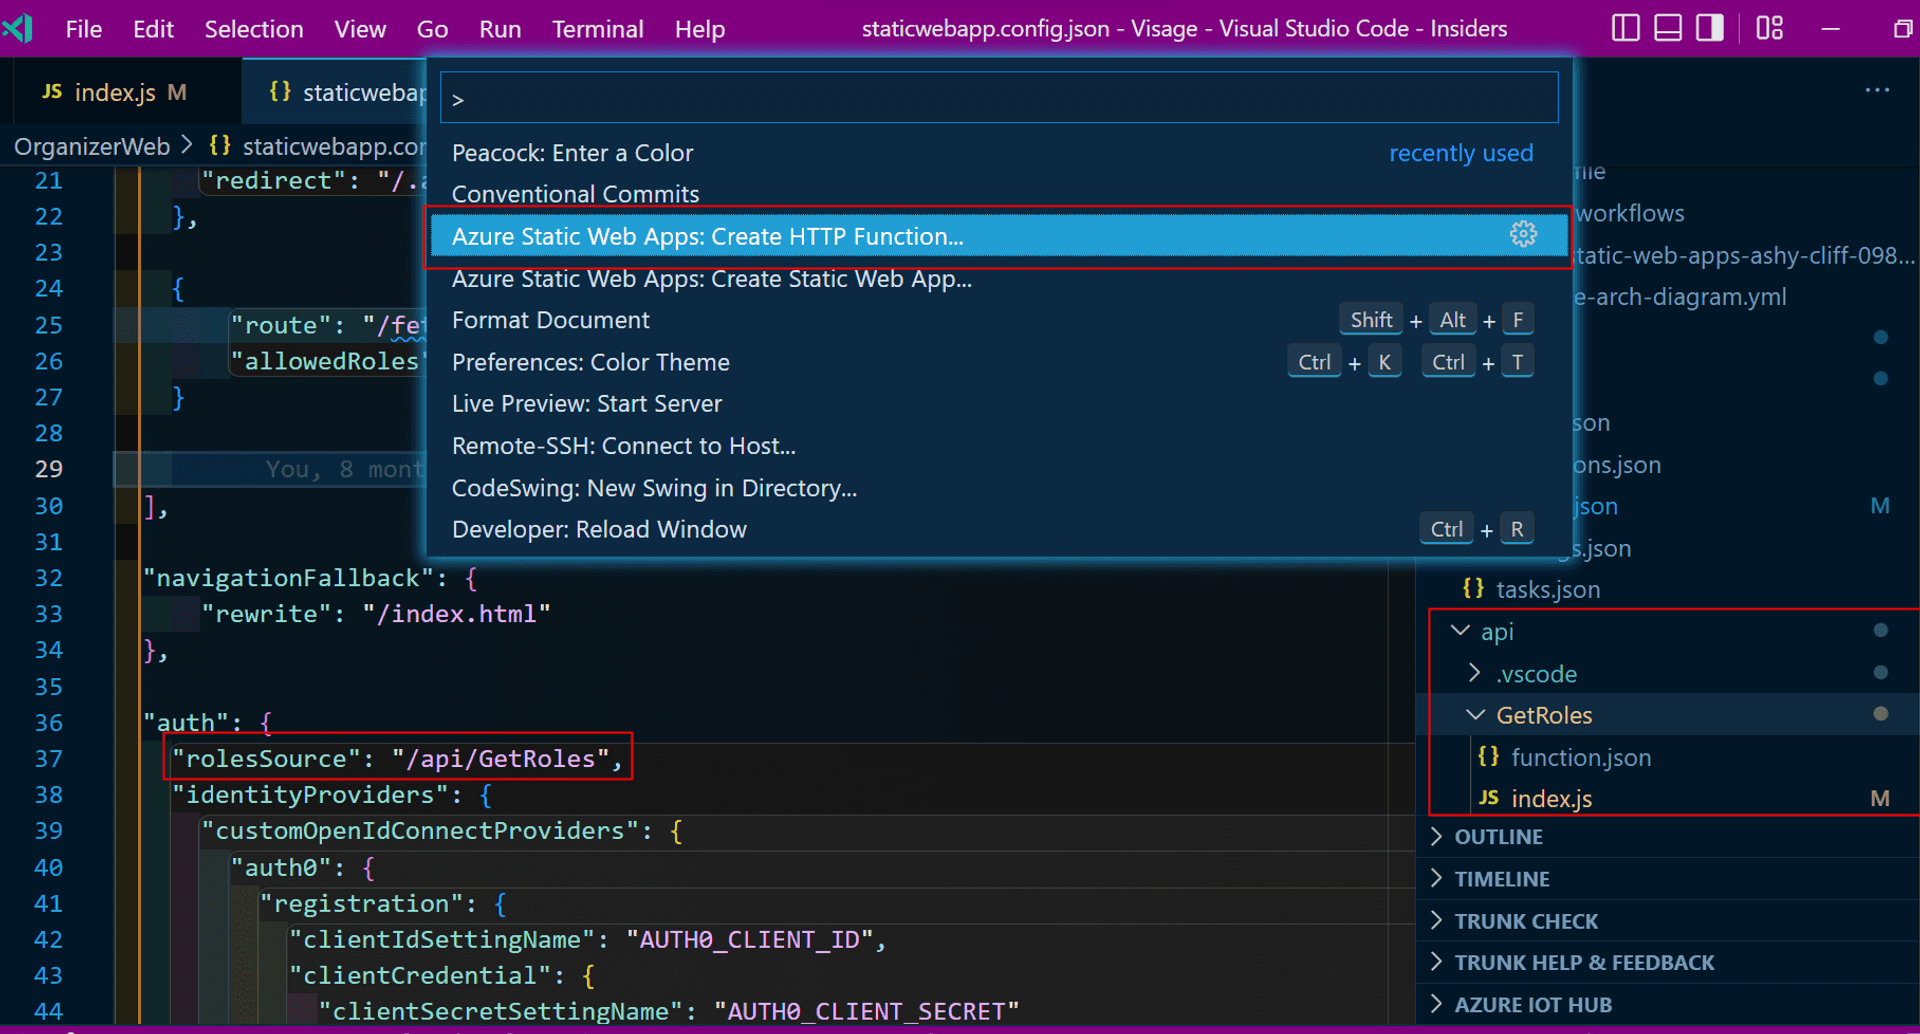
In the static config file, we need to enhance the auth section with the path of the Azure Function.
{
"auth": {
"rolesSource": "/api/GetRoles",
"identityProviders": {
// ...
}
}
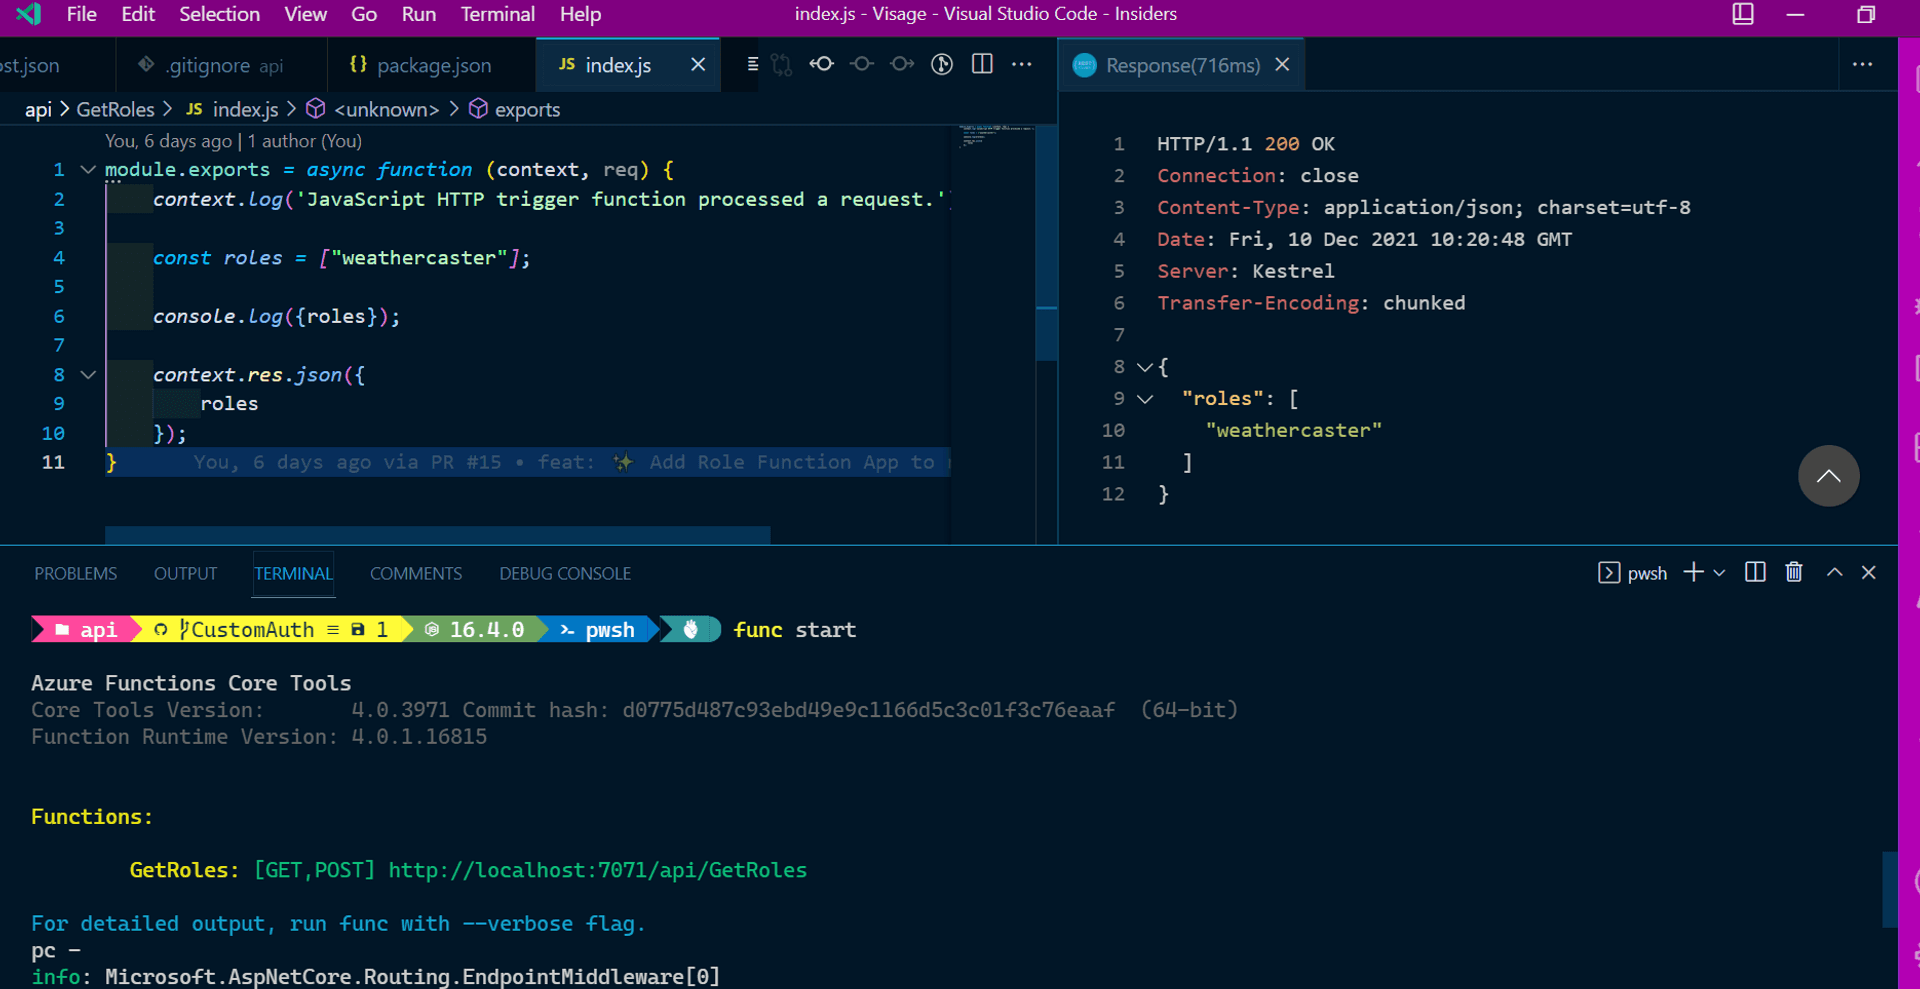
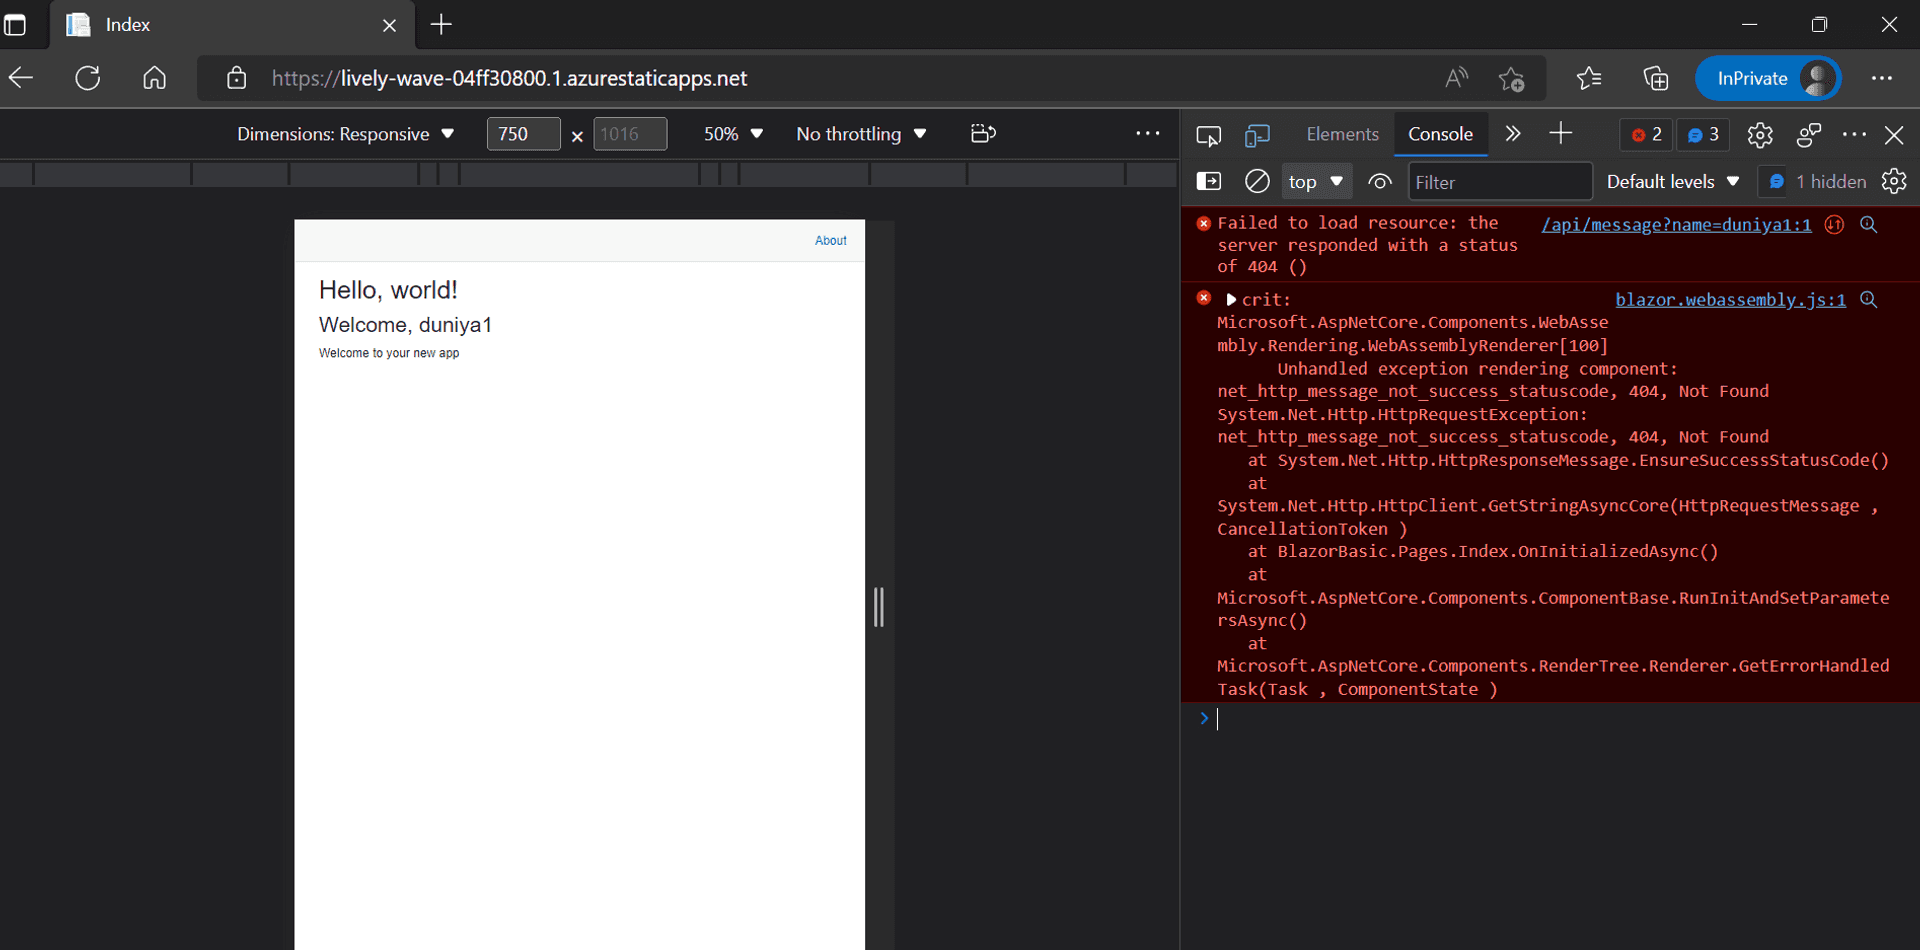
}But here is where things got awry. For our first iteration of the Azure Function, I wanted to play safe and used the sample tutorial. I even tried bypassing the processing of the Auth0, and had the function return hardcoded results. Also independently tested the GetRoles Function and it was returning the intended result.
But pushing these changes to GitHub, and post a successful login [verified via Auth0 logs] on the Stage URL, Azure SWA always threw up the dreaded internal server error.
Application Insight to the rescue, or so I thought #
Difference between an on-premise and a cloud deployment? In the former, you have a more easier and immediate access to the logs generated by your app and the infrastructure underneath. With cloud, you have to rely solely on their monitoring tools to get the logs. On Azure, the Application Insights service is a cloud service that provides you with a set of tools to monitor your application and infrastructure.
The Azure Static Web Apps blade on Azure Portal has a tab to create an associate Application Insights resource. So, we thought about using that to see why we were getting the internal server error.
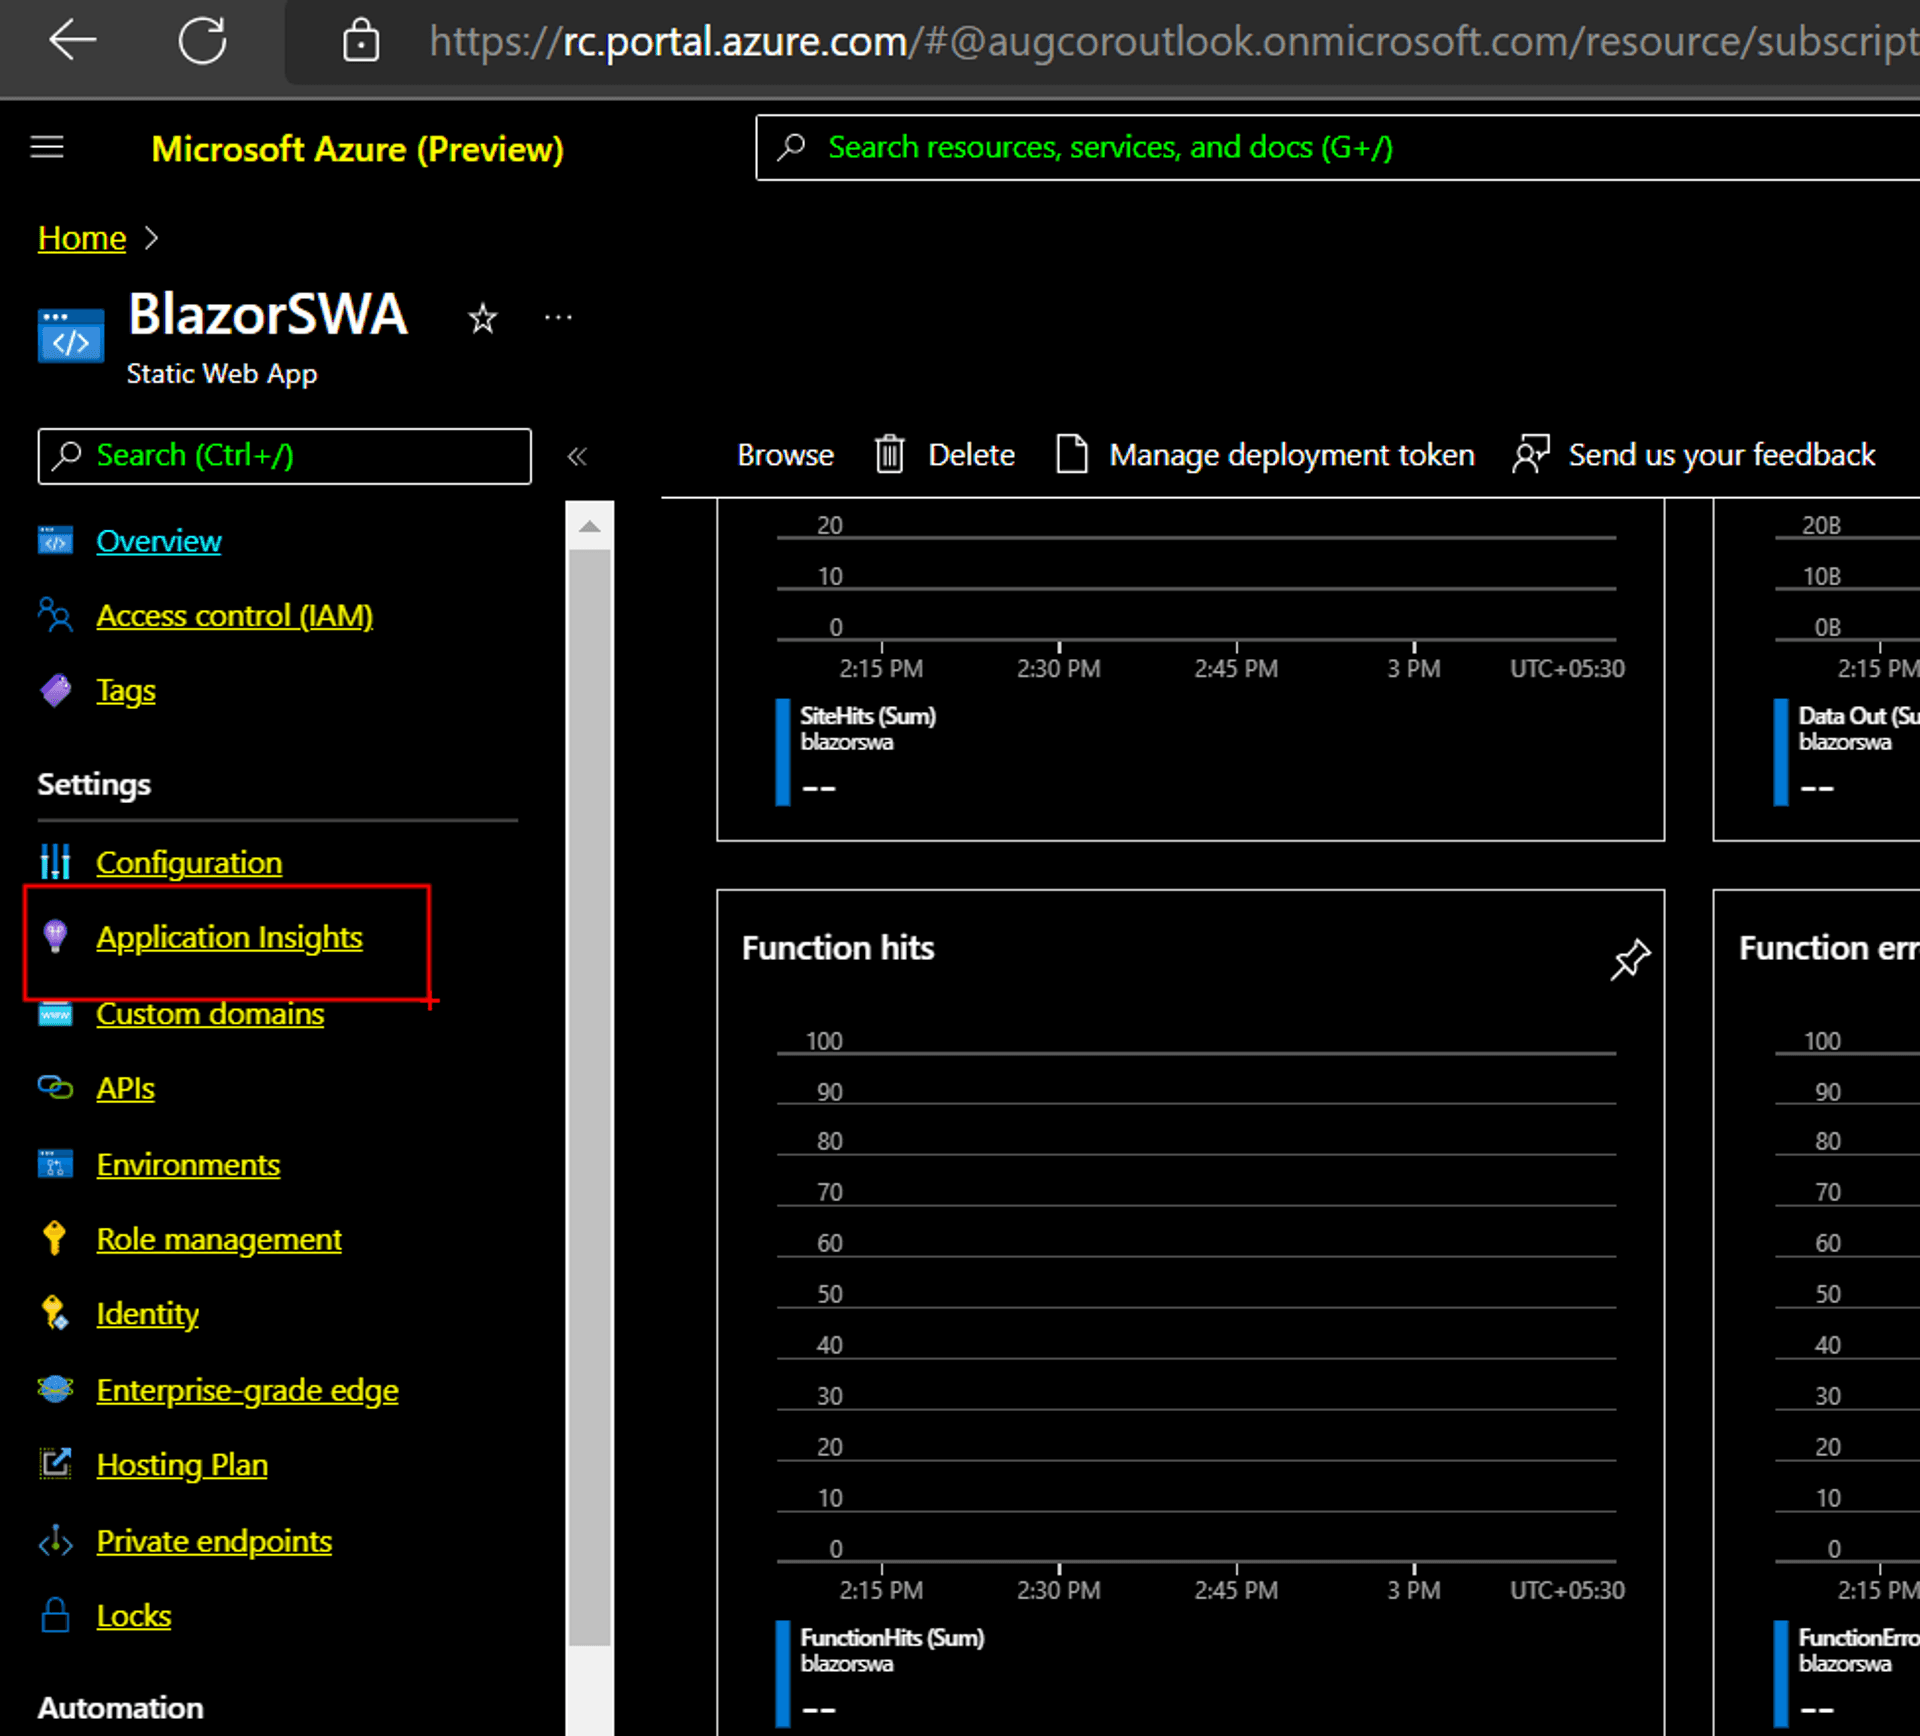
But, the Application Insights service refused to be created. And, it was an extremely insidious bug. There was no error displayed anywhere: neither on the Azure portal, nor on the browser console, and apparently not on the backend.[Screen capture]
The solution: In the interim, if you are using a new Azure account or have never created an Application Insight insight in that account, then please create one independently in its own blade. The Azure Application Insights team is aware of the bug and are working on a solution for it.
In the end, it finally worked, with a clean browser console.
Etc #
Just like how some movies play the bloopers reel at the end:
While the Microsoft Docs quickstart for building your first static site with Azure Static Web Apps has a tab for Blazor WASM, the subsequent post for adding an API has no sample code for Blazor WASM, for which I have opened a GitHub issue.
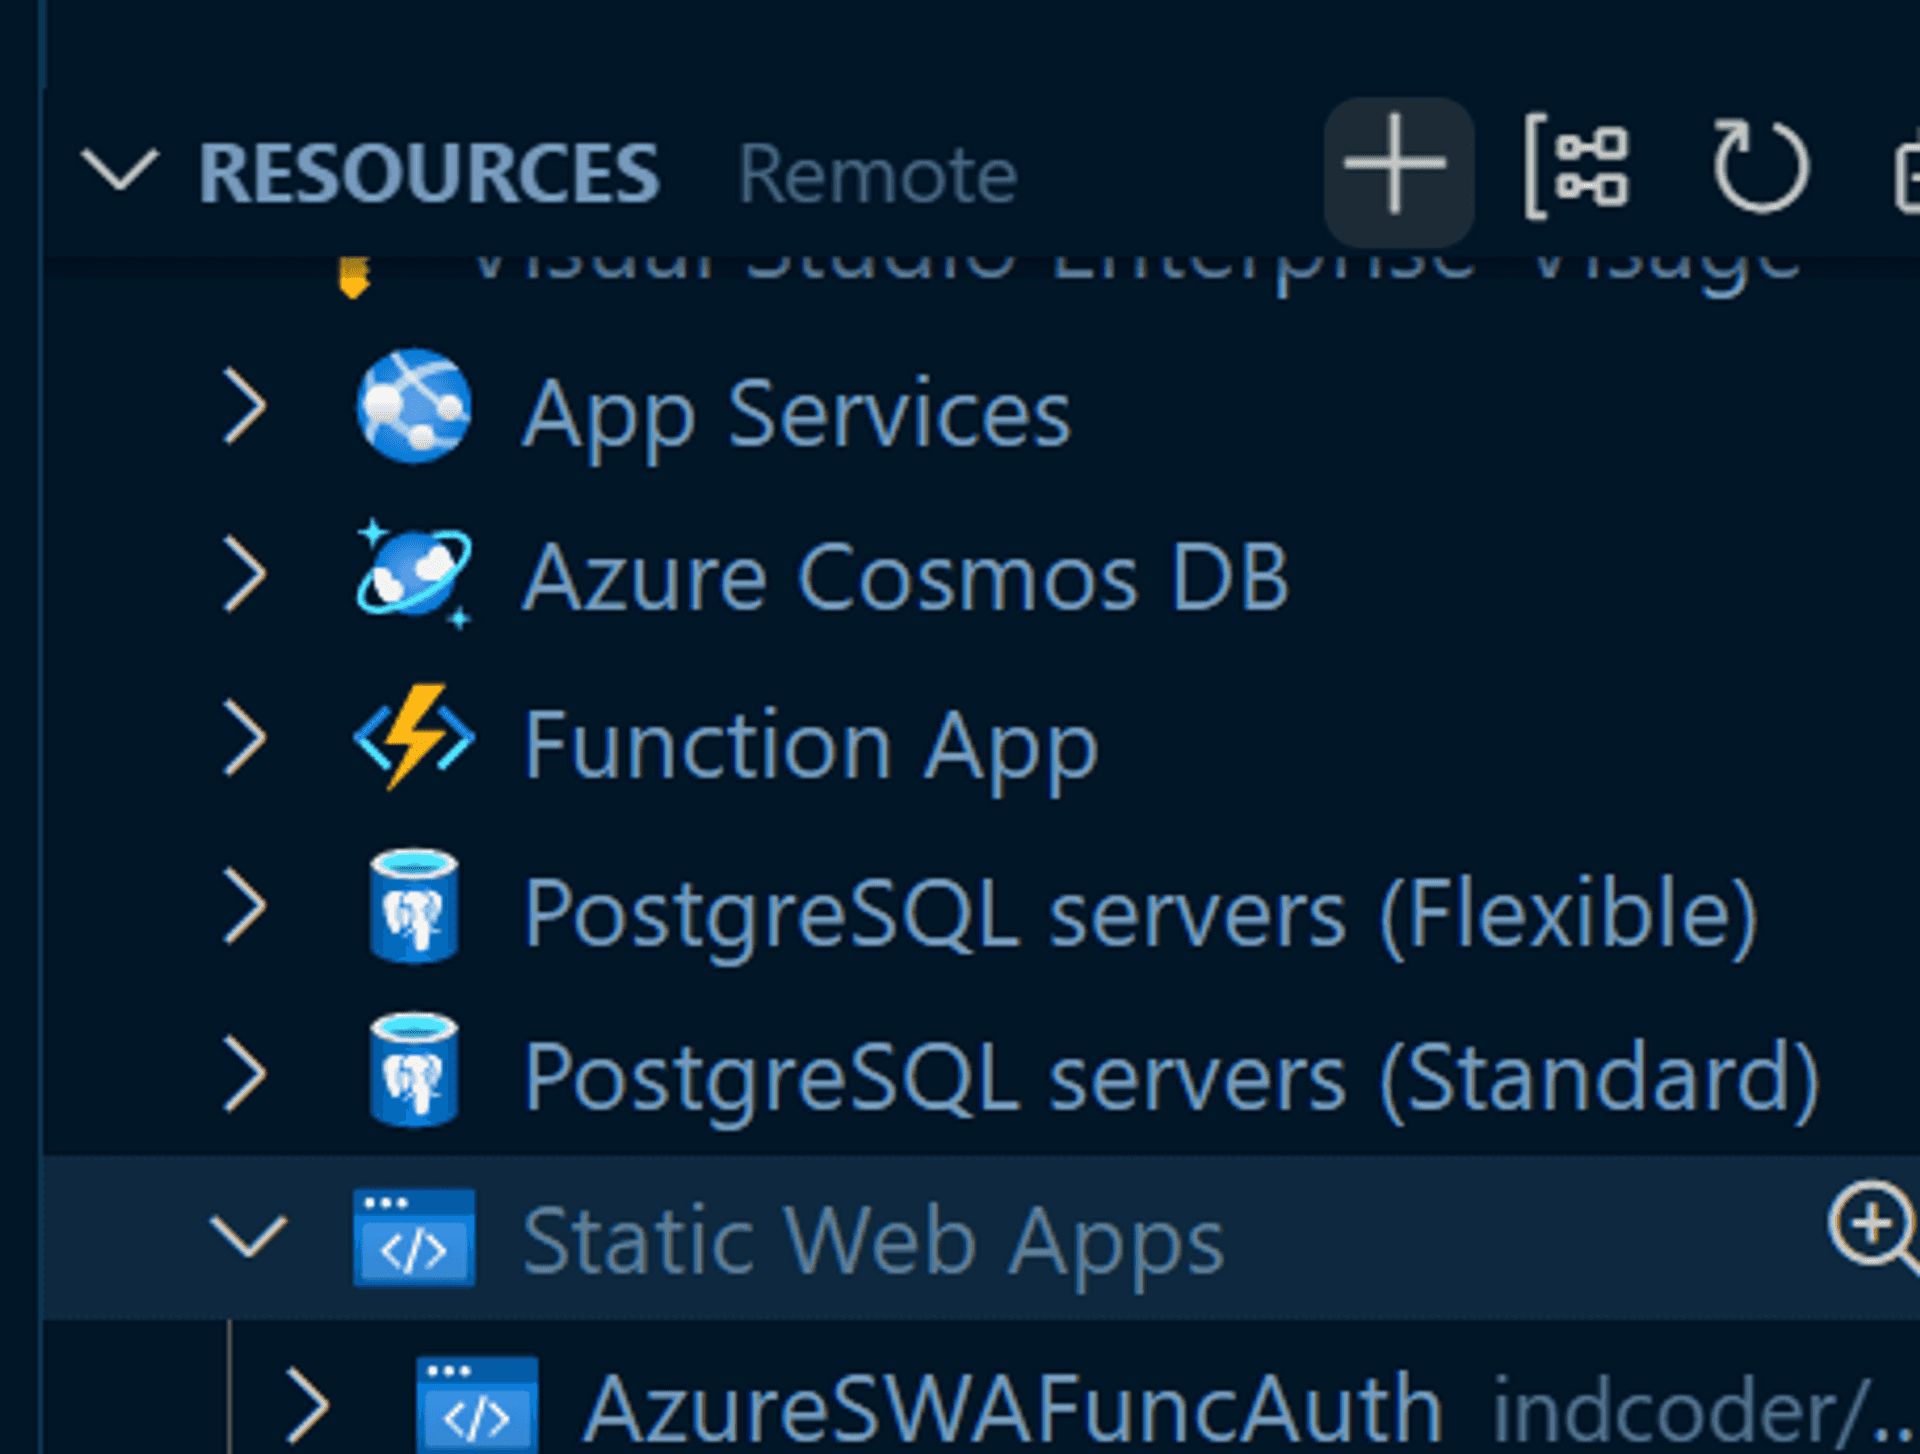
For creating a SWA, hopefully you get the below experience in your VS Code extension
But in the quickstart for step 2 [which was removed last month after the team was informed] is shown as below:
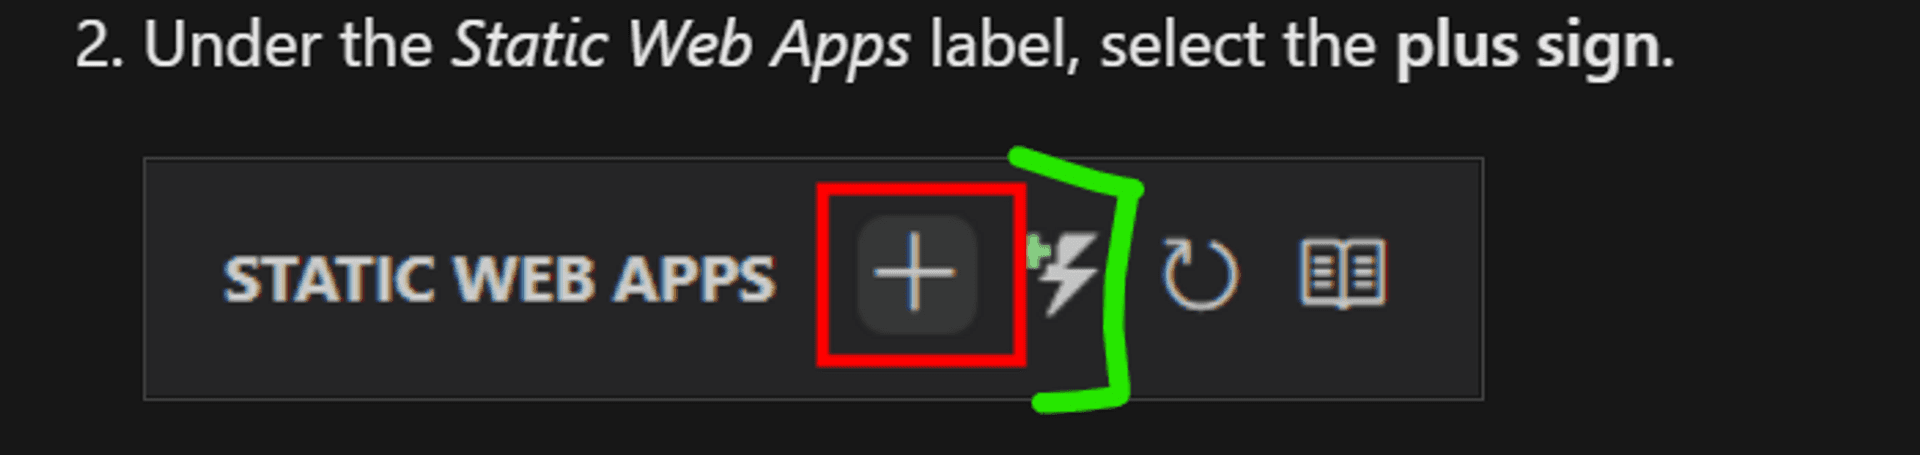
The icon I have highlighted in green was present in the original workflow, through which we could add the Azure Function in the SWA blade[if you can call that] of the Azure VS Code extension...without creating it explicitly via the Azure Function blade or the command palette as shown currently in the quickstart.
Yet the remnant of that workflow still persists in the VS Code marketplace for SWA extension
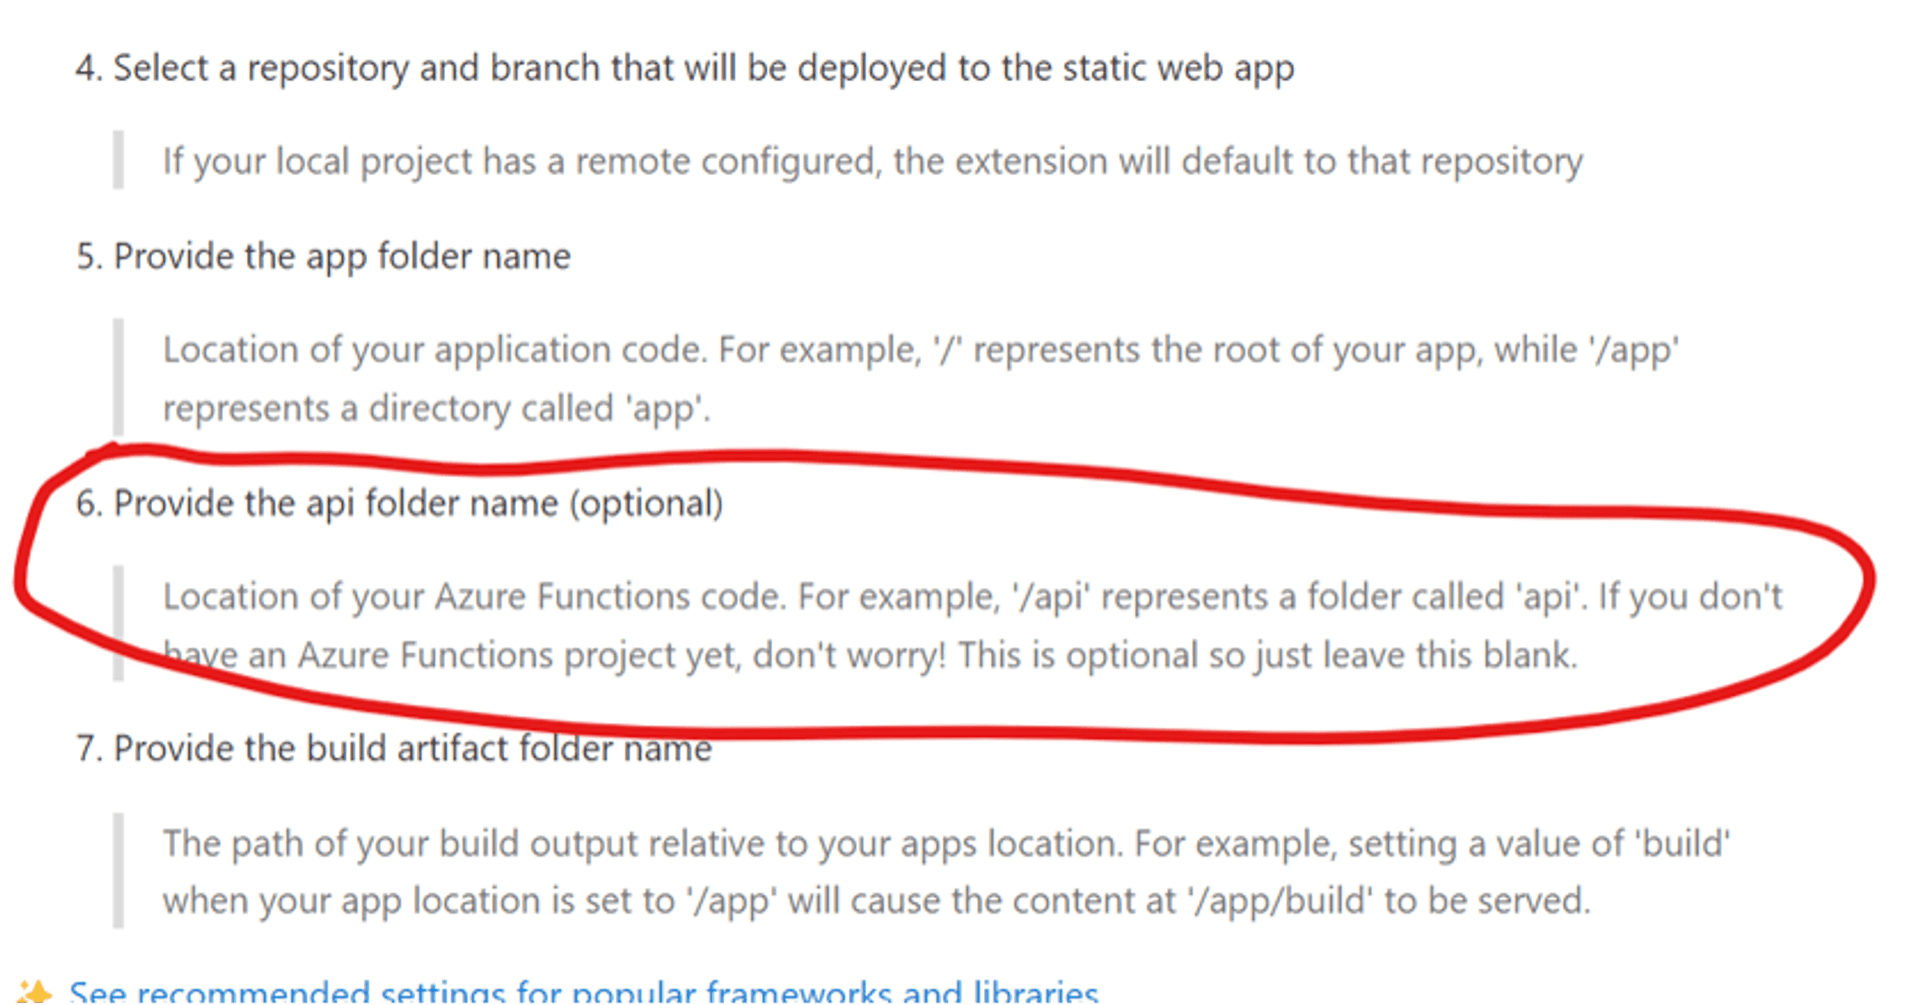
The API step [highlighted in red] in the SWA creation workflow is not present in its current version
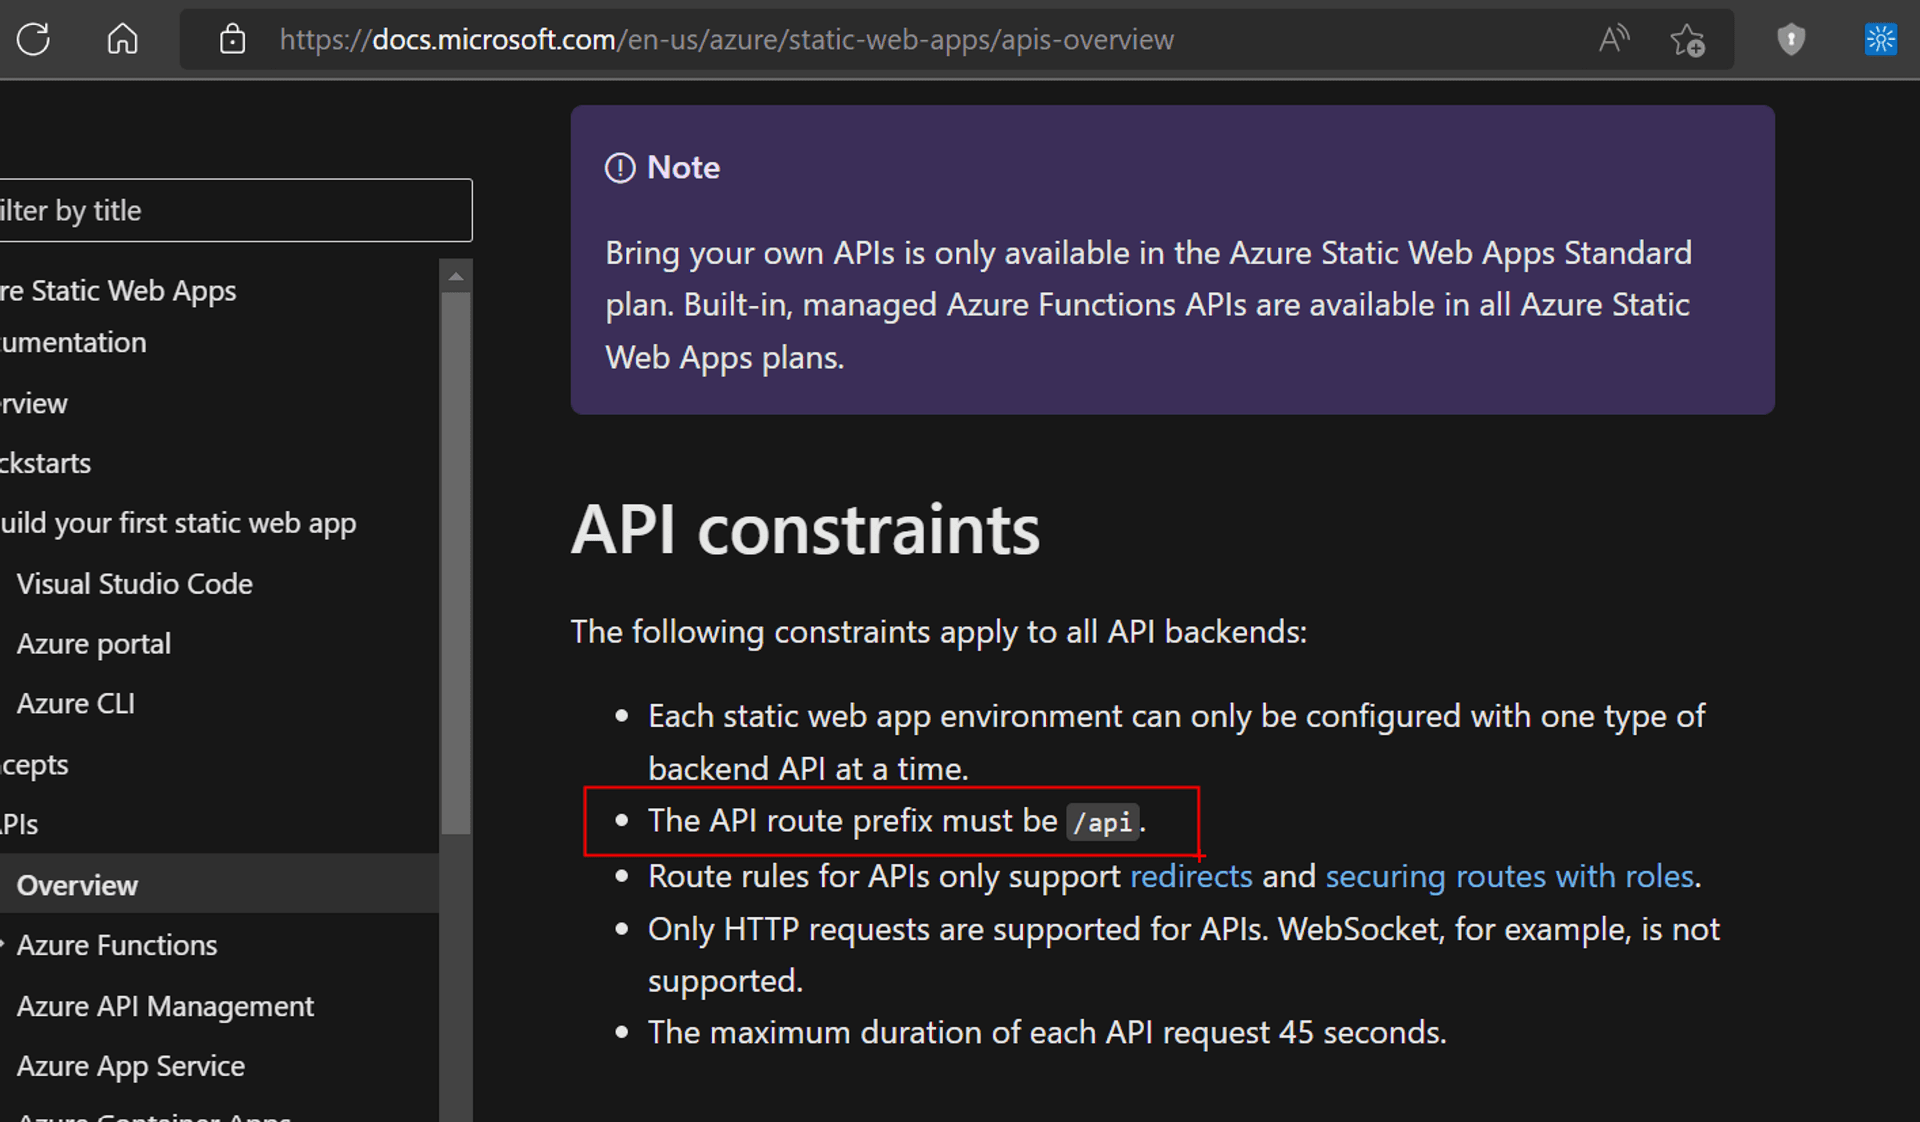
- While the API constraints explicitly mentions that the API route prefix must be "api"
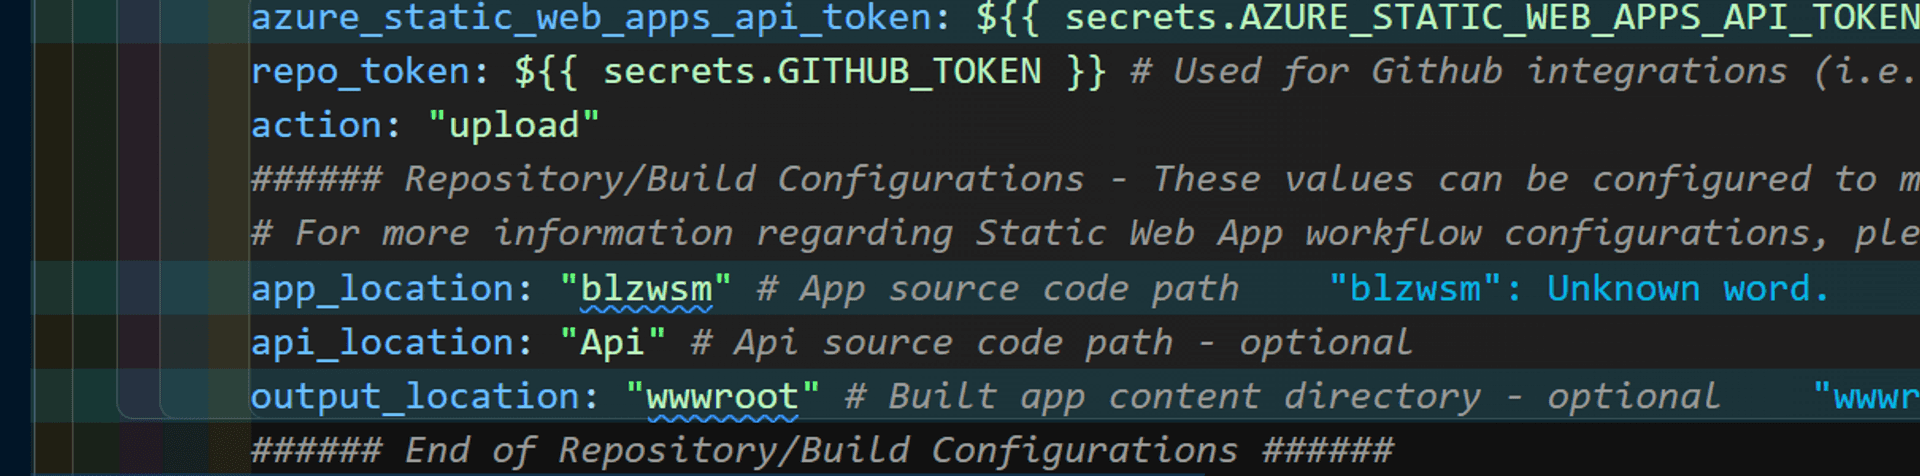
But, the VS Code extension generated Github Action workflow file names it as "Api".
Innocuous, right? Read on.
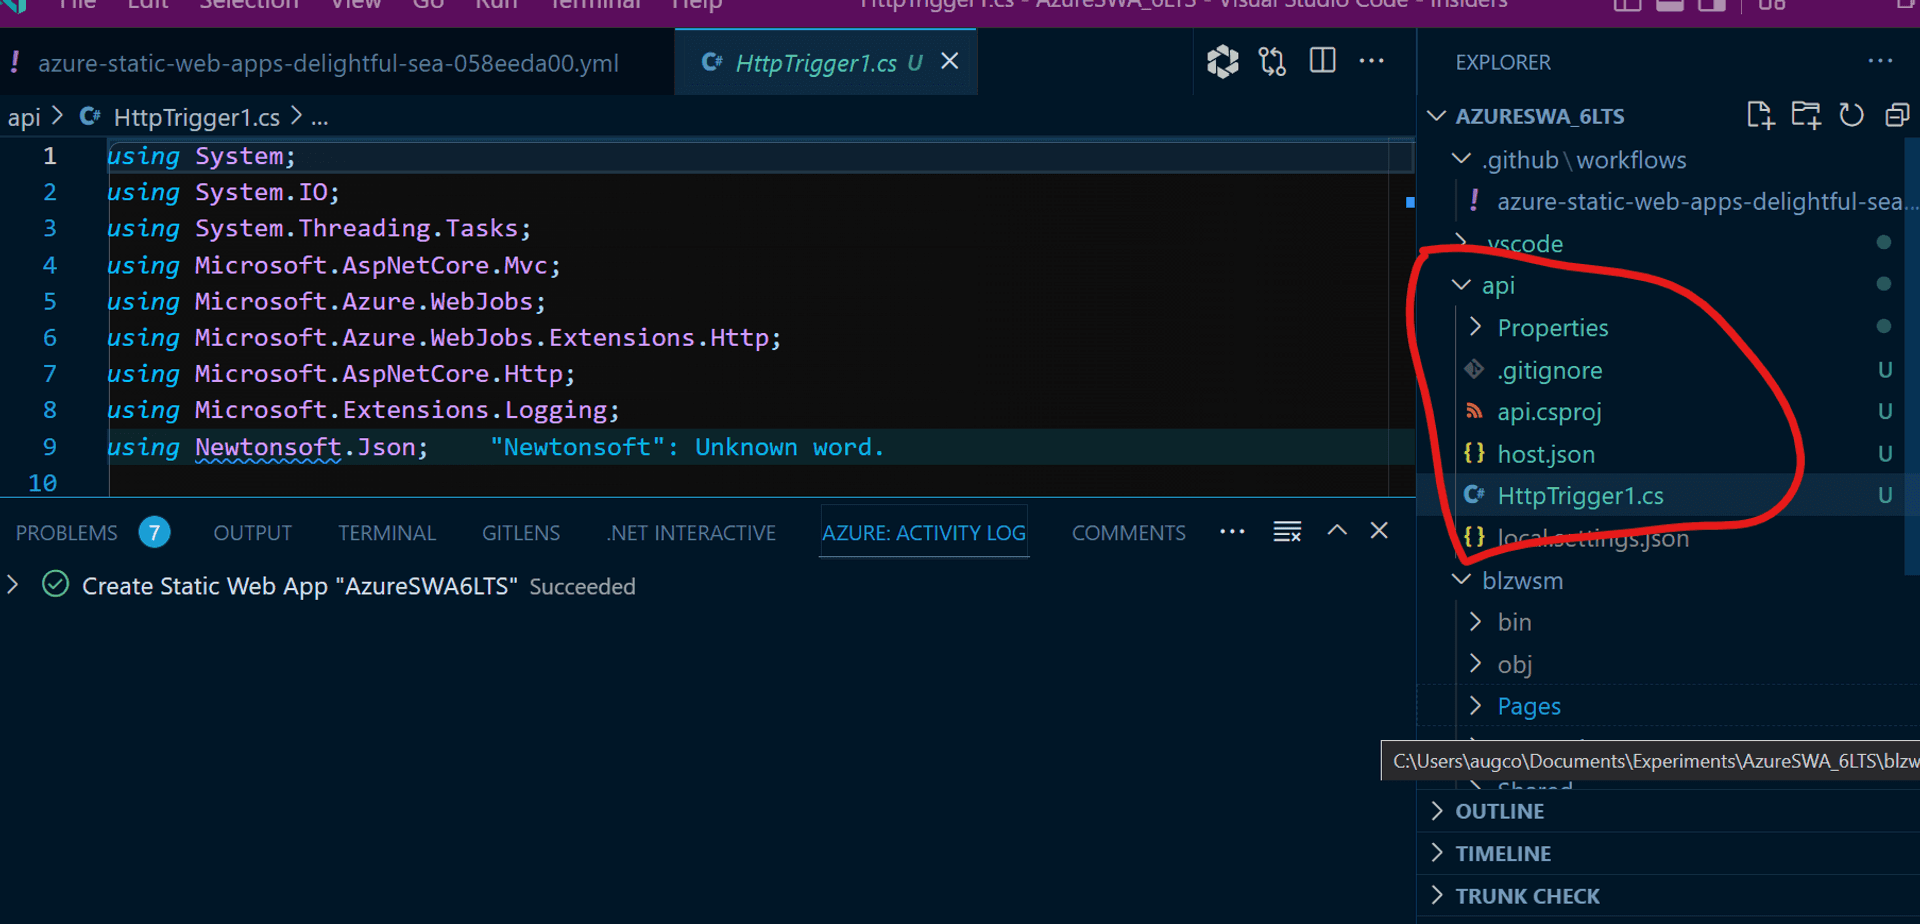
When we create the API via the command palette as instructed by the MS Docs,
it creates a file folder titled "api" in the SWA folder.
Now,if you test it locally via the SWA CLI using "API"on windows ,it works !!!

And when pushed to GitHub, no error is thrown and is deployed. But errors out on the browser.
If you are diligent enough to go through the successful GitHub Actions logs, there is a hint.

🙏🙏🙏
Since you've made it this far, sharing this article on your favorite social media network would be highly appreciated 💖! For feedback, please ping us on Twitter.
Published